Creating New Shifts For Employees
There are two ways to add shifts for employees:
- Through Staff Attendance Module
- Through quick add
- Through Staff Attendance Module.
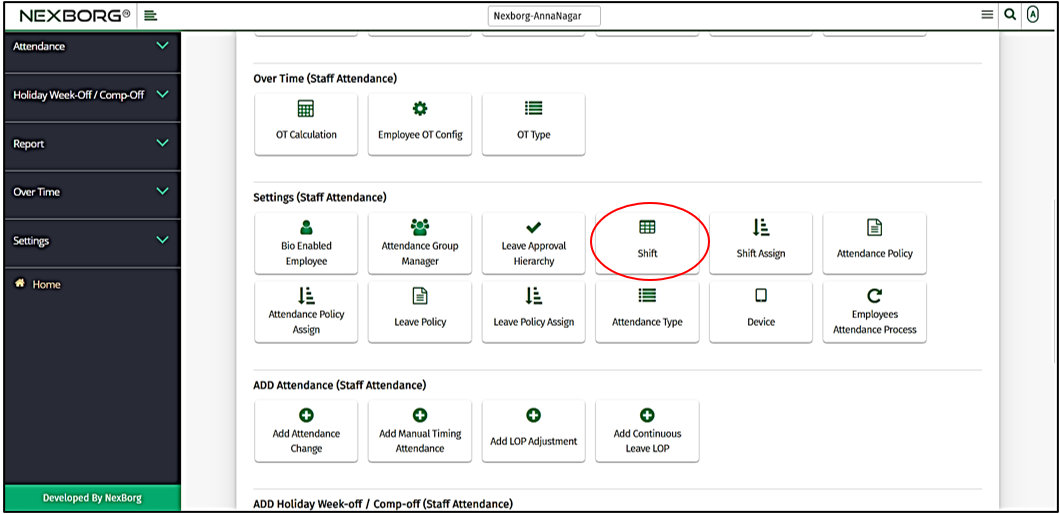
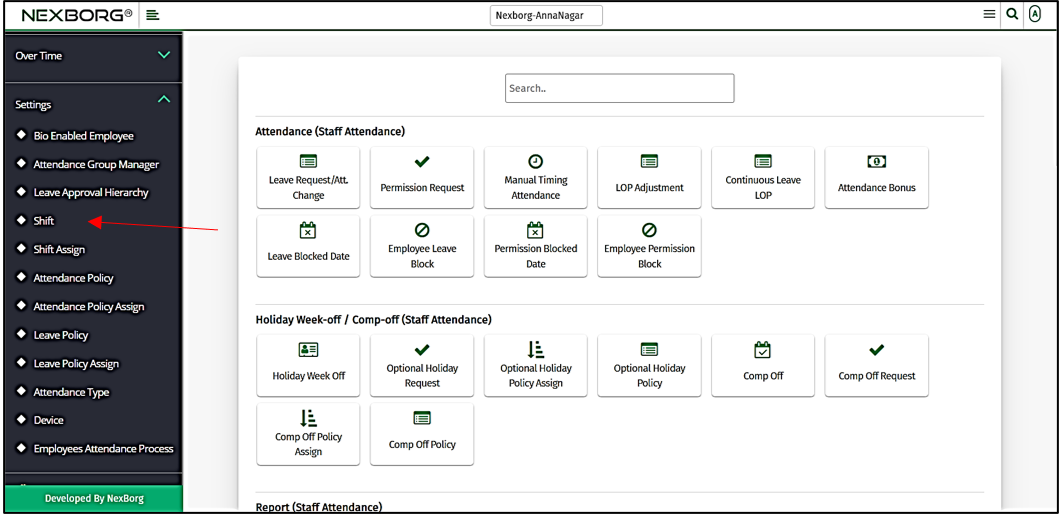
Go to Staff Attendance-->Settings-->Shift on the home page.
On Settings, select Shift.
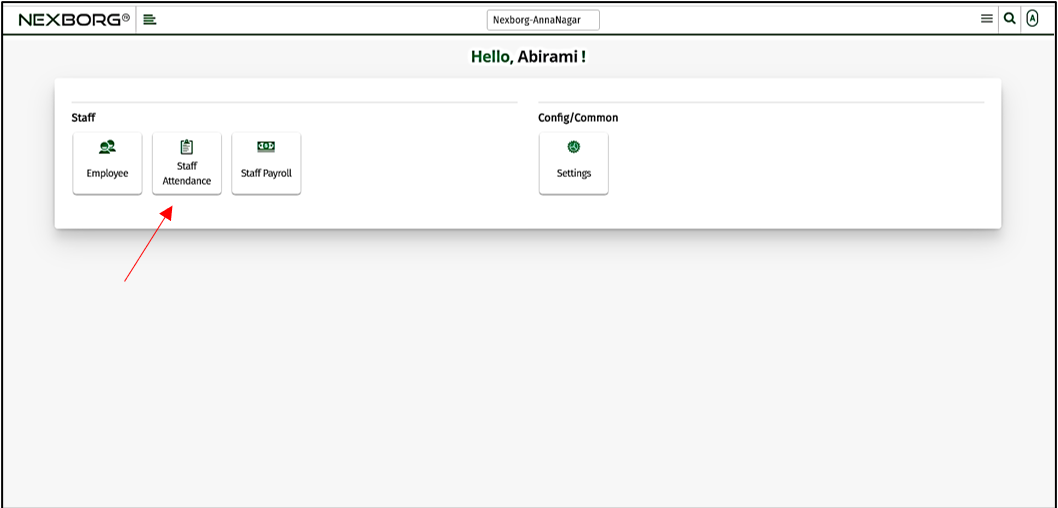
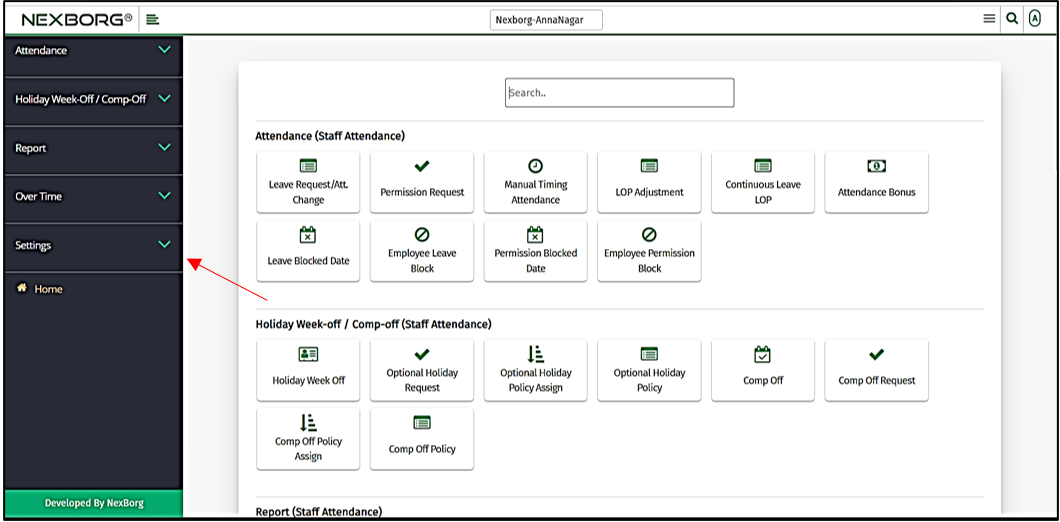
Or select Settings on the left navigation bar.
Then select Shift.
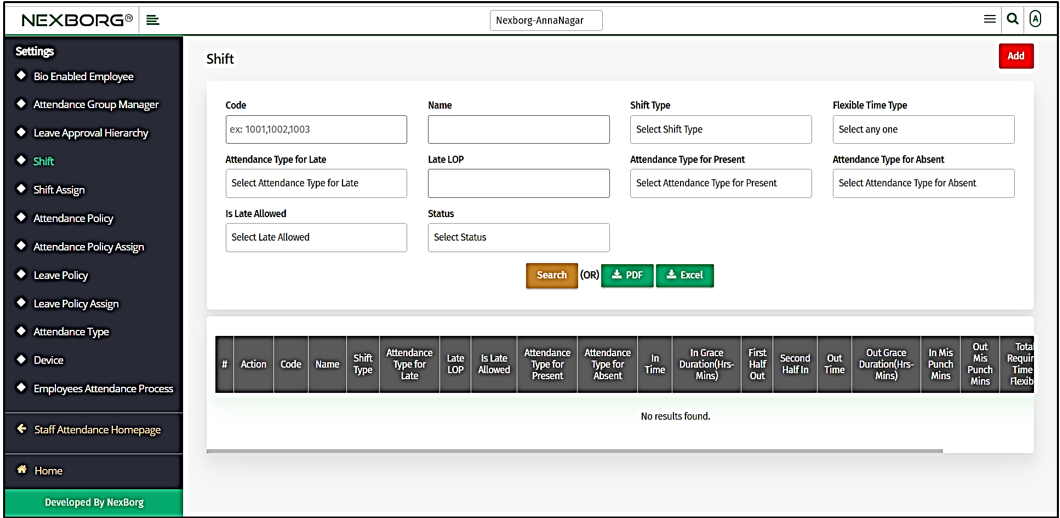
A preview of the Shift menu is shown below.
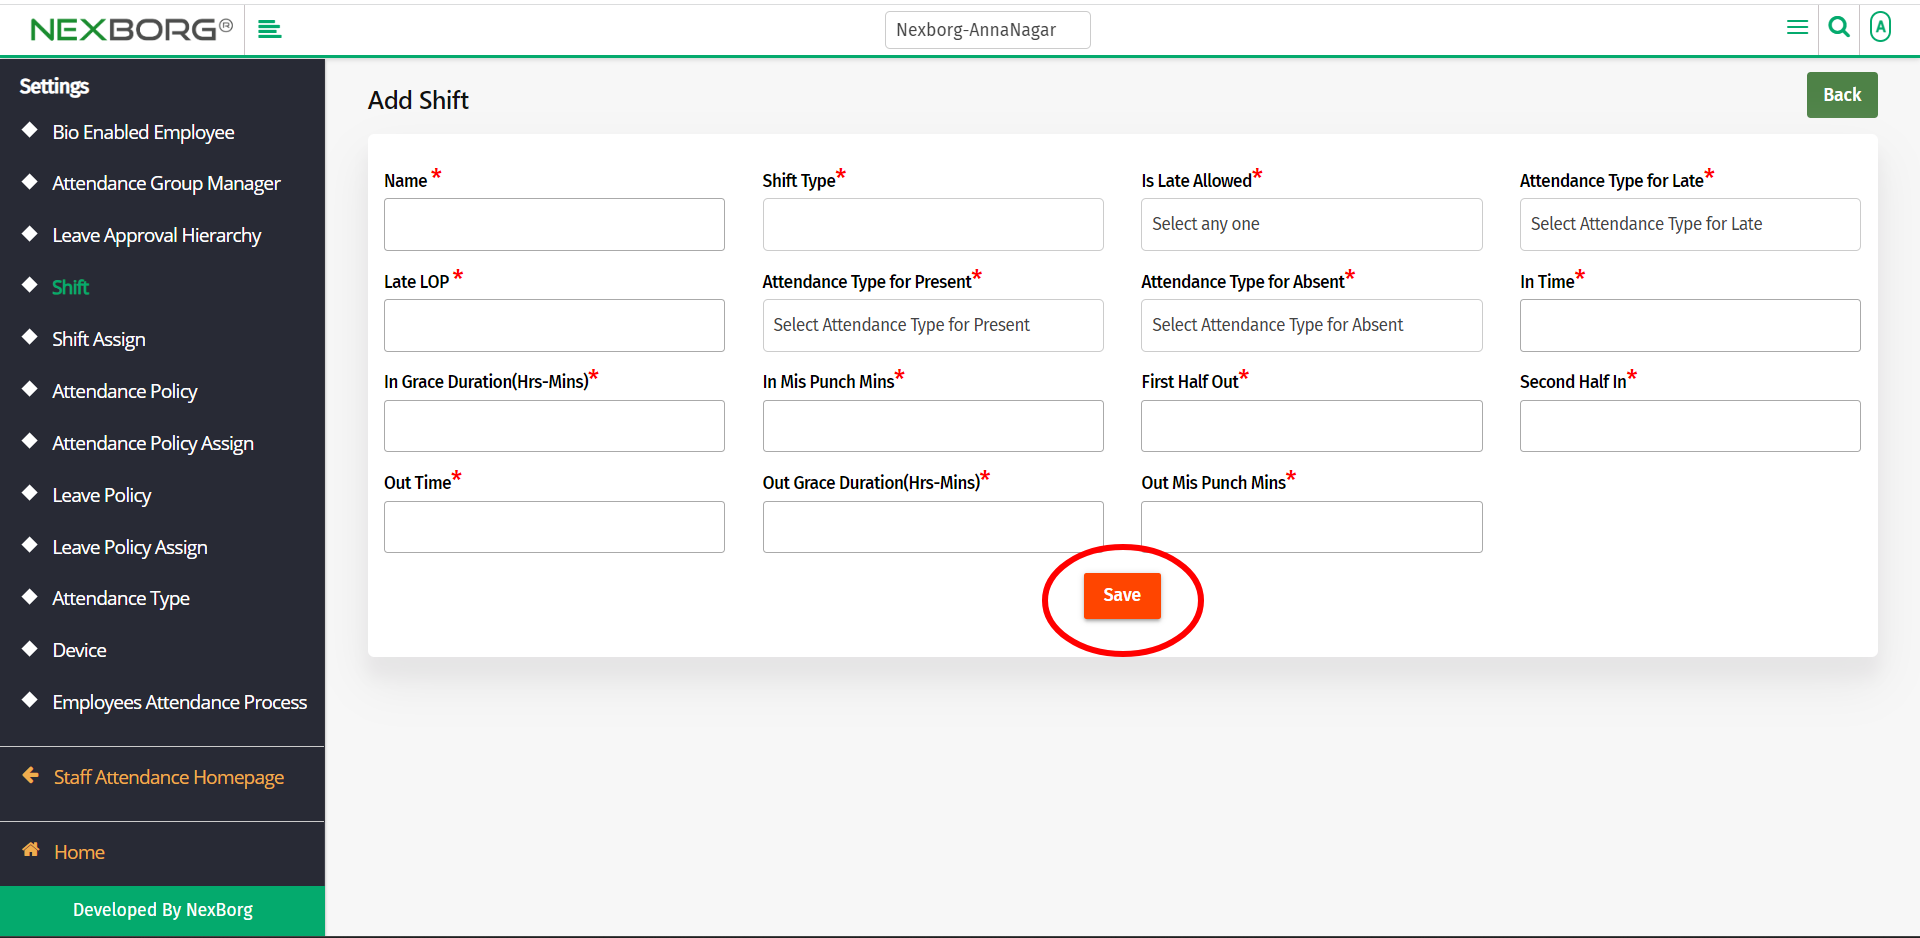
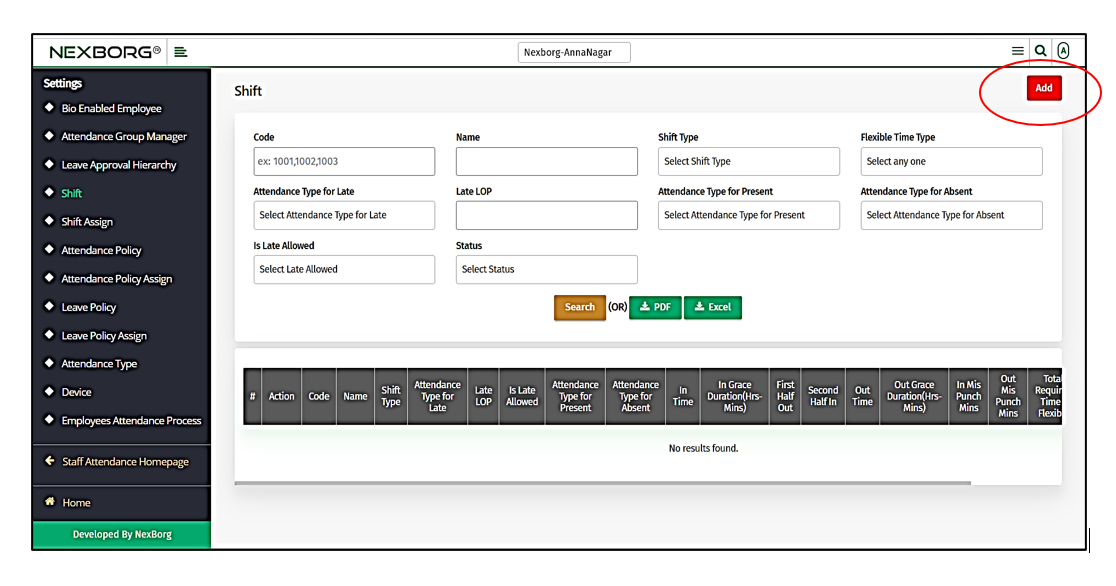
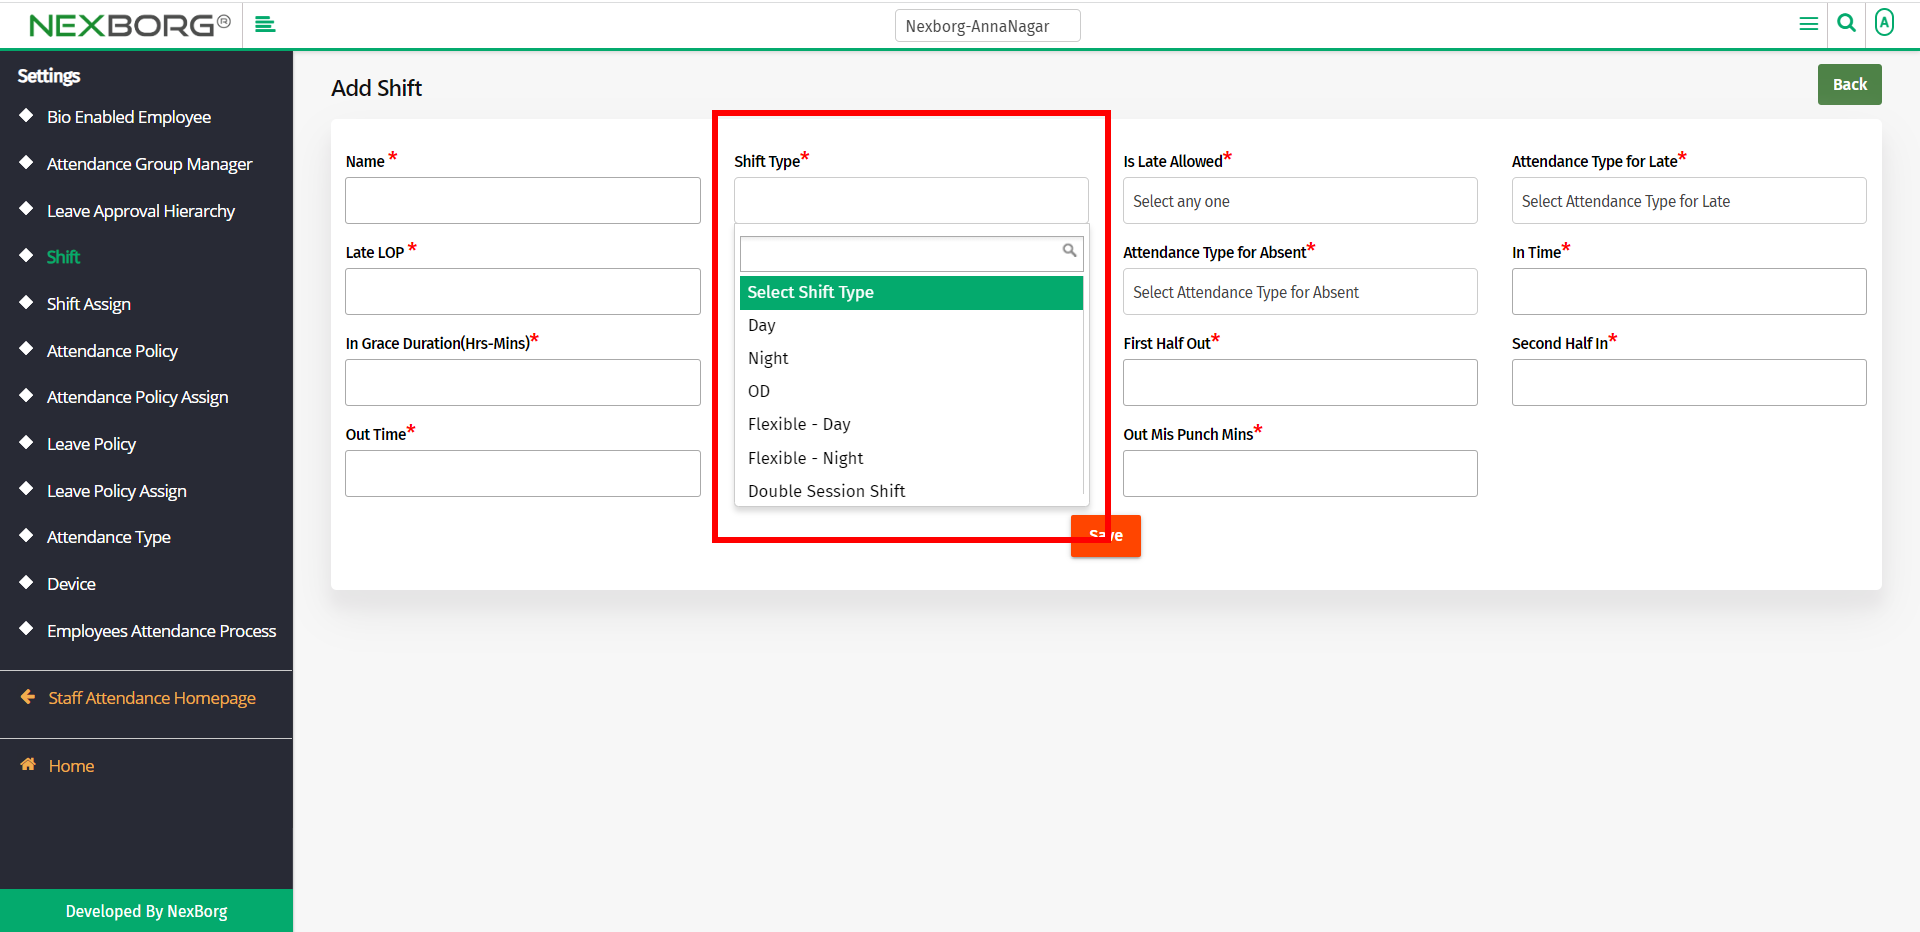
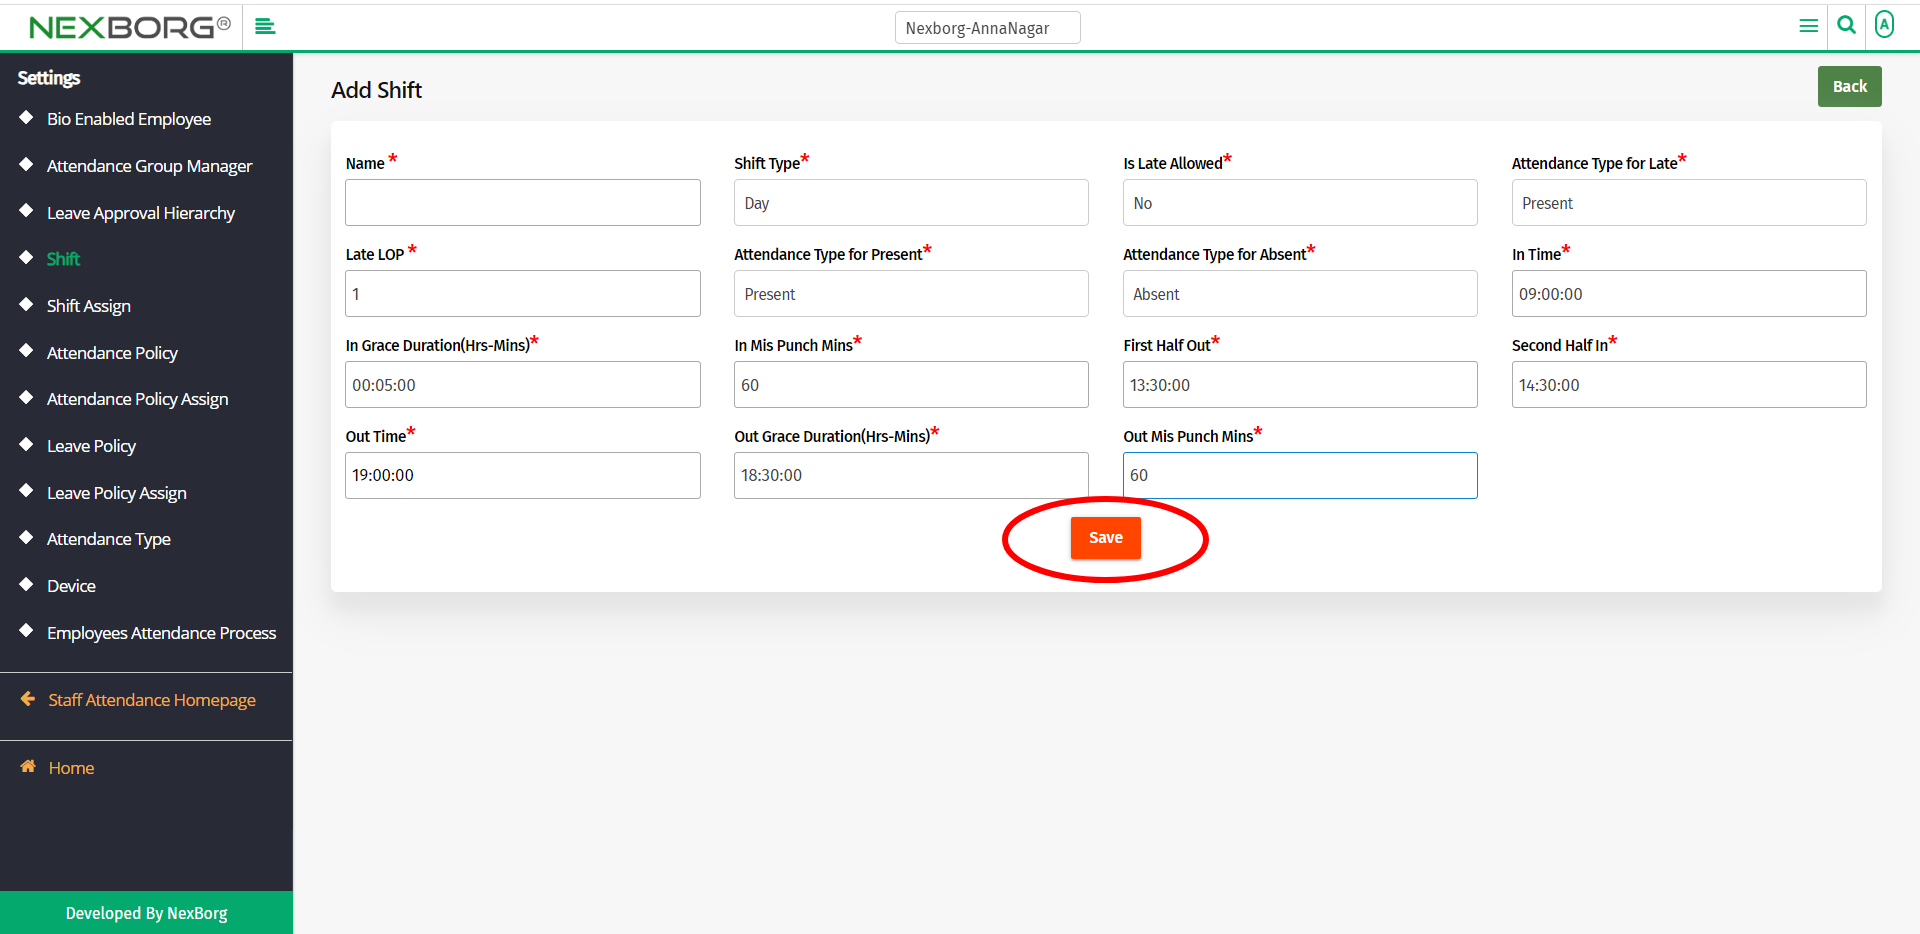
To add shifts, click on the Add button in the top right corner of the Shift menu.
Fill in all the necessary fields and click on the Save button to save your changes.
Initially, provide the Shift Name.
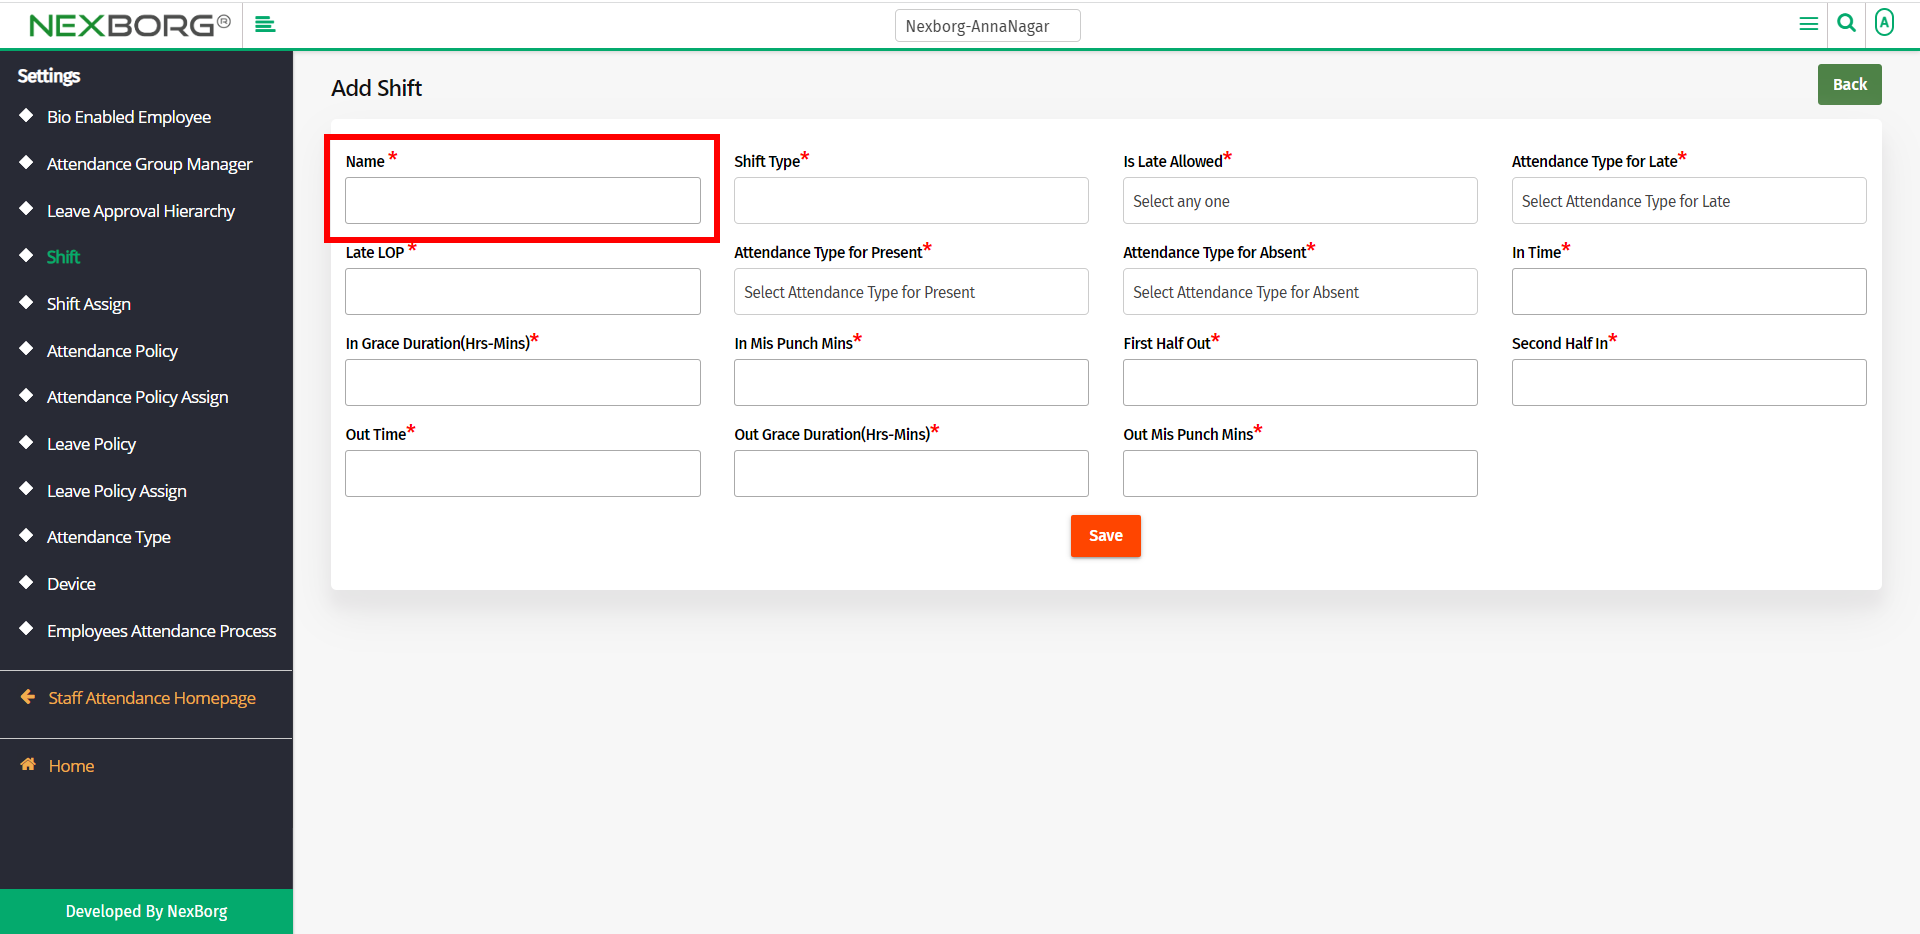
Provide the Shift Type. There are various shift types present.
- Day shift refers to the work shift during the day (For example., 9 a.m. to 5 p.m.).
- Night shift refers to the work shift during the night(For example., 10 p.m. to 6 a.m.).
- OD shift refers to the work shift where the employee will not be physically present in the company, but be working outside the company premises.
- Flexible - Day shift means employees can work any eight hours in the day shifts according to their convenience.
- Flexible - Night shift means employees can work any eight hours in the night shifts according to their convenience.
- Double Session Shift means an employee can work any time of the day/night to complete their standard shift hours. For example, if an employee needs to work for 8 hours, he/she can work for 4 hours in the morning, and then come back in the evening to complete the remaining shift hours.
If you select Flexible - Day/Flexible - Night Shift Type, then two additional fields have to be filled.
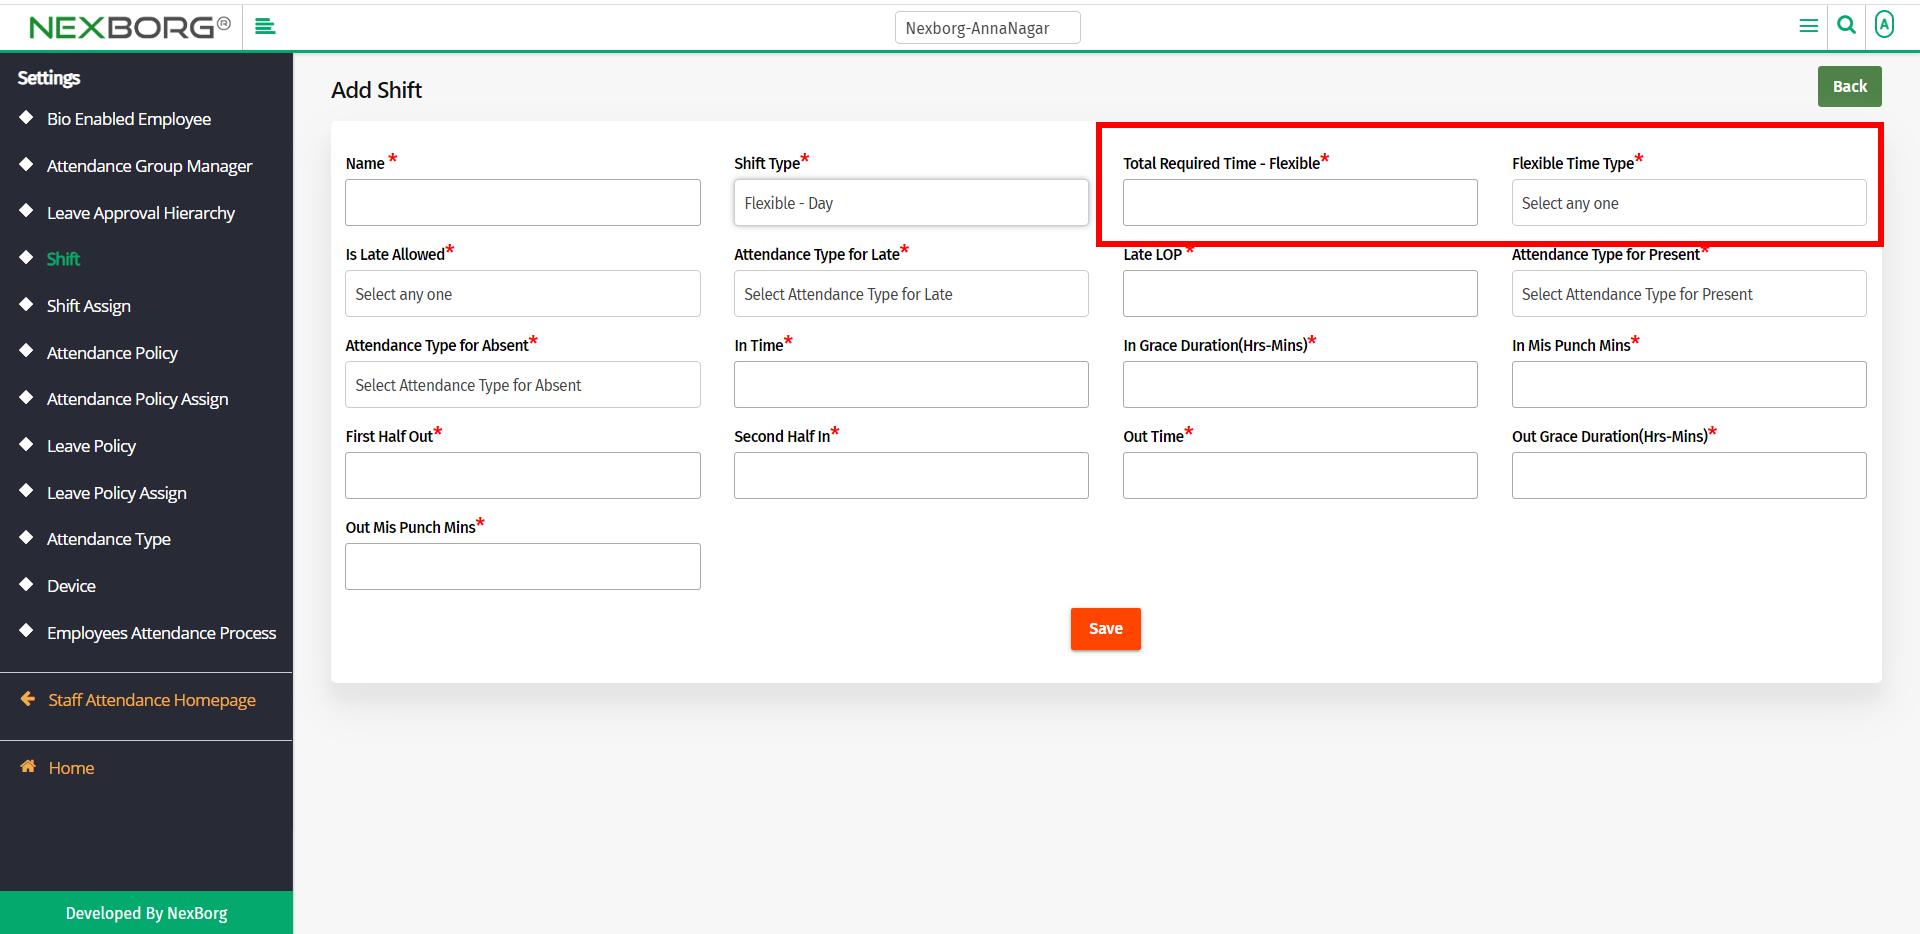
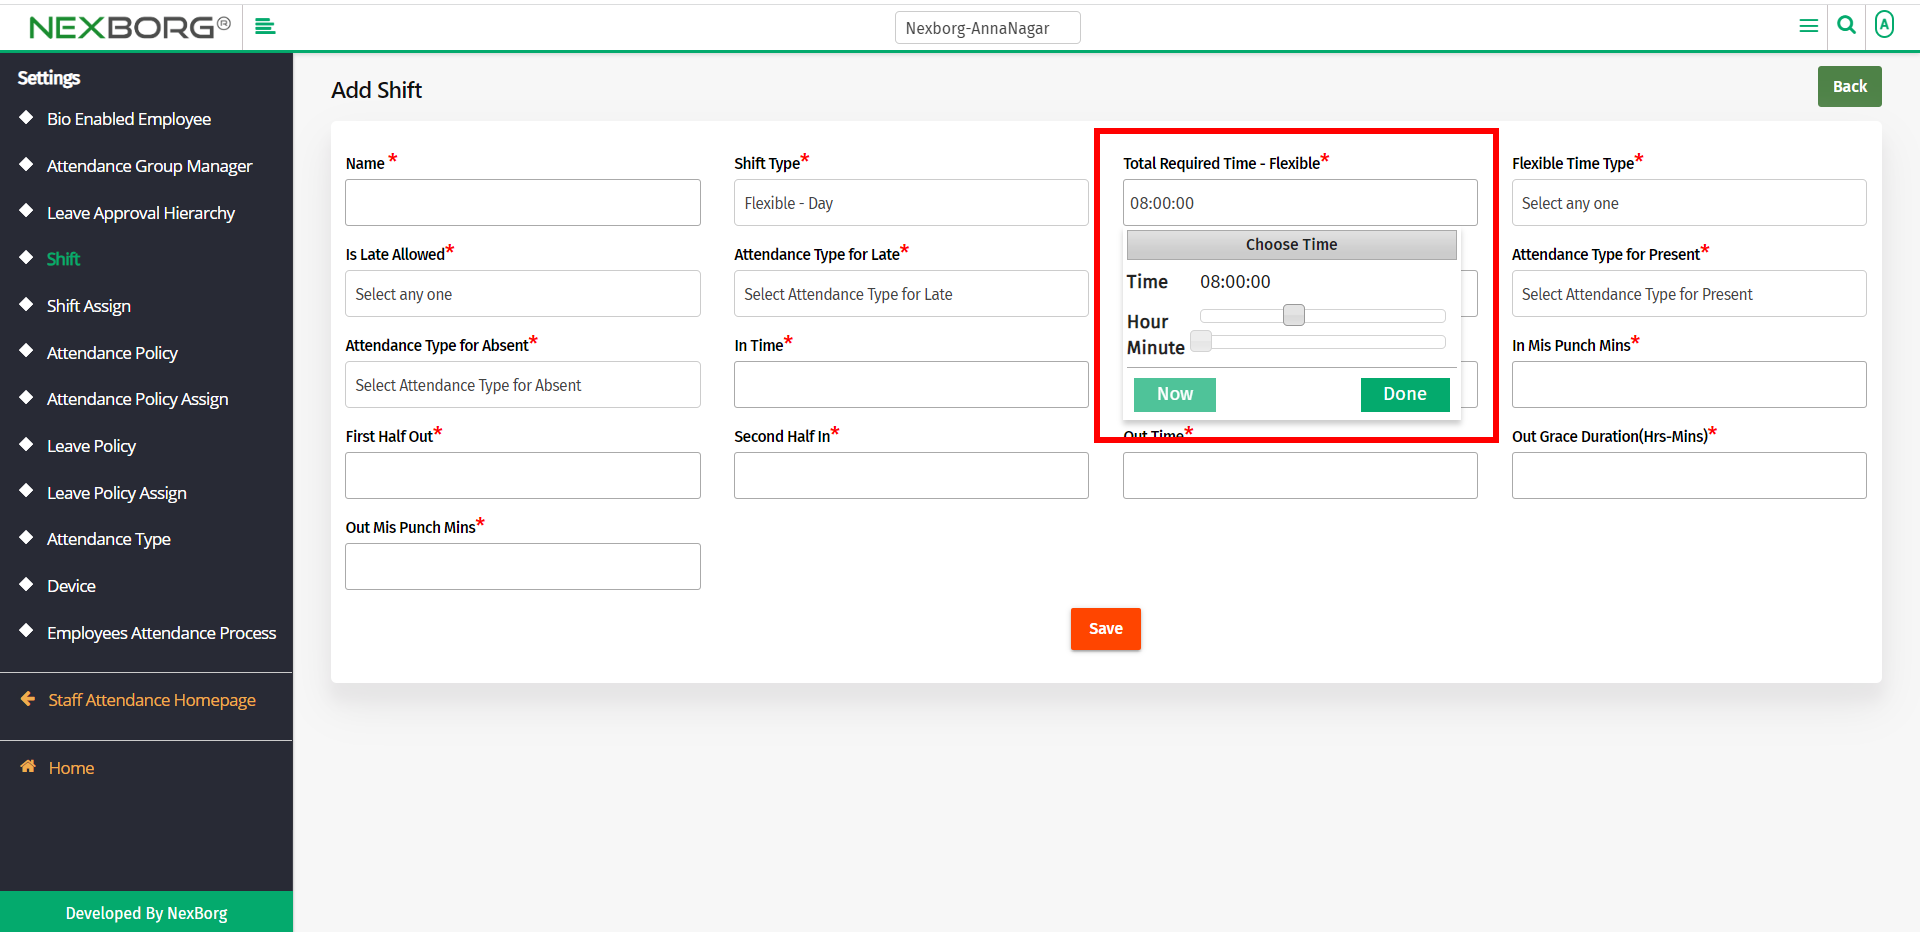
Provide the Total Required Time - Flexible. This is the total flexible time that the employees must work.
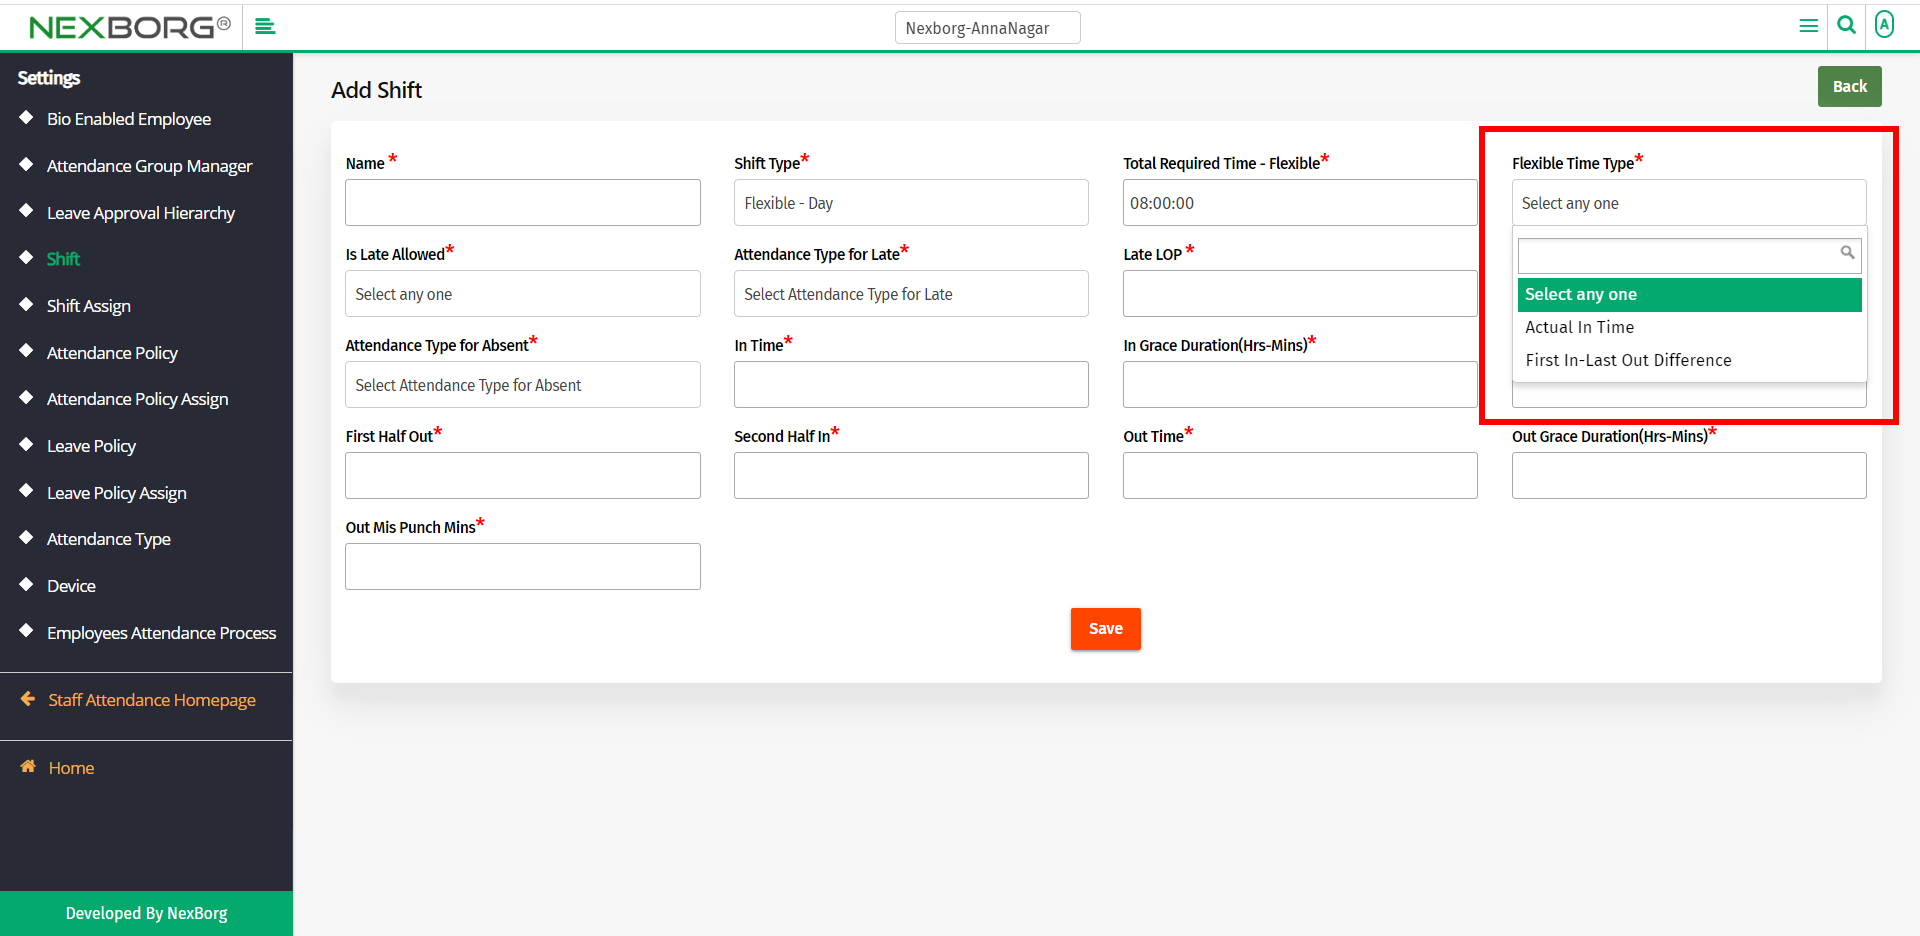
Then provide the Flexible Time Type. The time type can be "Actual in Time/First In-Last Out Difference".
In the Actual in Time, the actual period of how long the employee is in the office is calculated.
In the First In-Last Out Difference, the difference between the first and the last punch is calculated.
Let the Shift Type be Day.
Provide if Late is allowed or not(Yes/No).

Select the Attendance Type for the employees who came late. We can mark it as Present, Absent, On-Duty, Week Off, Holiday, or Comp Off.
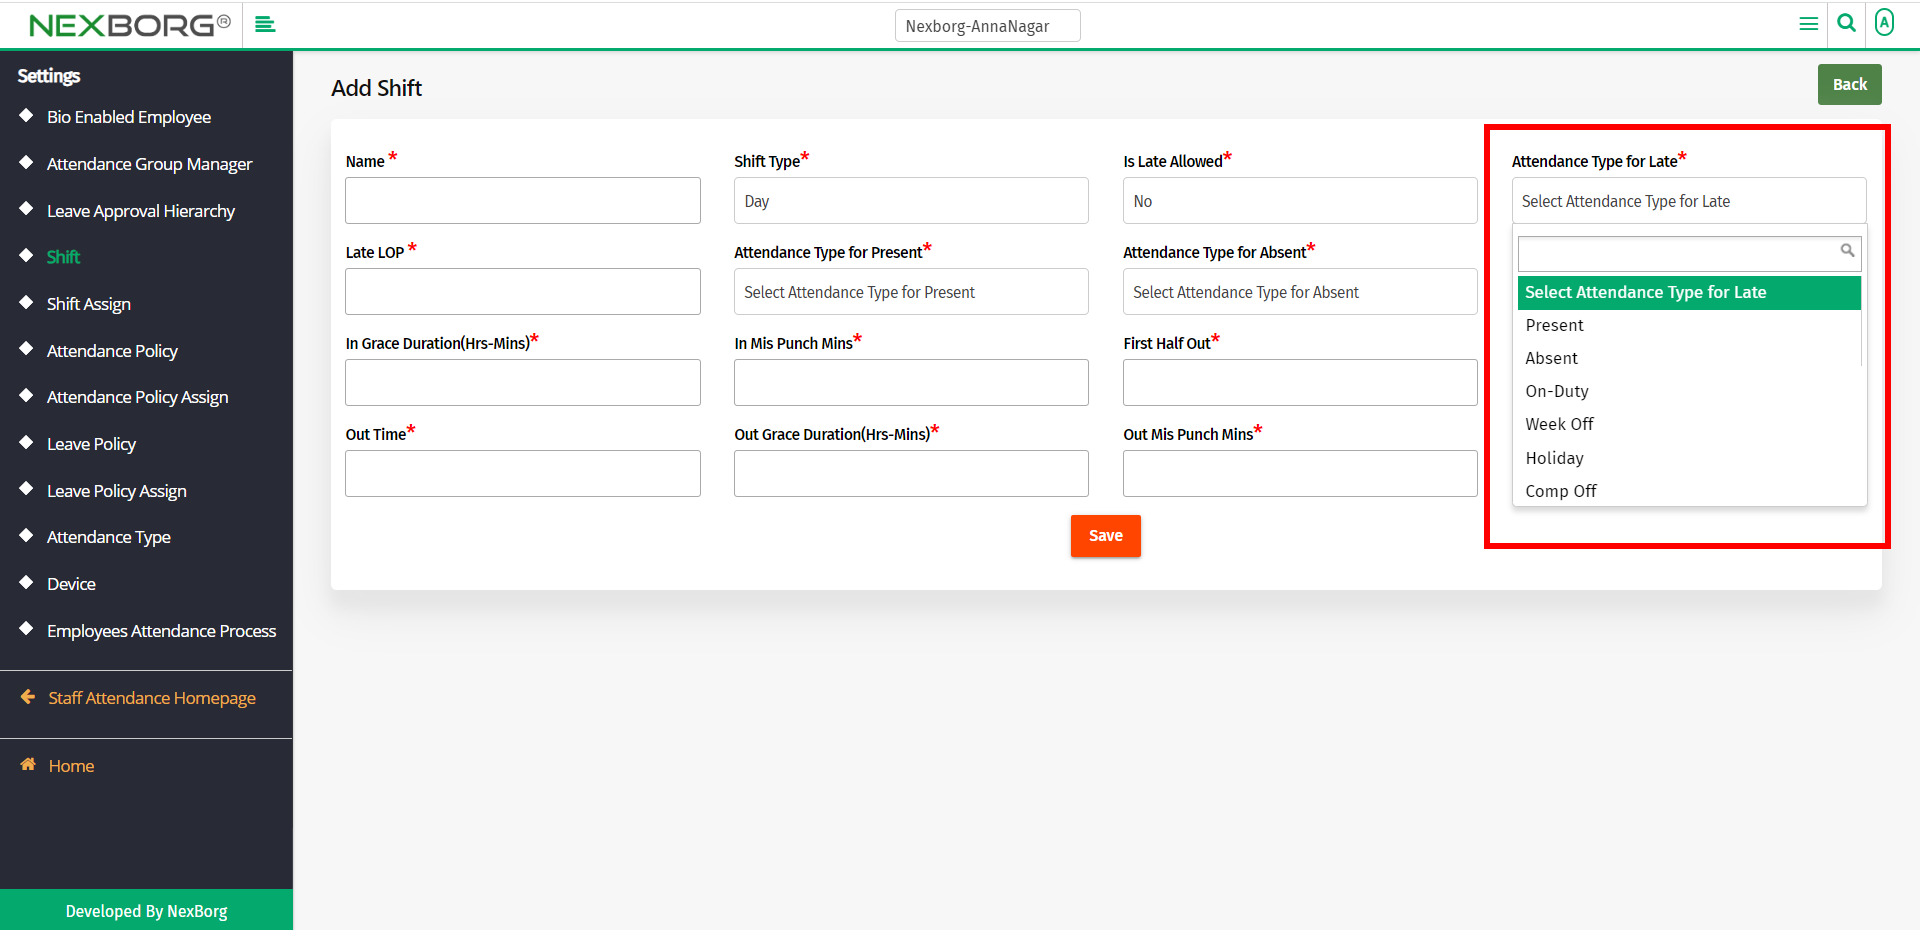
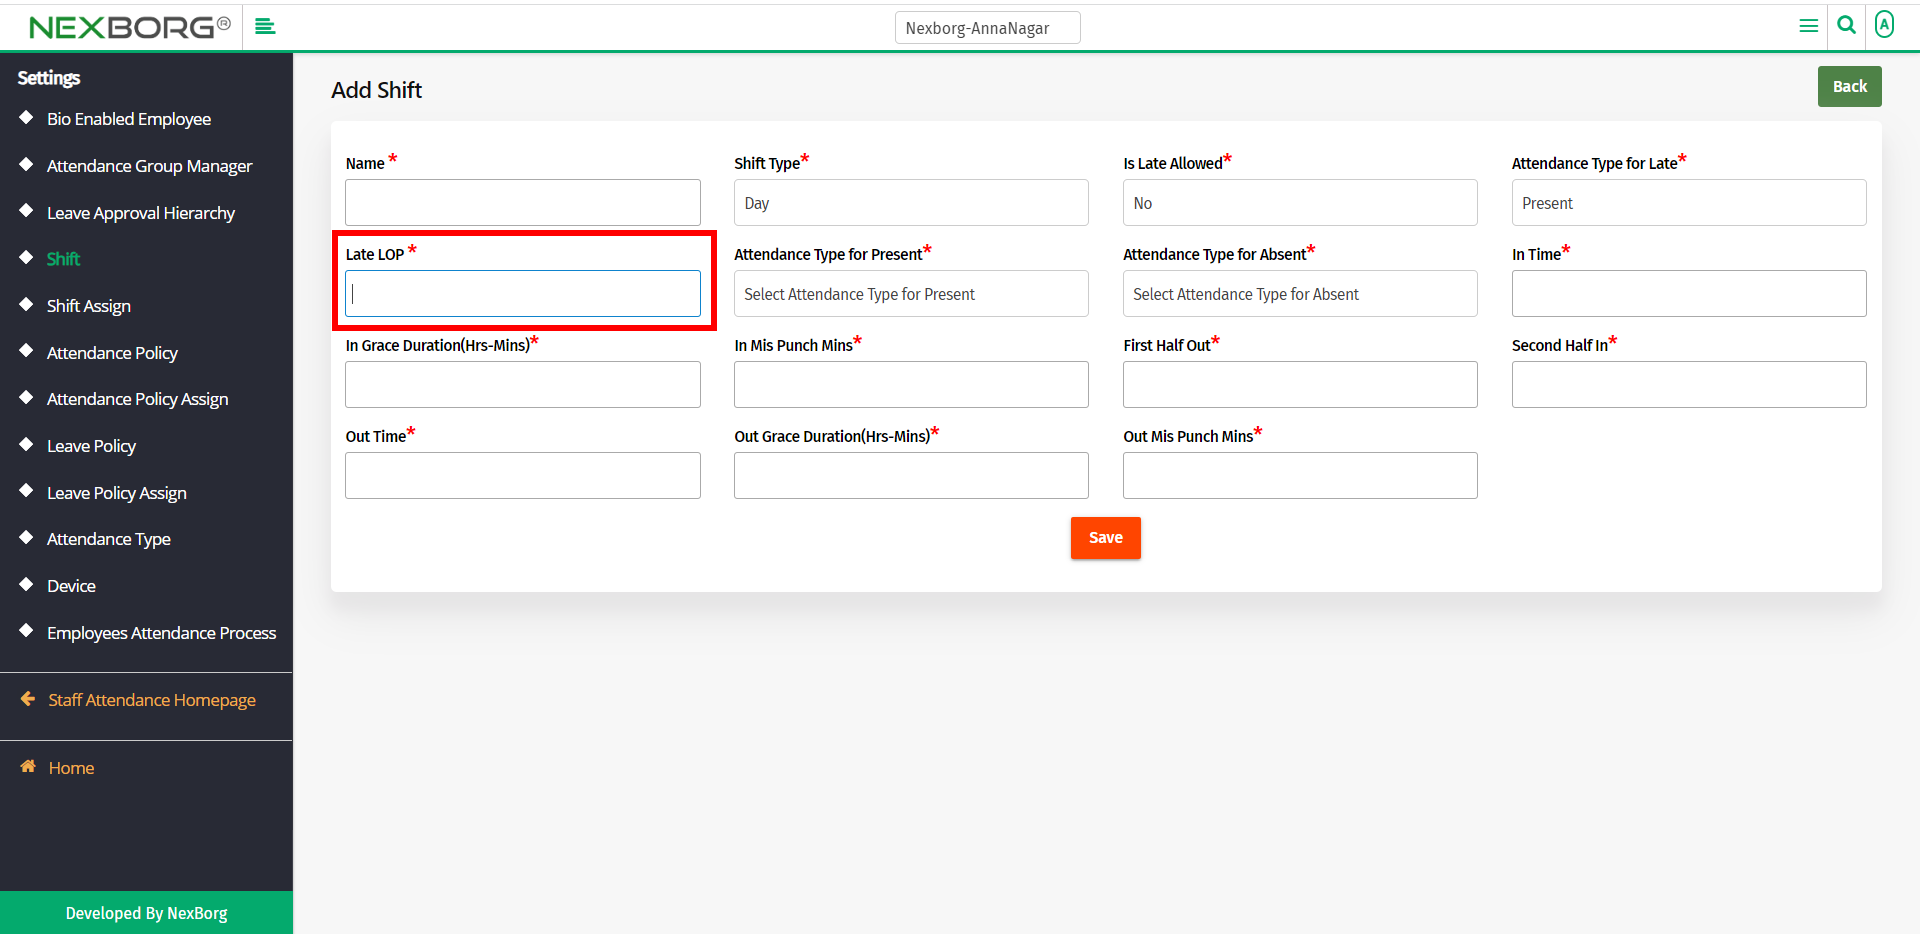
Provide the LOP for being late(If the Is Late Allowed is marked as No, then this Late LOP will be taken into account).
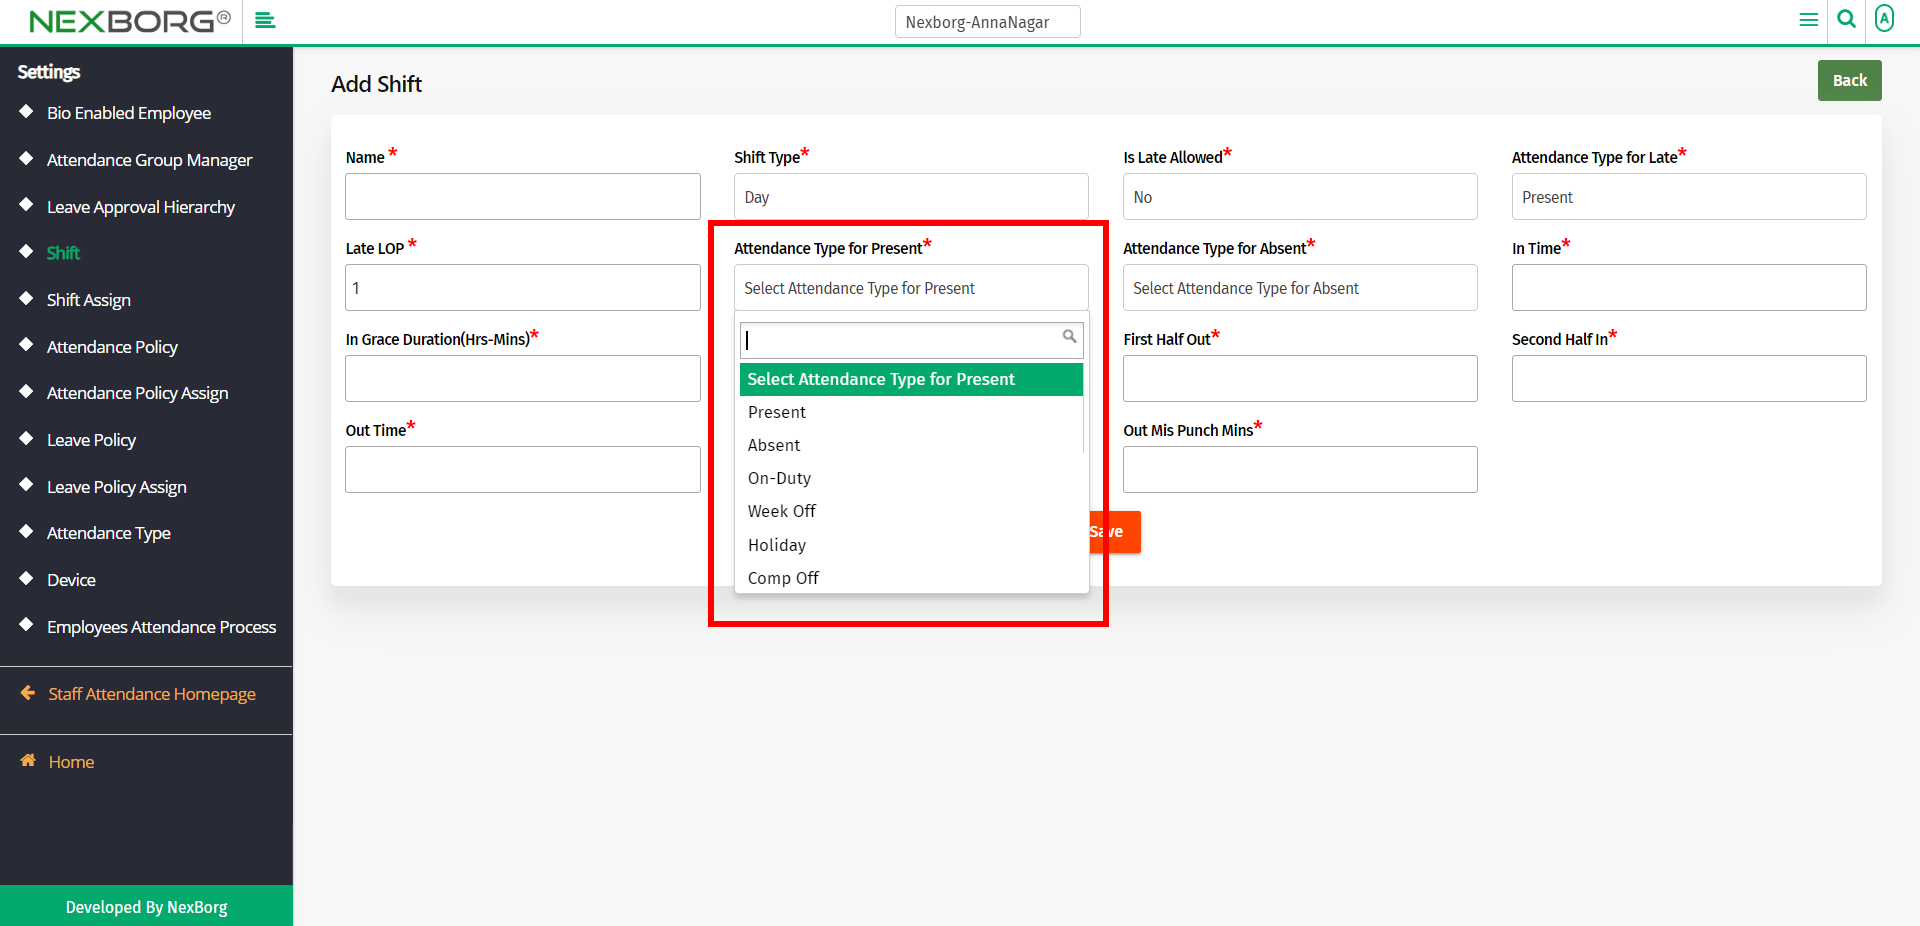
Select the Attendance Type for the employees who are present. We can mark it as Present, Absent, On-Duty, Week Off, Holiday, or Comp Off.
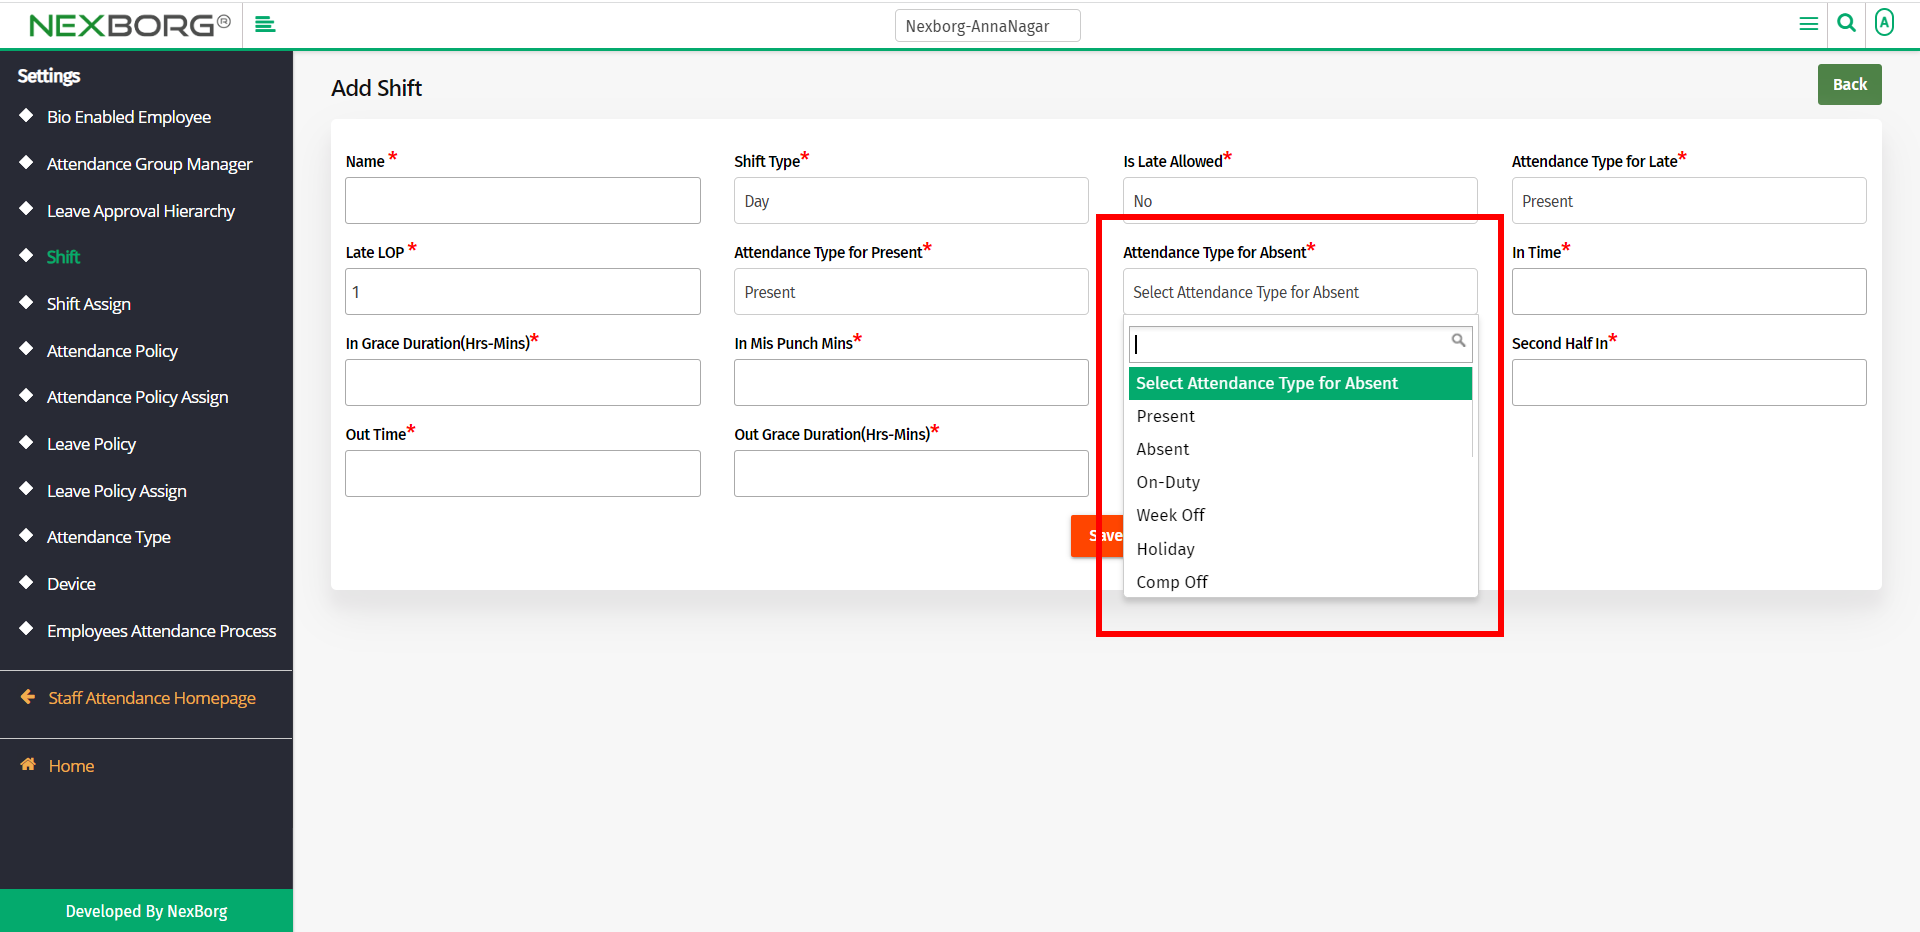
Select the Attendance Type for the employees who are absent. We can mark it as Present, Absent, On-Duty, Week Off, Holiday, or Comp Off.
Provide the In Time for the shift.
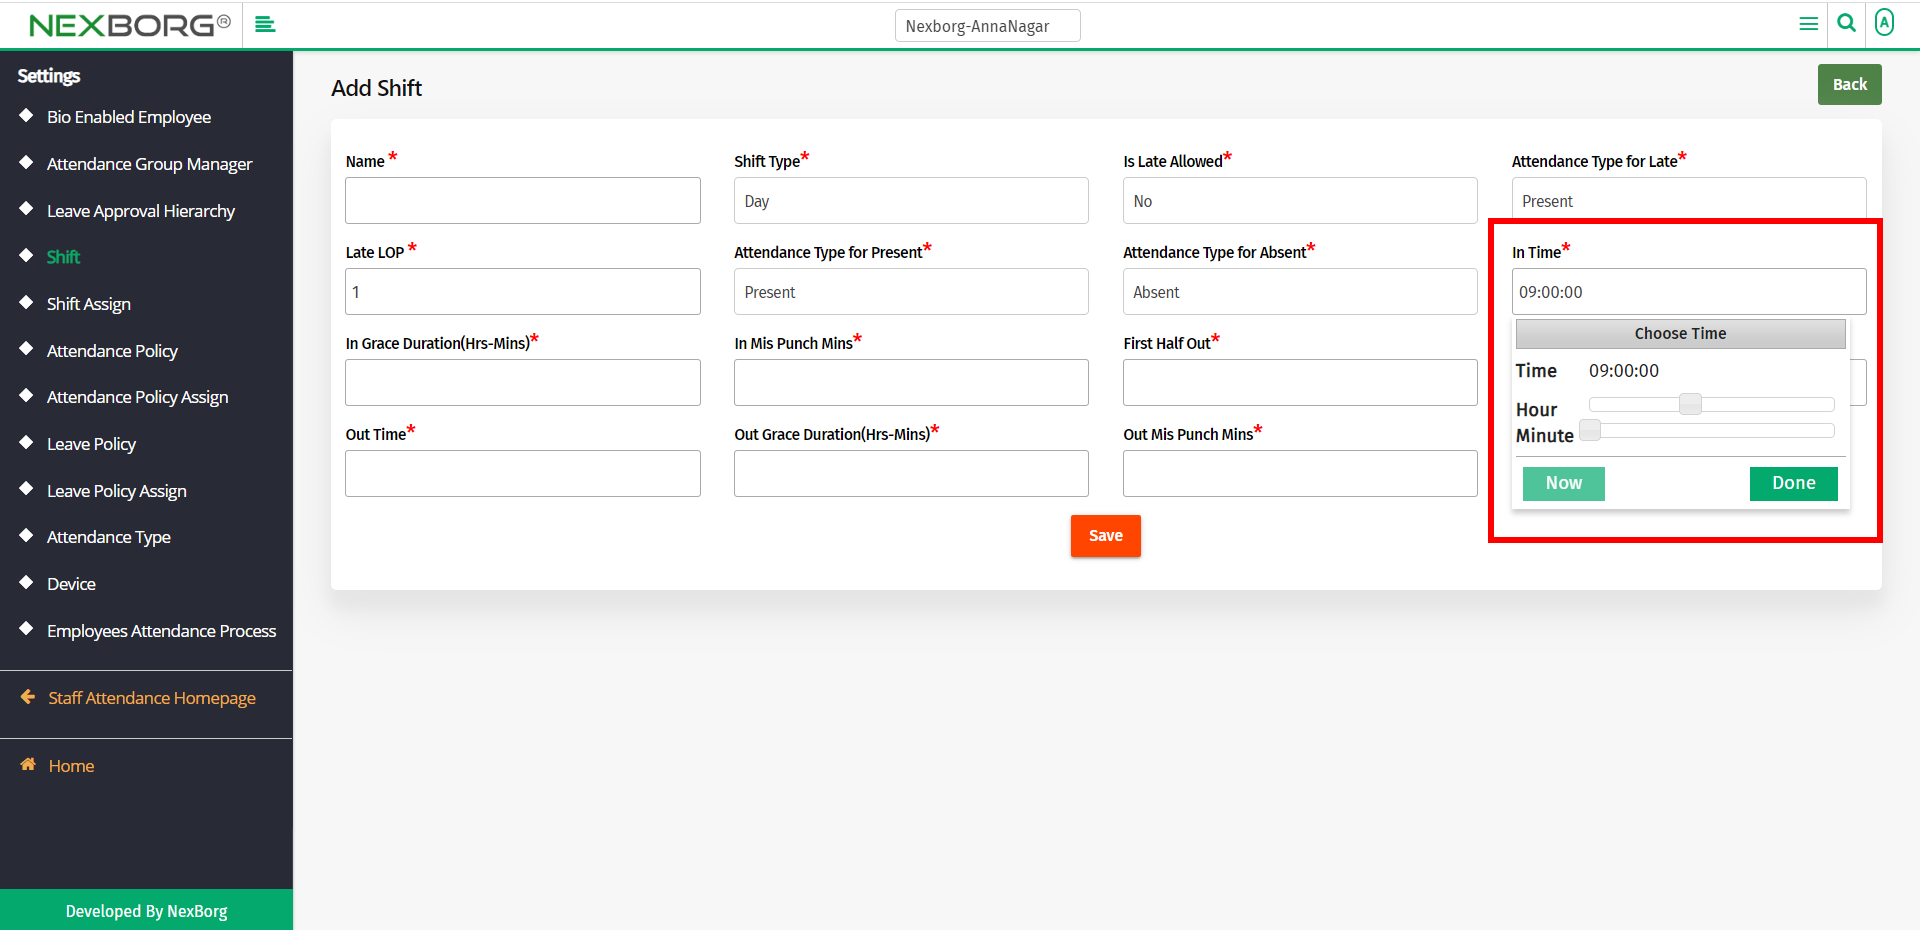
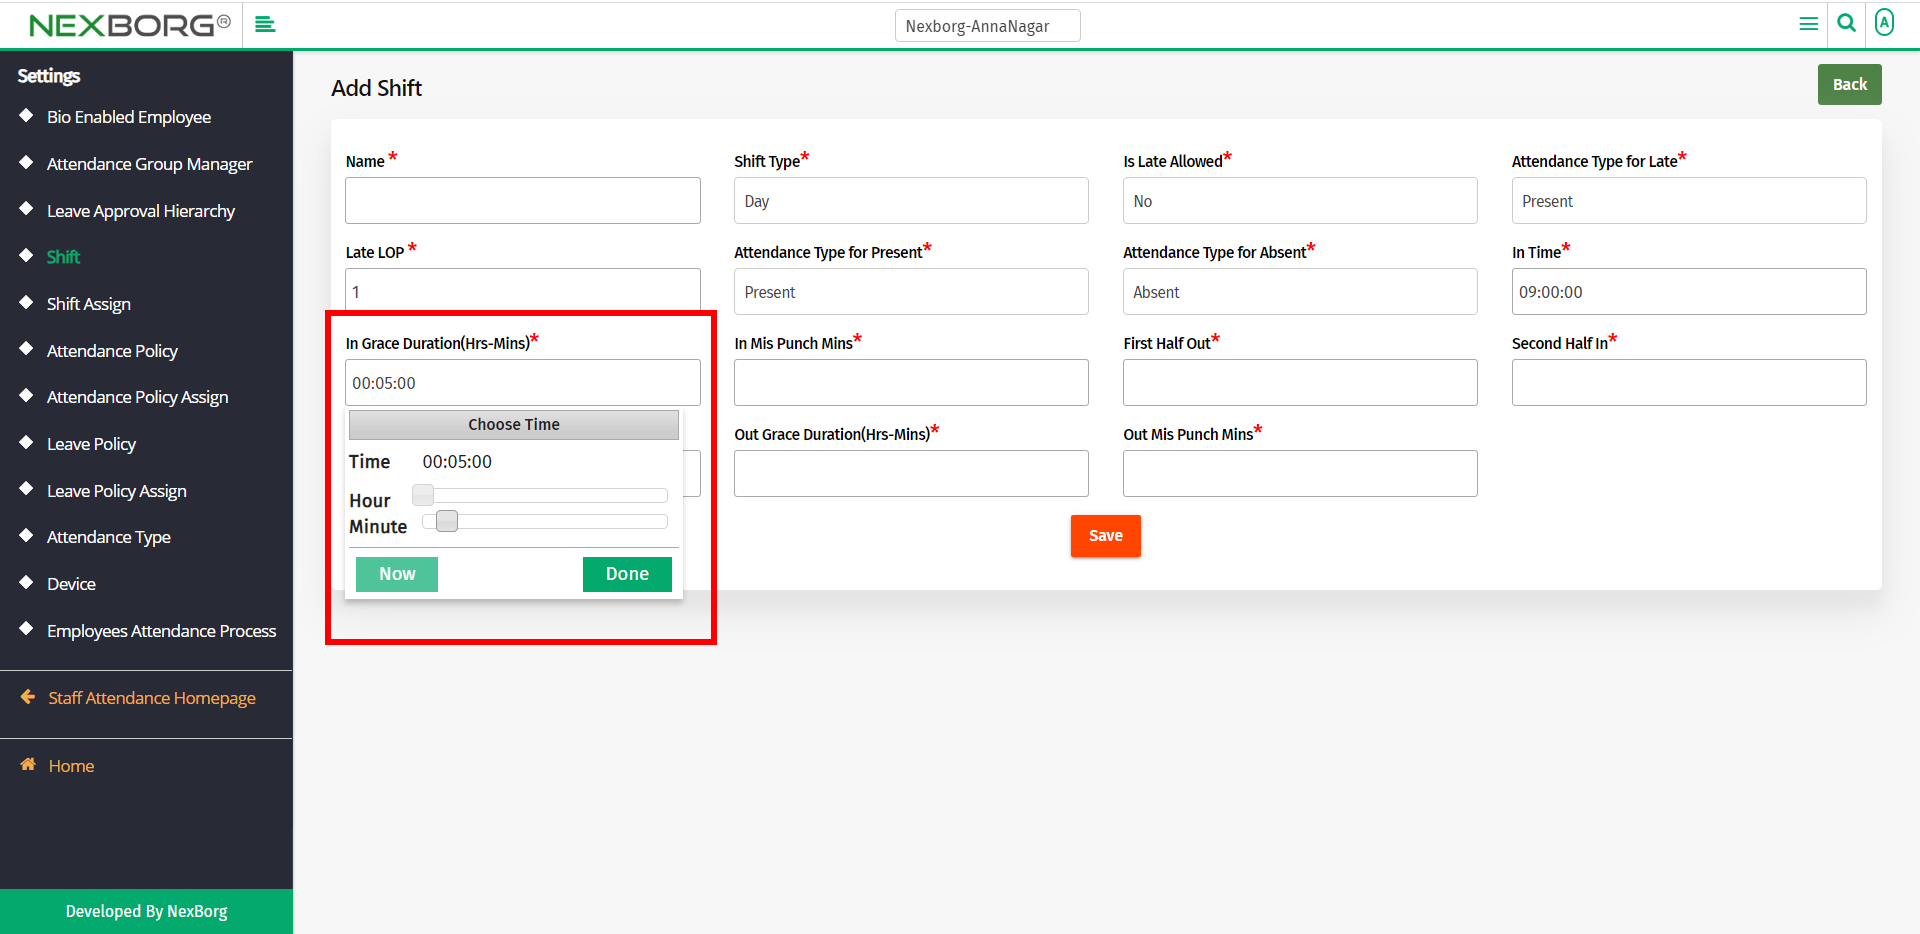
Provide the In Grace Duration time. This is a period beyond the standard time in which the employees can be late and still not be given any LOP.
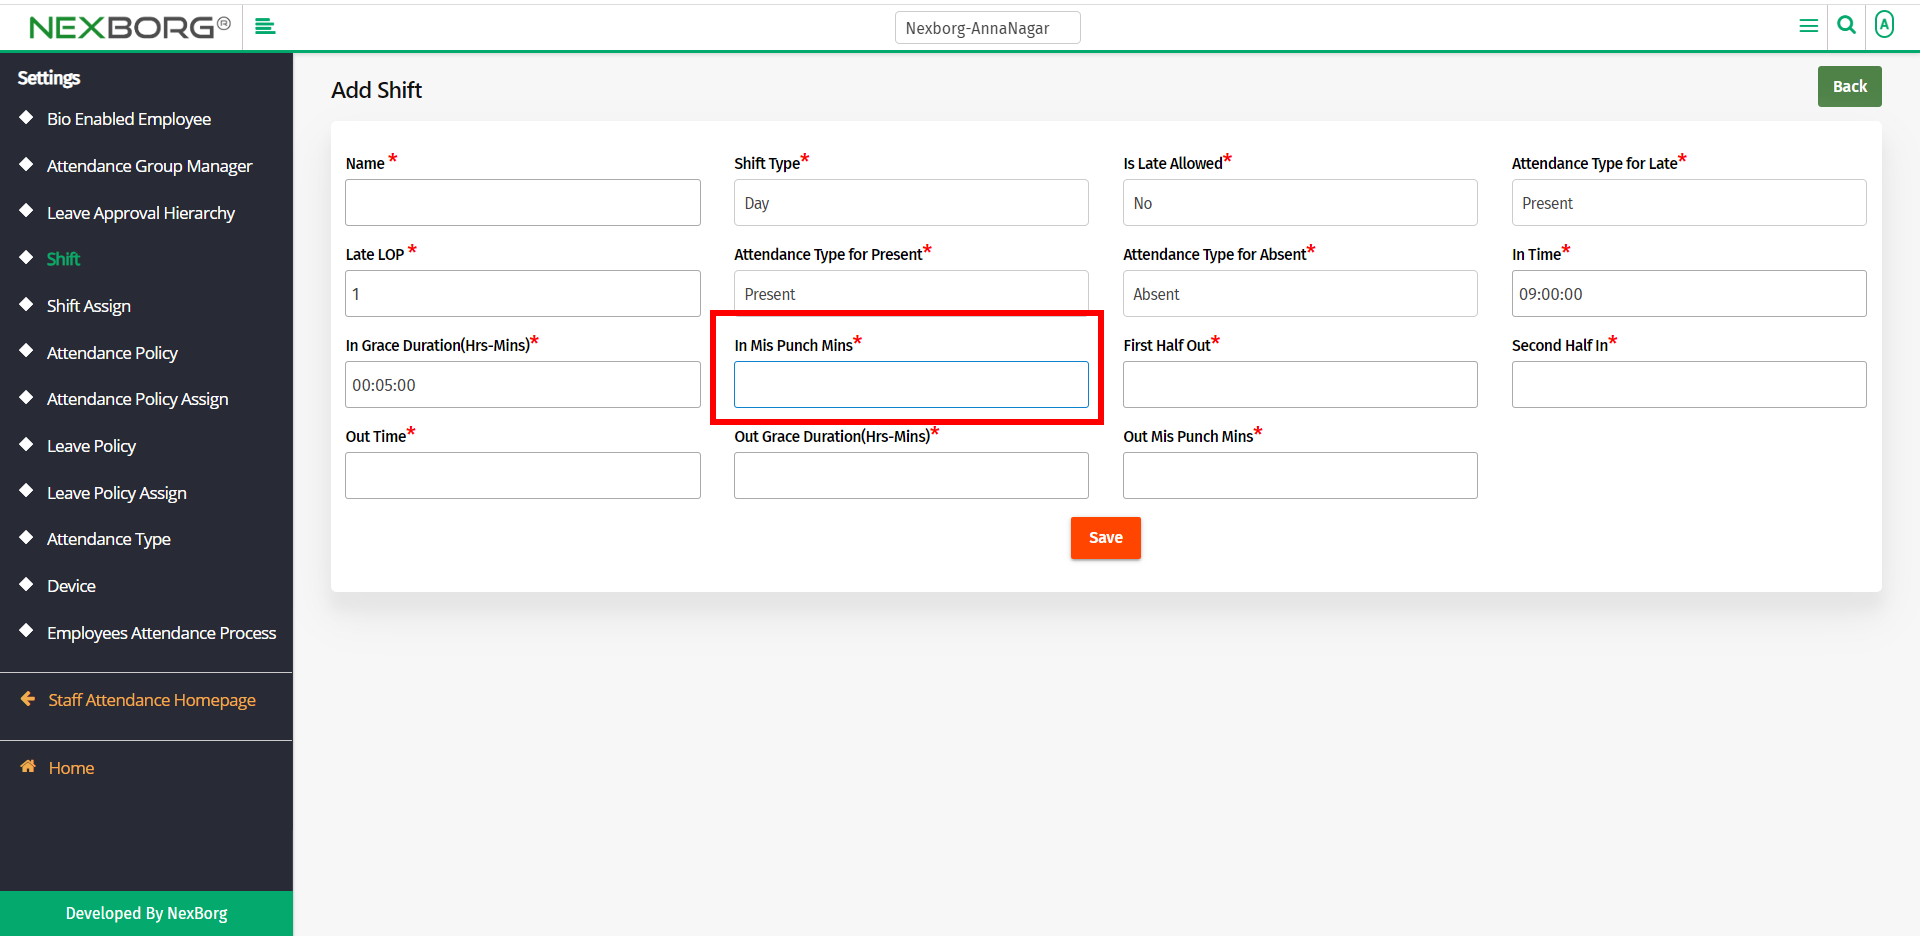
Provide the In Miss Punch Mins. This timing provides the time(mins) within which the punch should be kept.
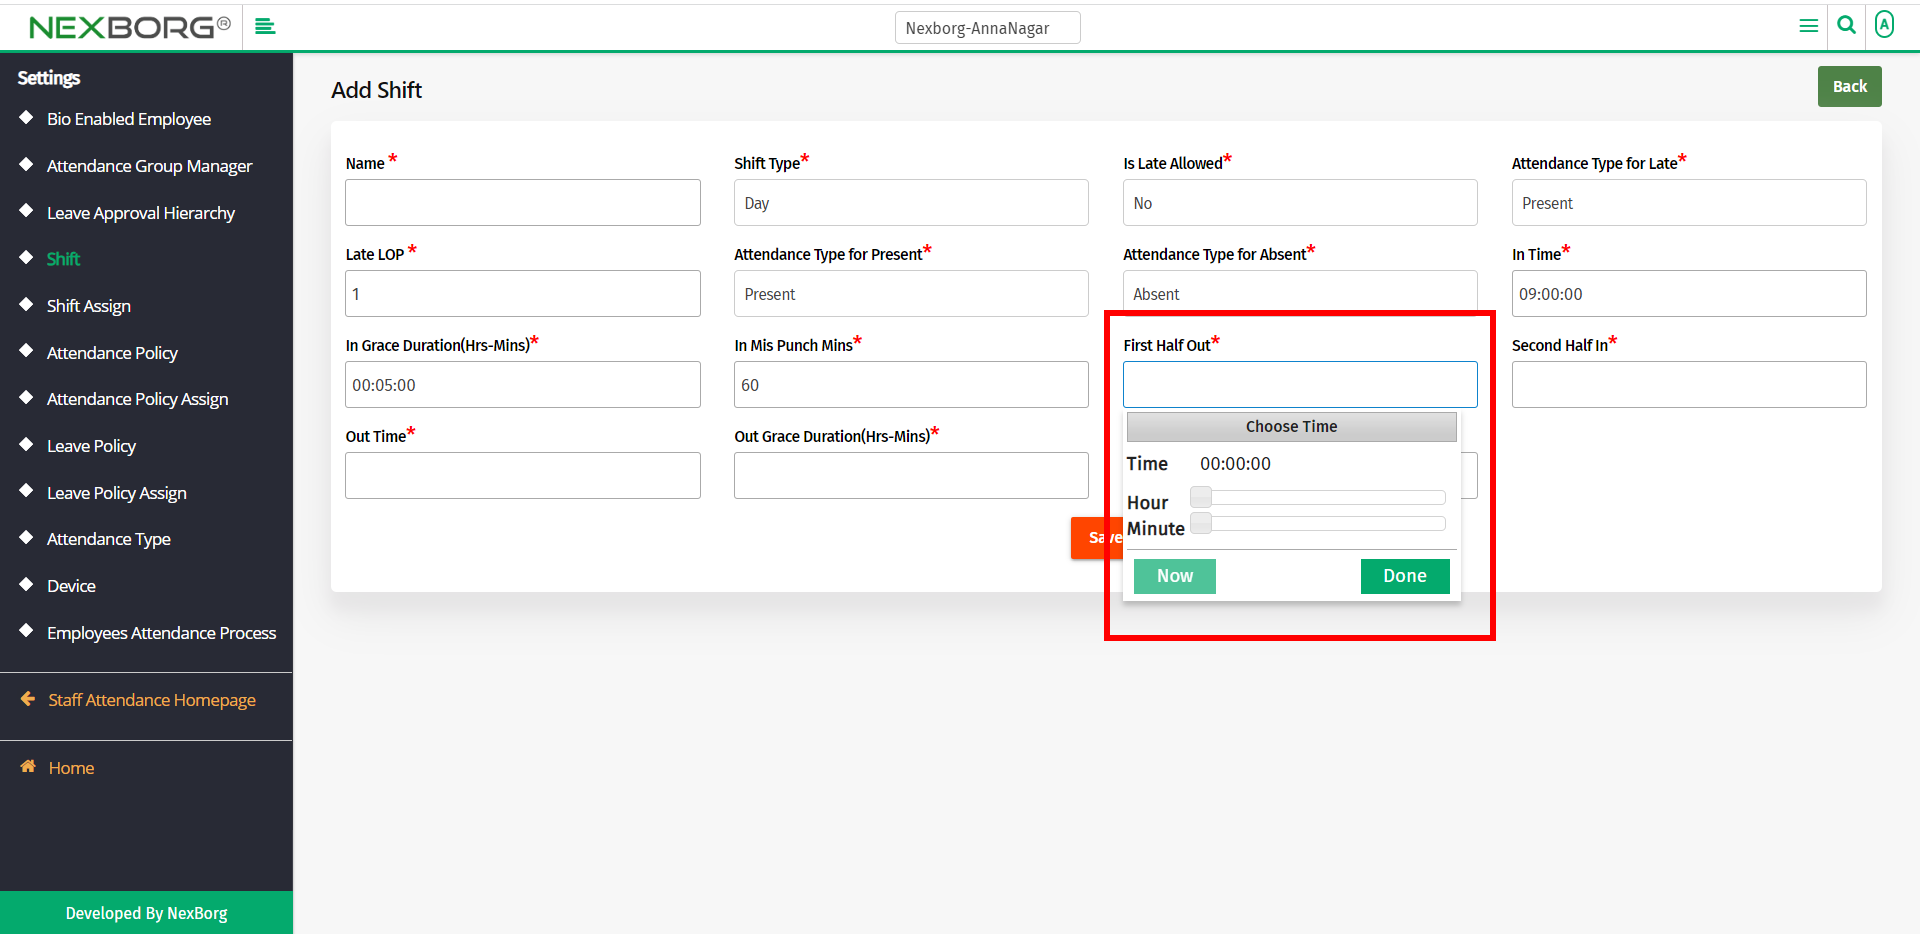
Provide the First Half Out time. This is the time when employees on this shift can go out for a break(lunch maybe).
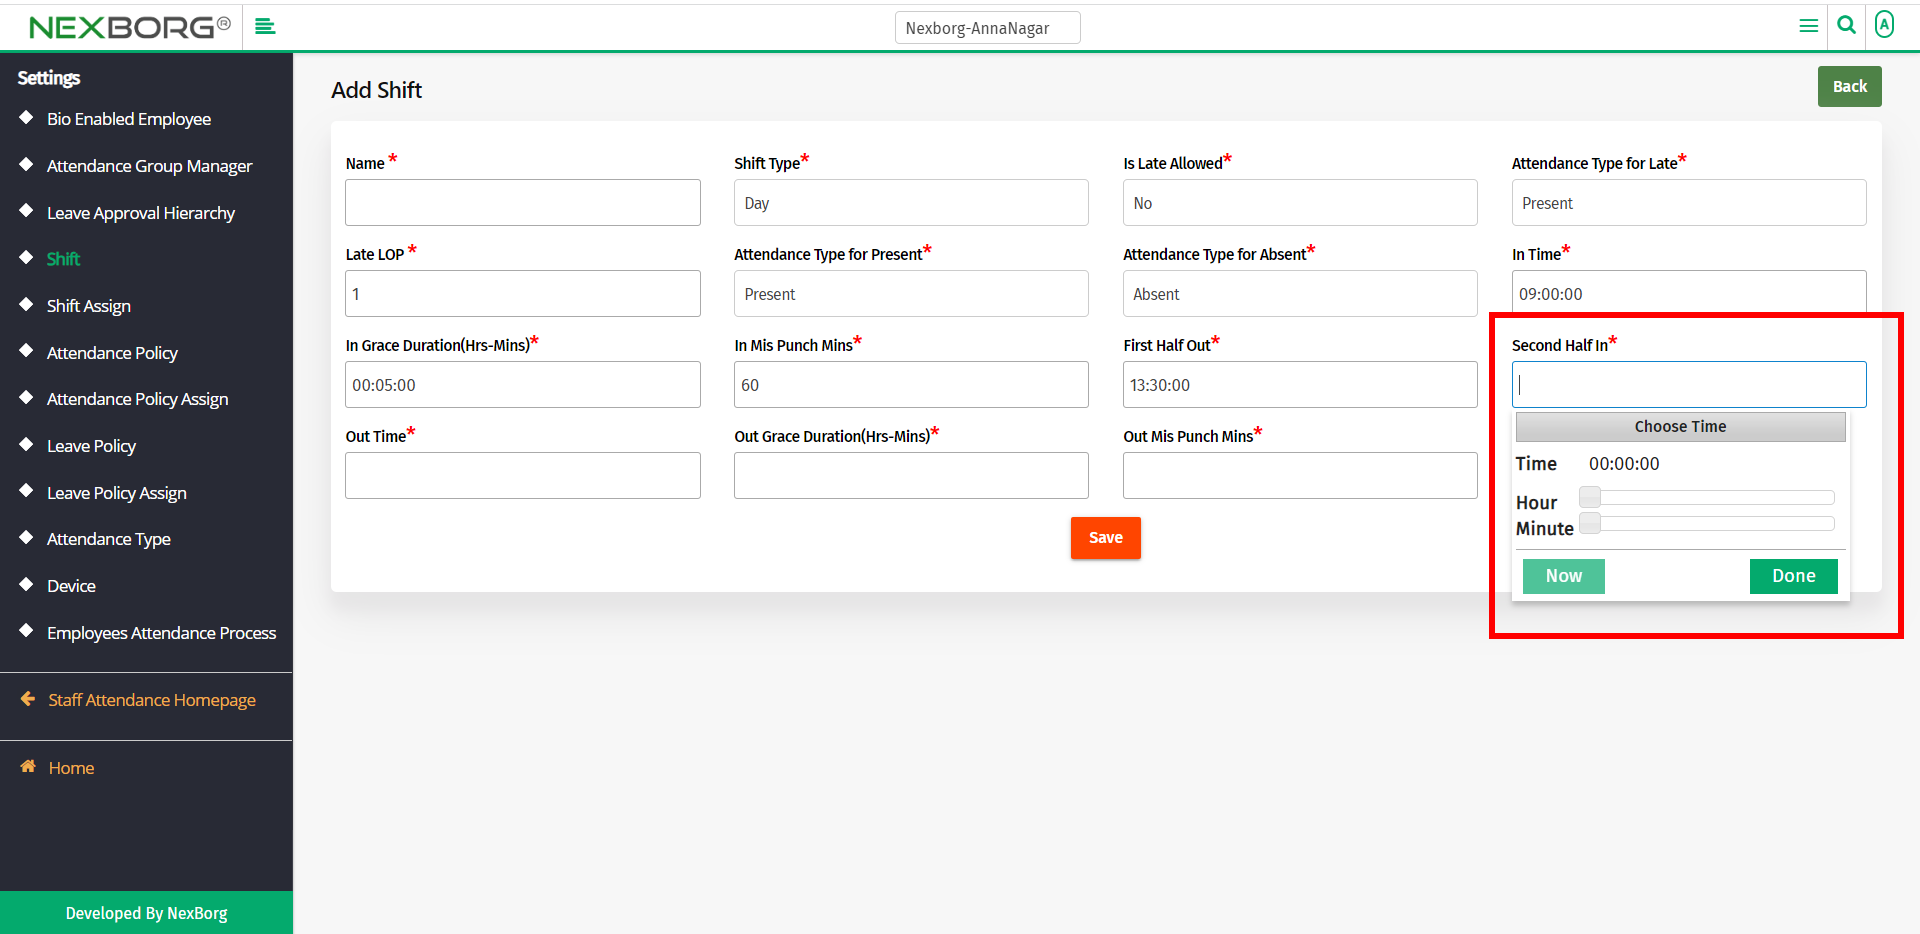
Provide the Second Half In time. This is the time when employees on this shift should get back to work.
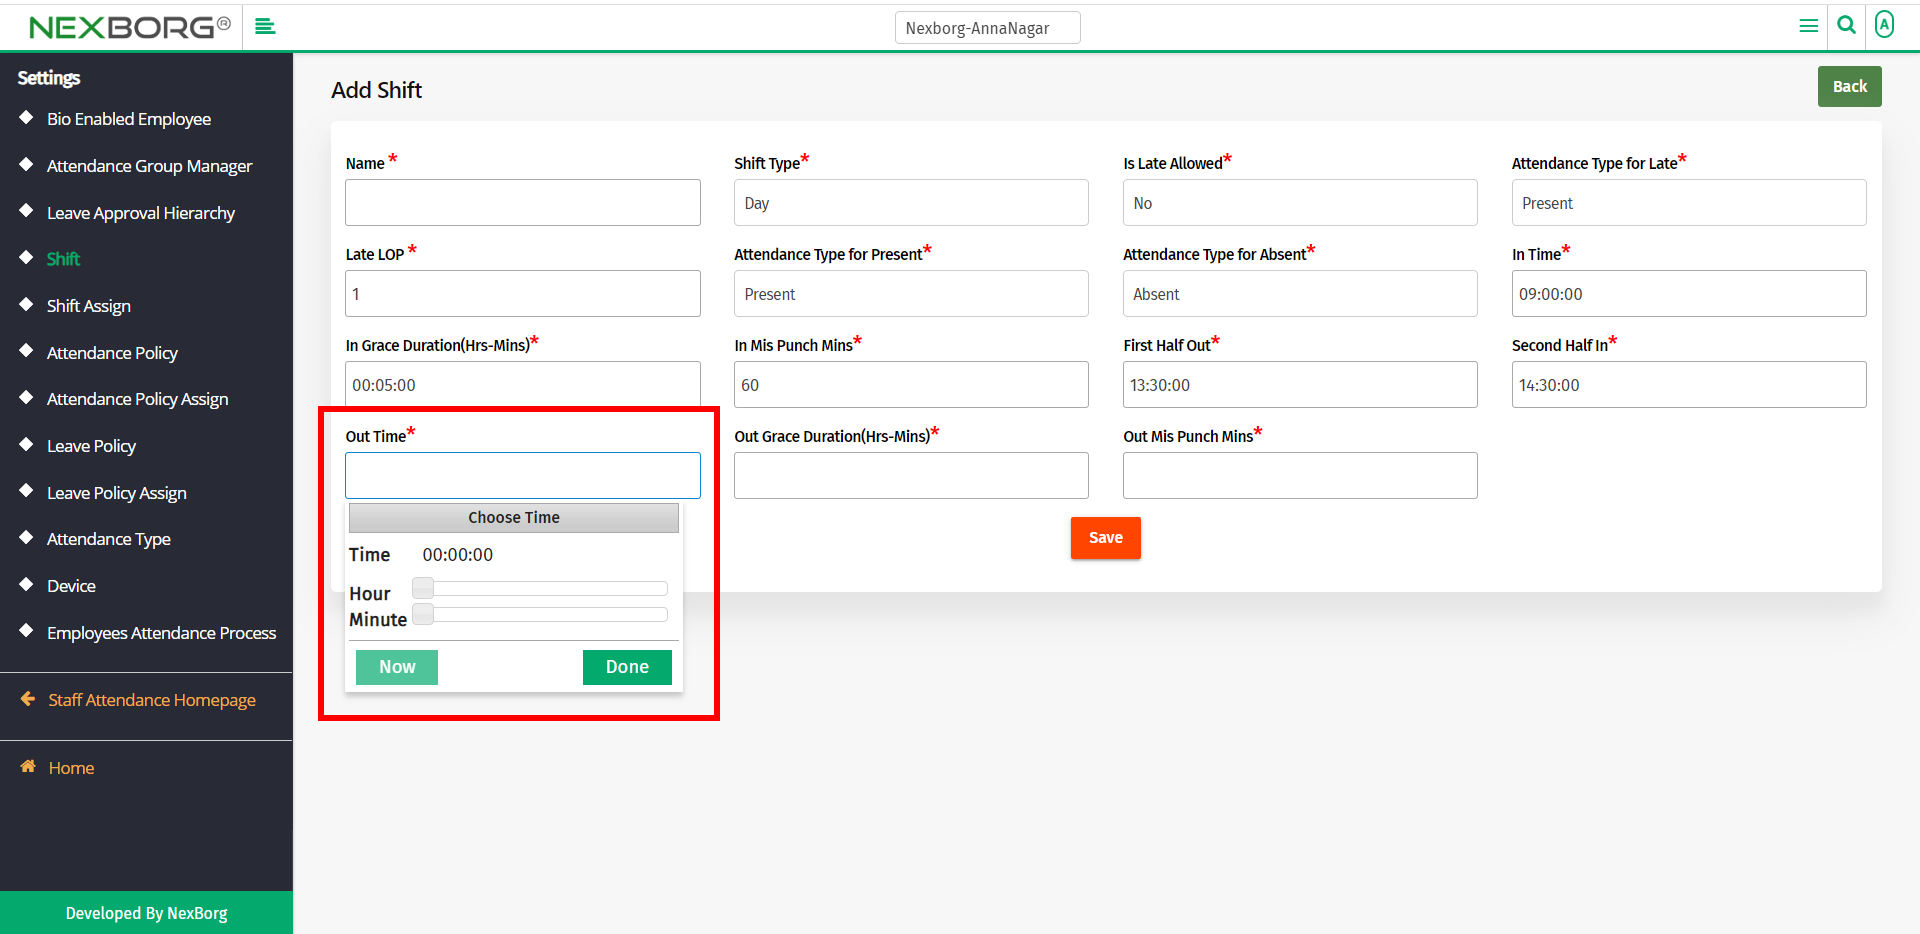
Provide the Out Time. This is the time when the shift is over and the employees are free to leave.
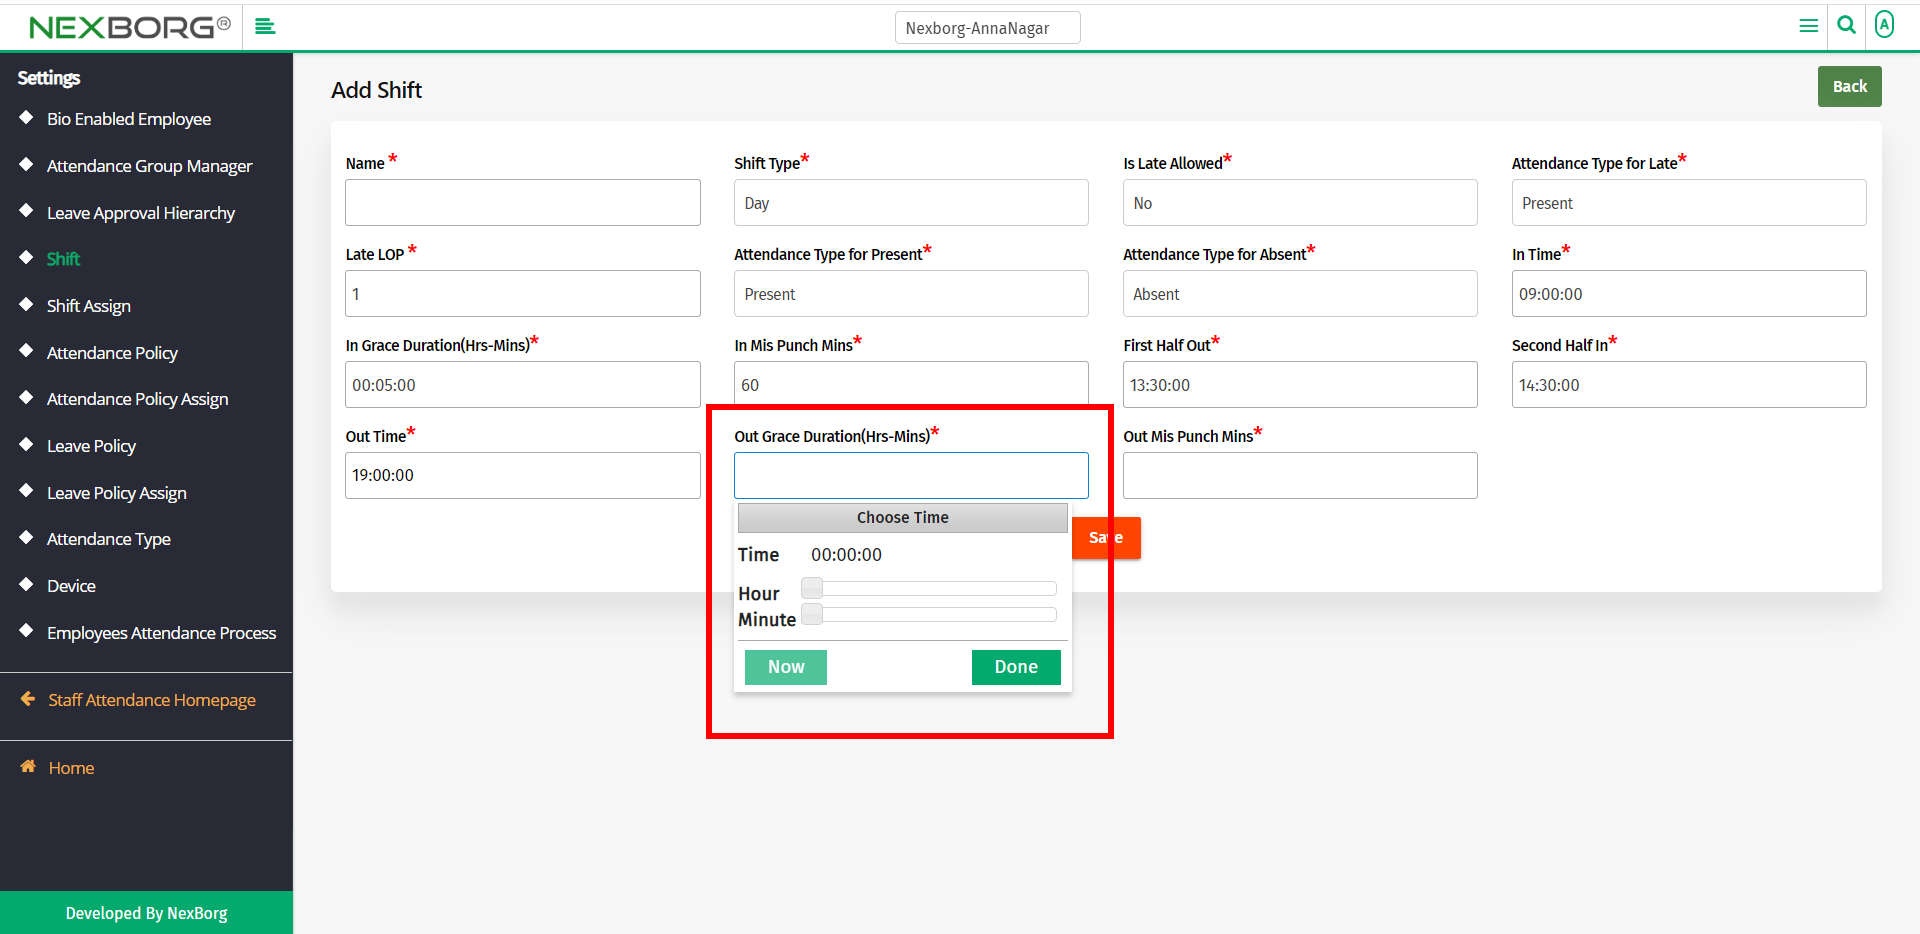
Provide the Out Grace Duration time. This is a period before the standard time in which the employees can leave and still not be given any LOP.
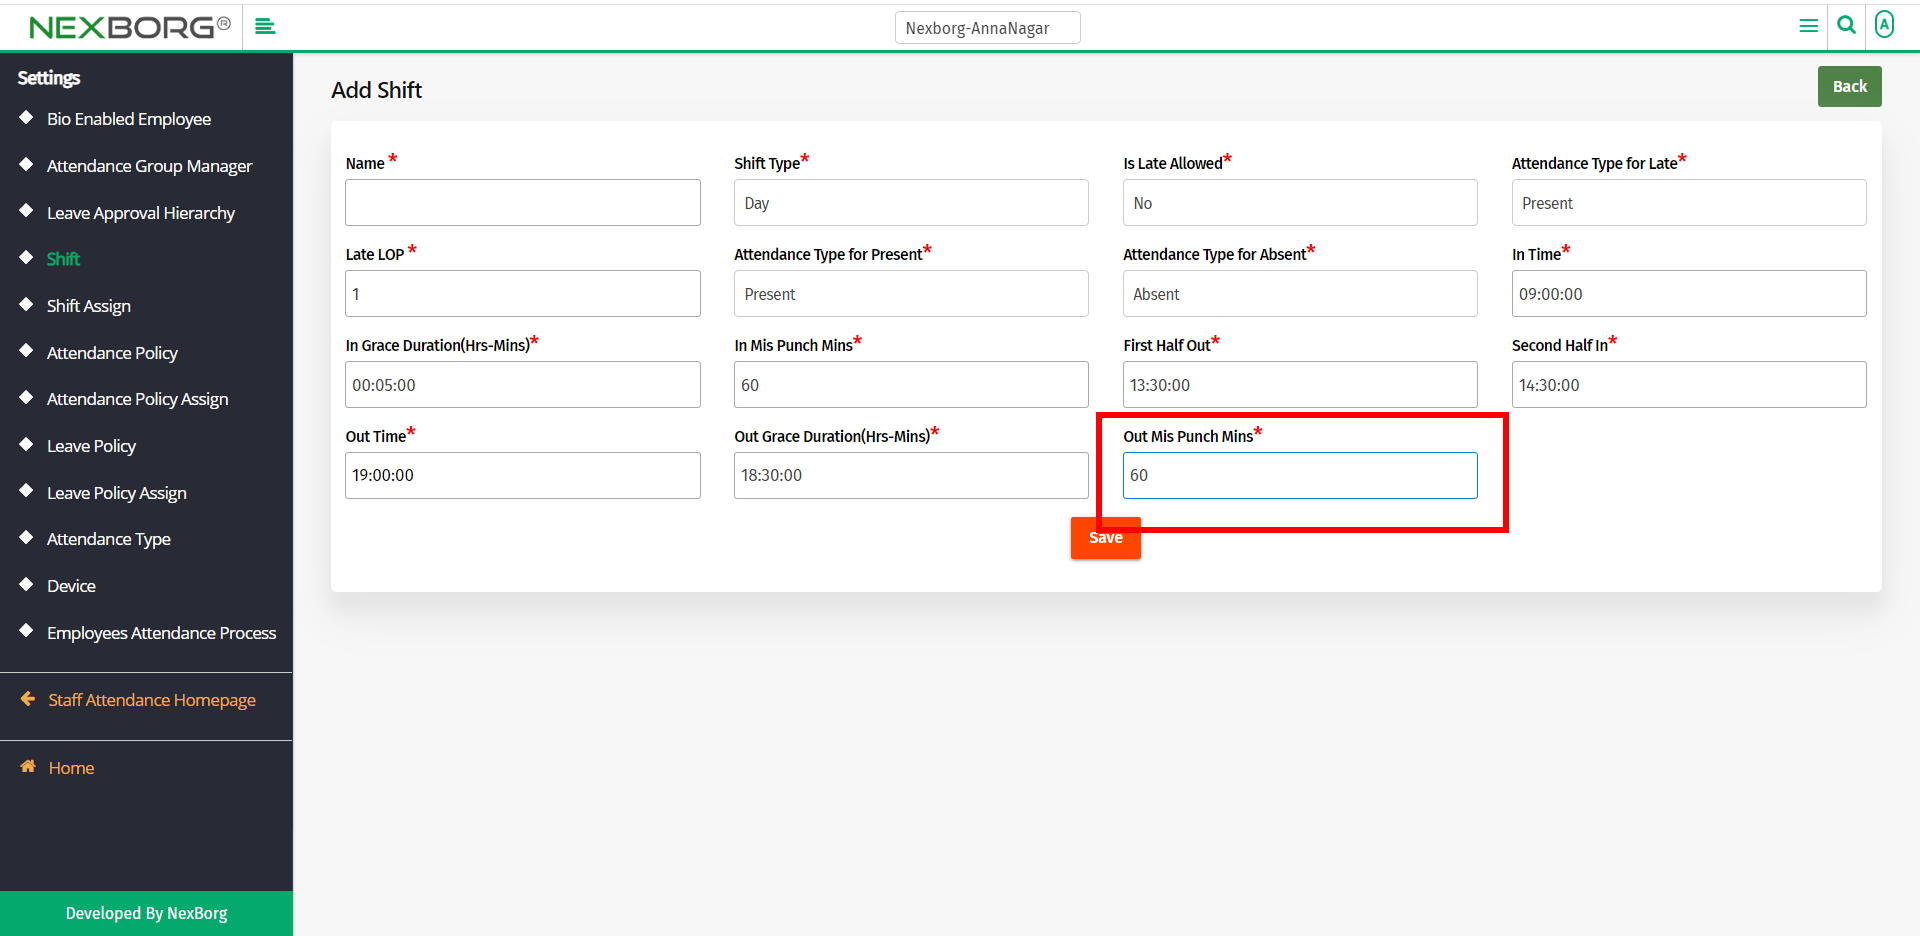
Provide Out Miss Punch Mins. This timing provides the time(mins) within which the punch should be kept.
Click on the Save button to save the shift details.
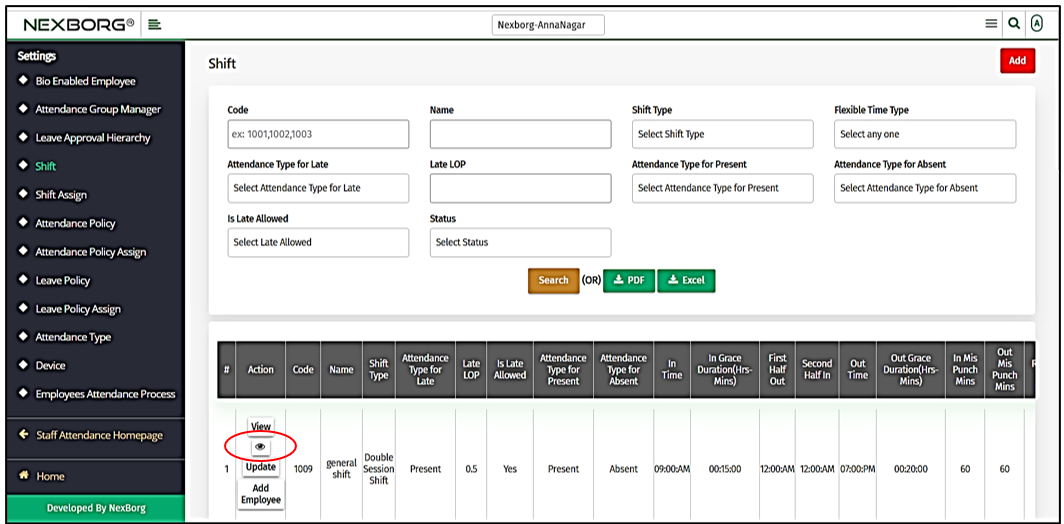
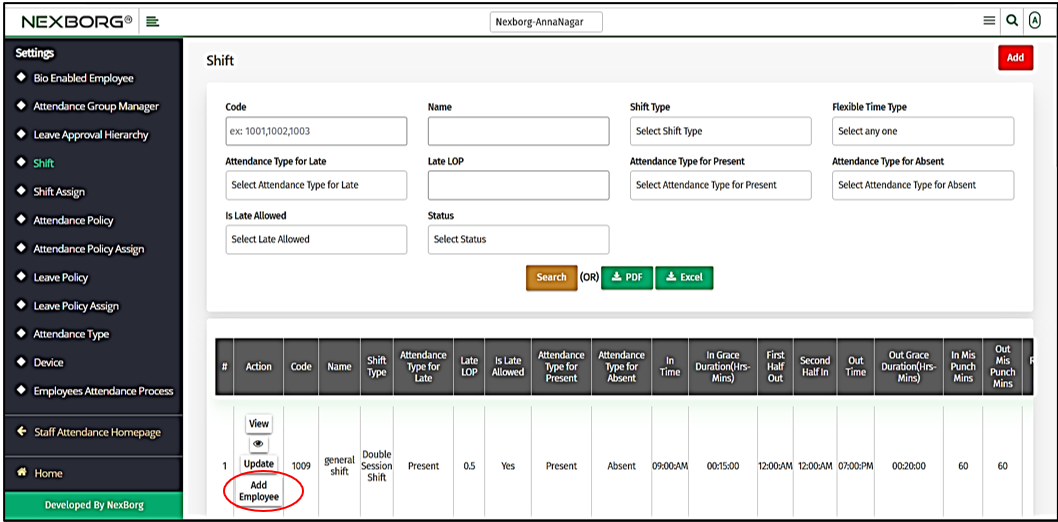
In the Shift menu, click on the Search button to list the shifts' details.
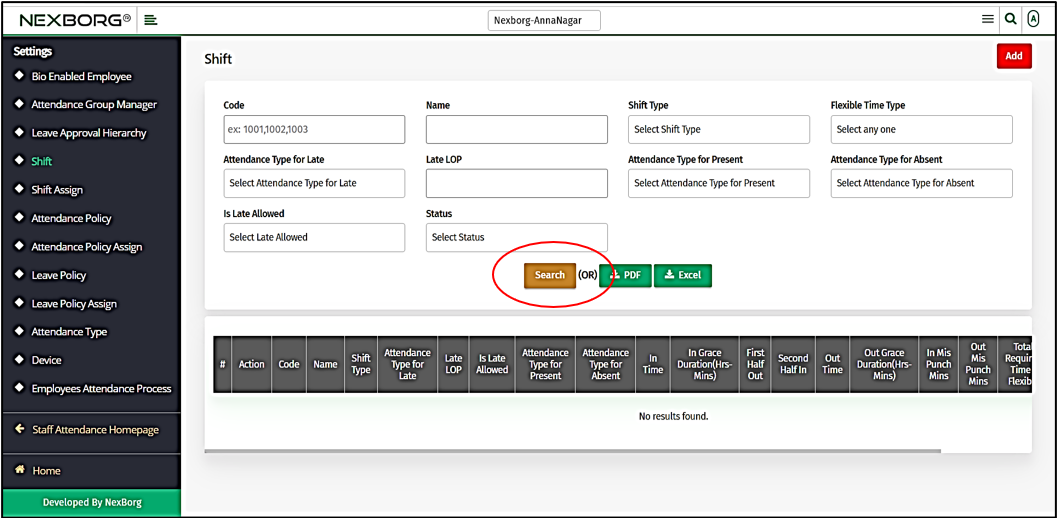
You can either View shifts, Update shifts or Add Employees to any shifts.
- To view the details of the shifts, click on the View action button from the list.
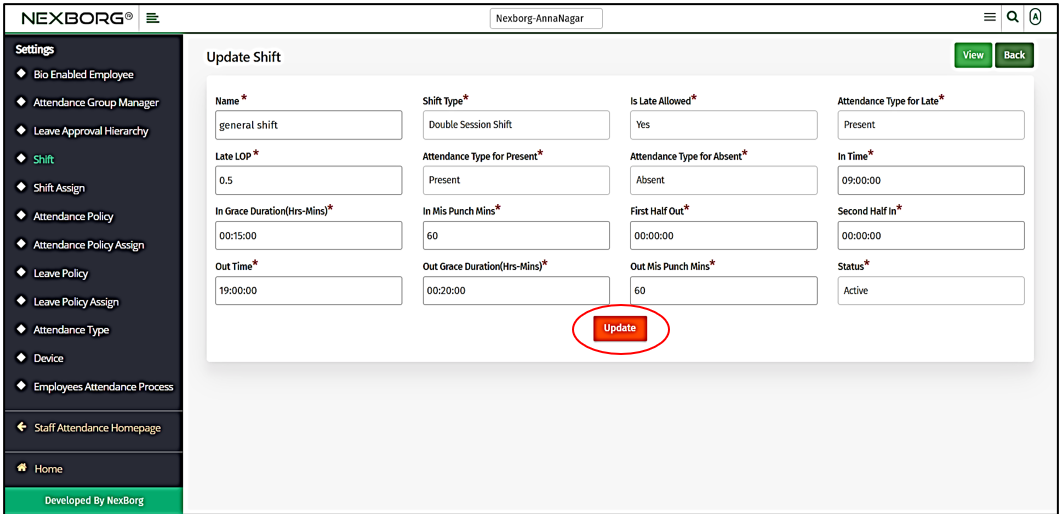
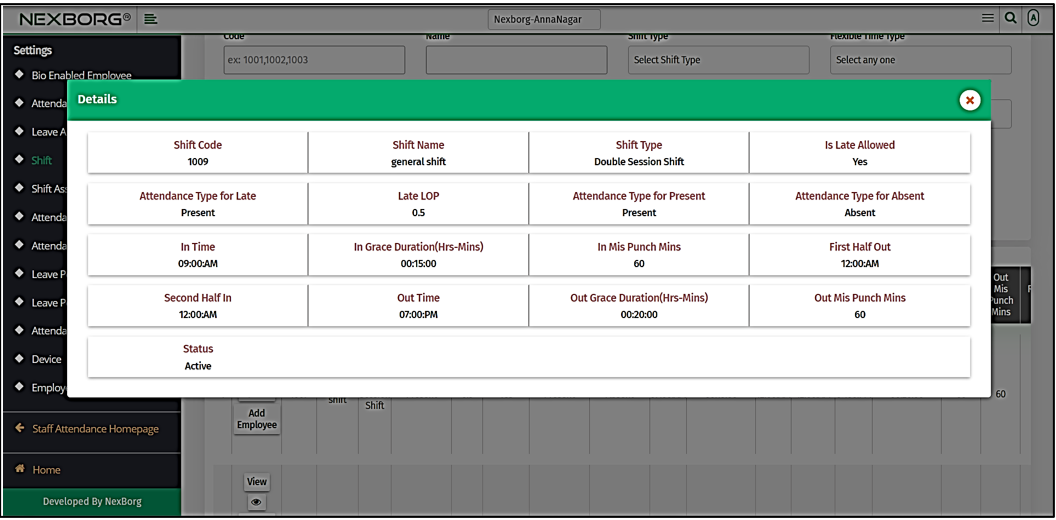
Now, the details of the shifts can be viewed. If you want to edit the shift details, click the Update button in the top right corner.
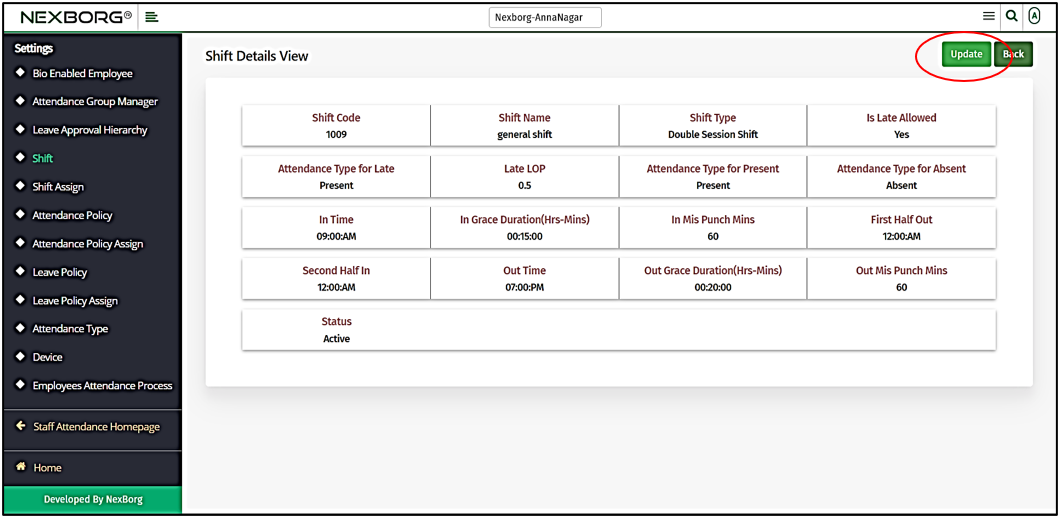
You can edit the shift's details in the Update Shift menu. Click on the Update button to save the changes.
- You can also view the details of the shifts by clicking on the View action symbol from the list.
You can now view the details of the shifts.
- Click on the Update action from the list to update details of the shifts.
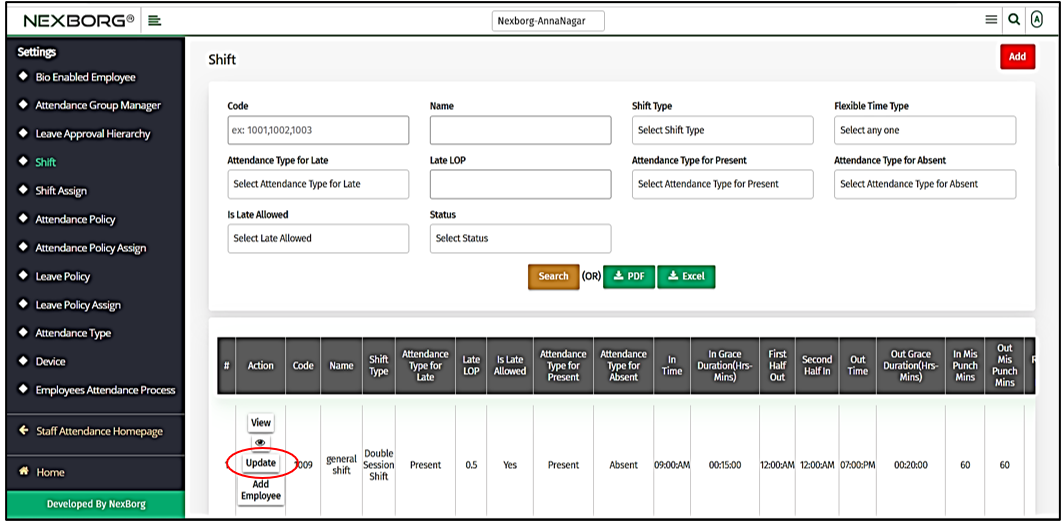
You can edit the shift's details in the Update Shift menu. Click on the Update button to save the changes.
You can also view the details of the shifts by clicking on the View button from the top right corner.
- To add employees to the shifts, click on the Add Employee action from the list.
Refer to the Assigning Shifts to Employee post for further details.
2. Through quick add.
We can also use the Search menu for quick searches.
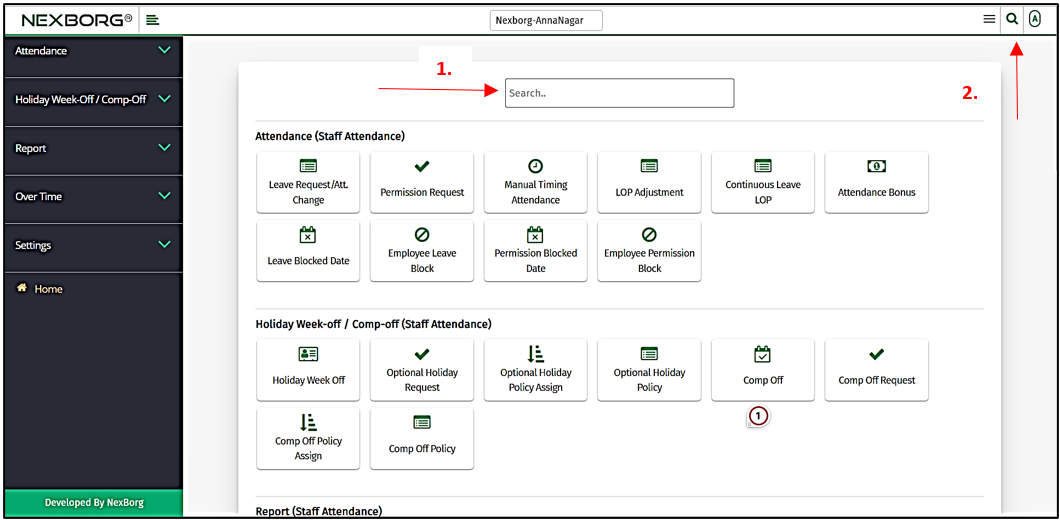
Use the keyword "shift" to find the Shift menu. Now you can view, add or update the shifts.
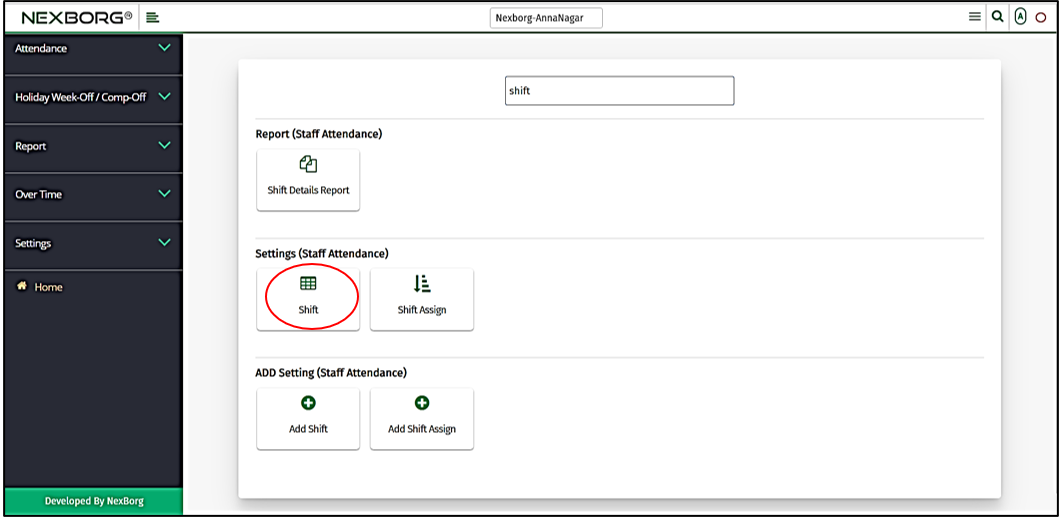
You can use Add Shift from the ADD Setting to add shifts.
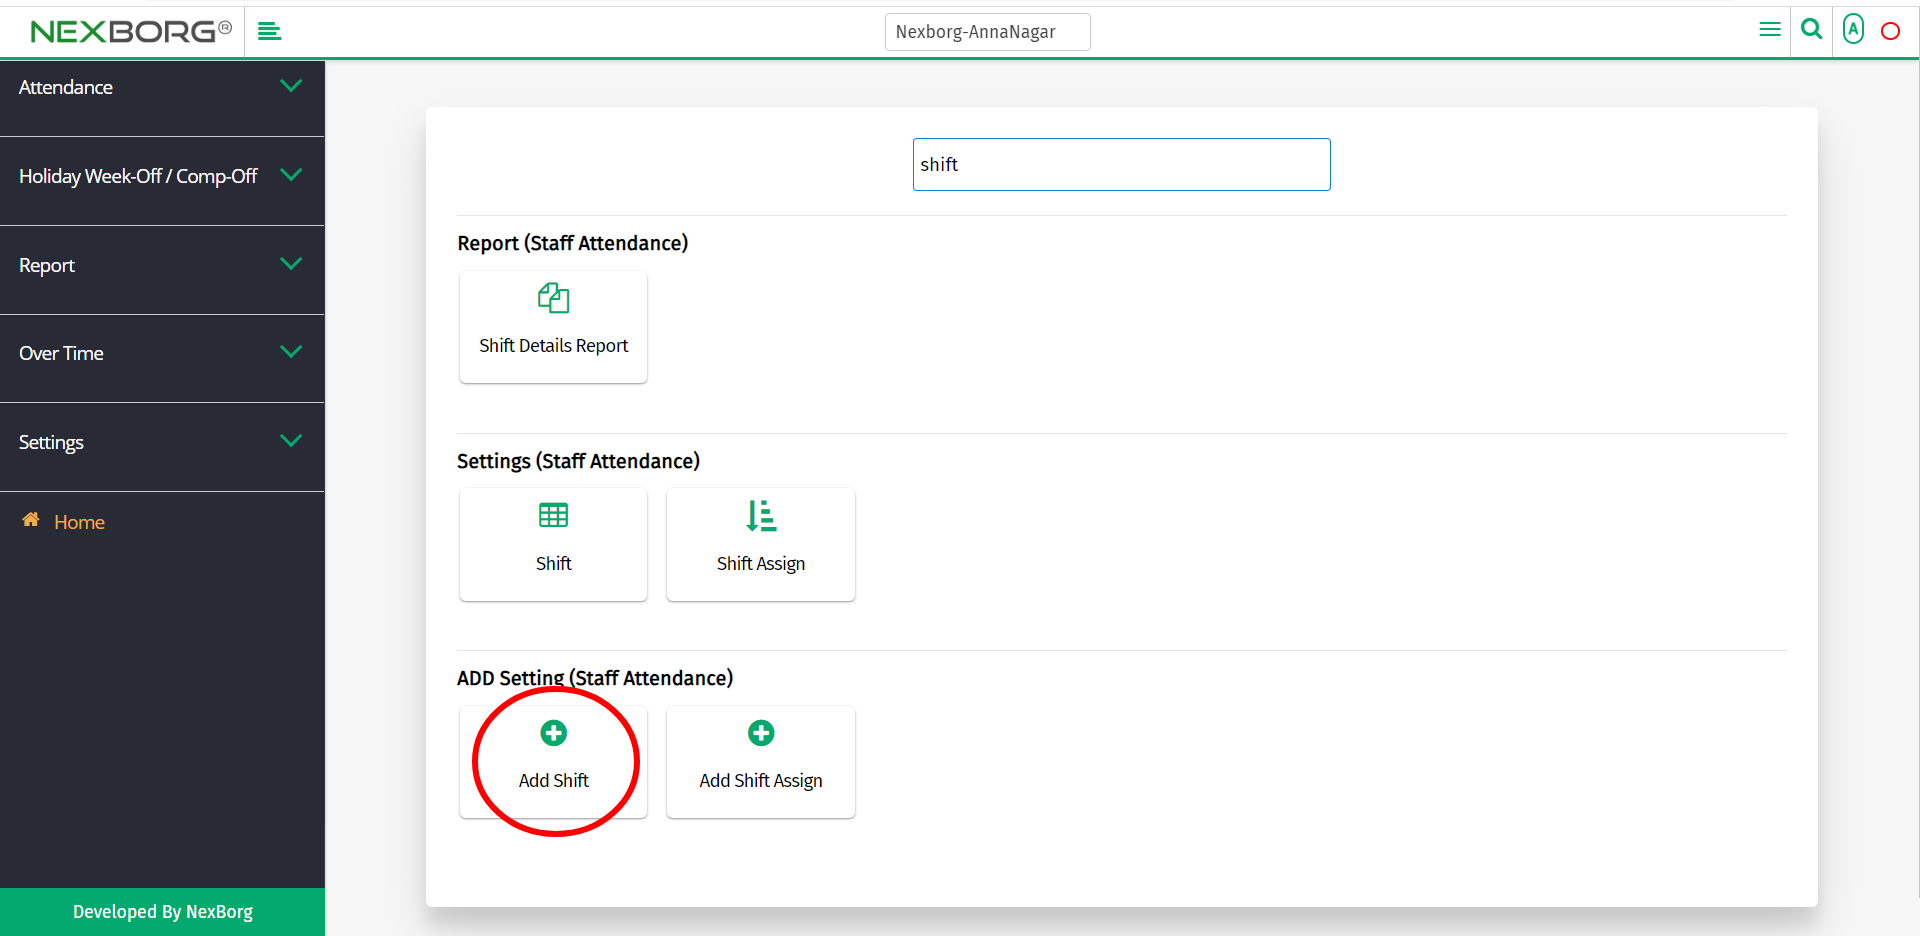
Provide the necessary details of the shift and then click on the Save button to save the changes.