View/Manage Employee Details
To view the details of the employee:-
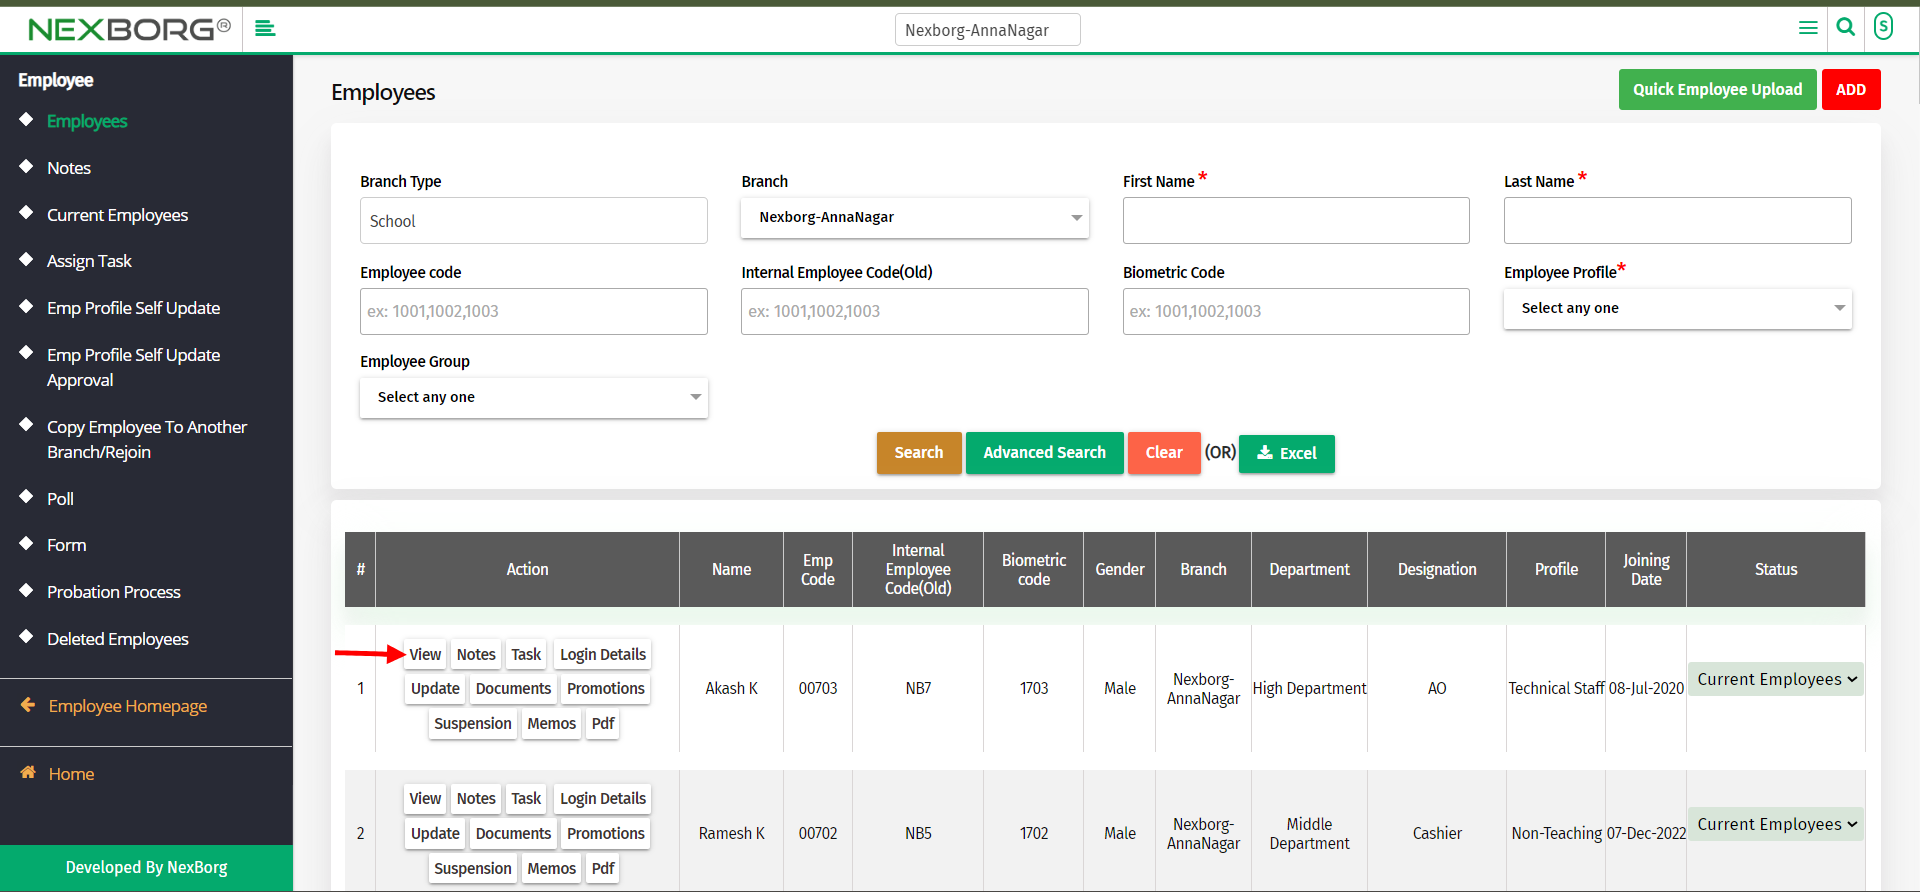
1. Go to Employee module > Employees menu > perform a search or advanced search by filling out all mandatory fields.
2. After the search operation, a list of employees or a particular employee will be displayed according to the requirements.
3. Click the "View" button in the action column on the list that appears on the screen.
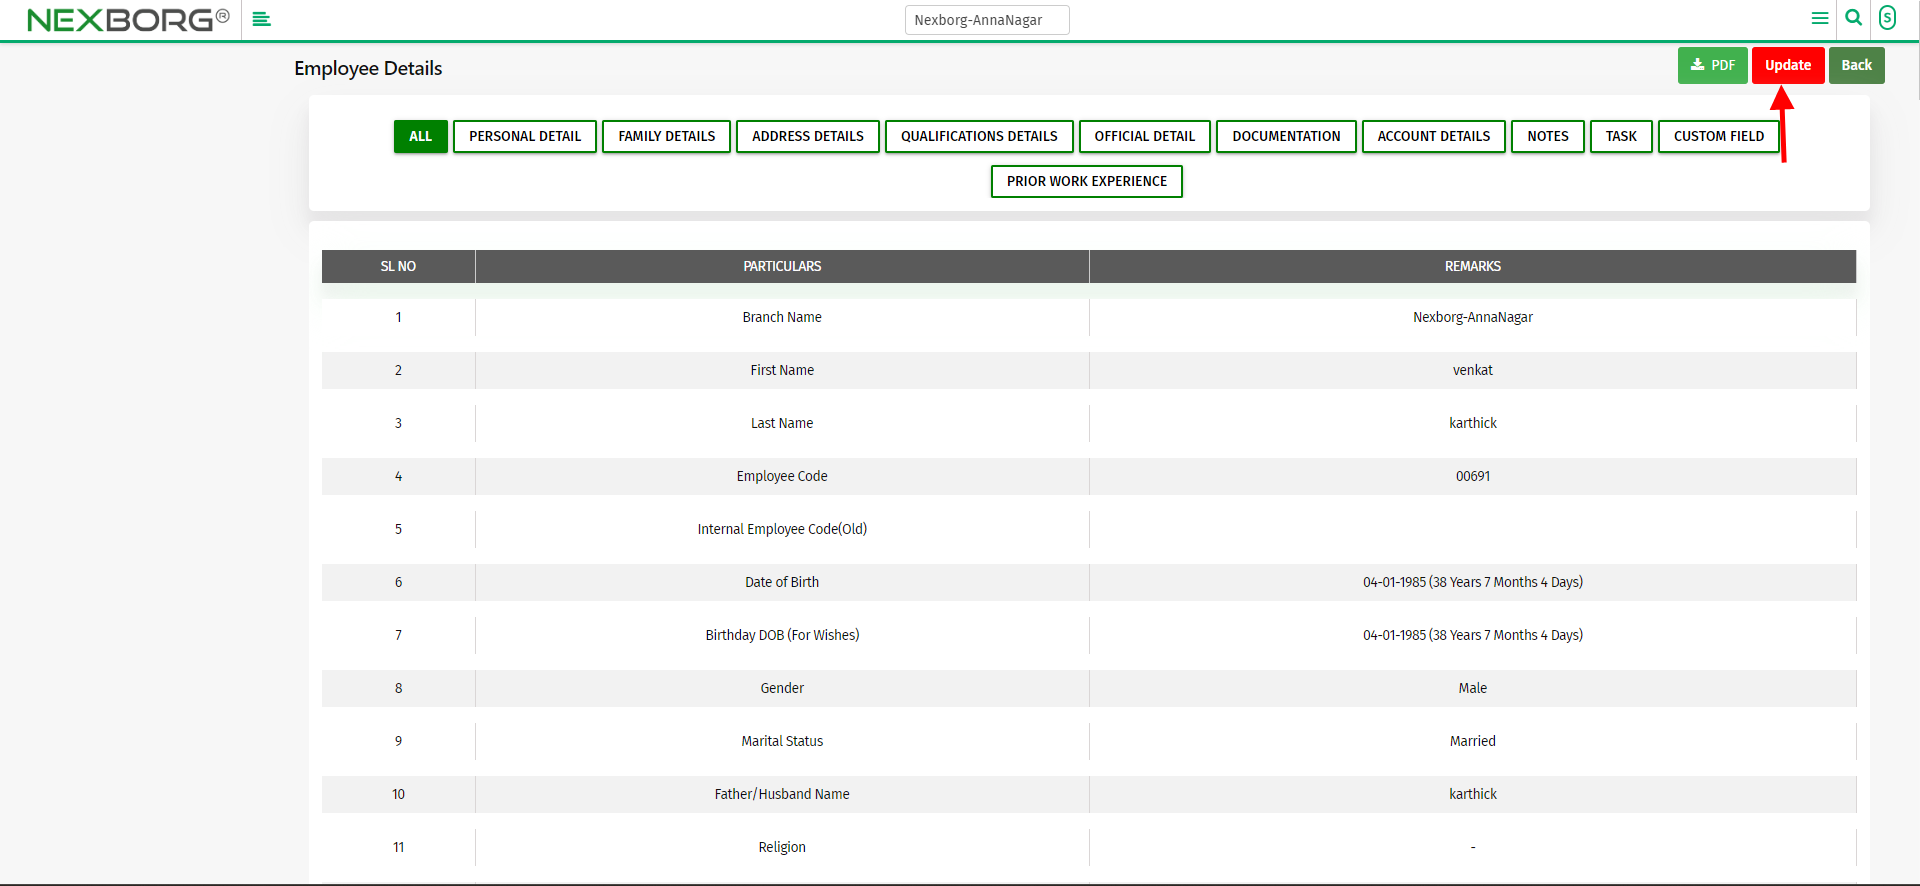
4. By clicking on the view button, it redirects to another page consisting of an employee's
* Personal details
* Family details
* Address details
* Qualification details
* Official details
* Documentation.
* Account details.
*Notes, Tasks, Custom field, Prior work experience.
You can click the on "update" button to enter the personal details, Address details, Official details ,Documentation ,Account details.
- Personal details
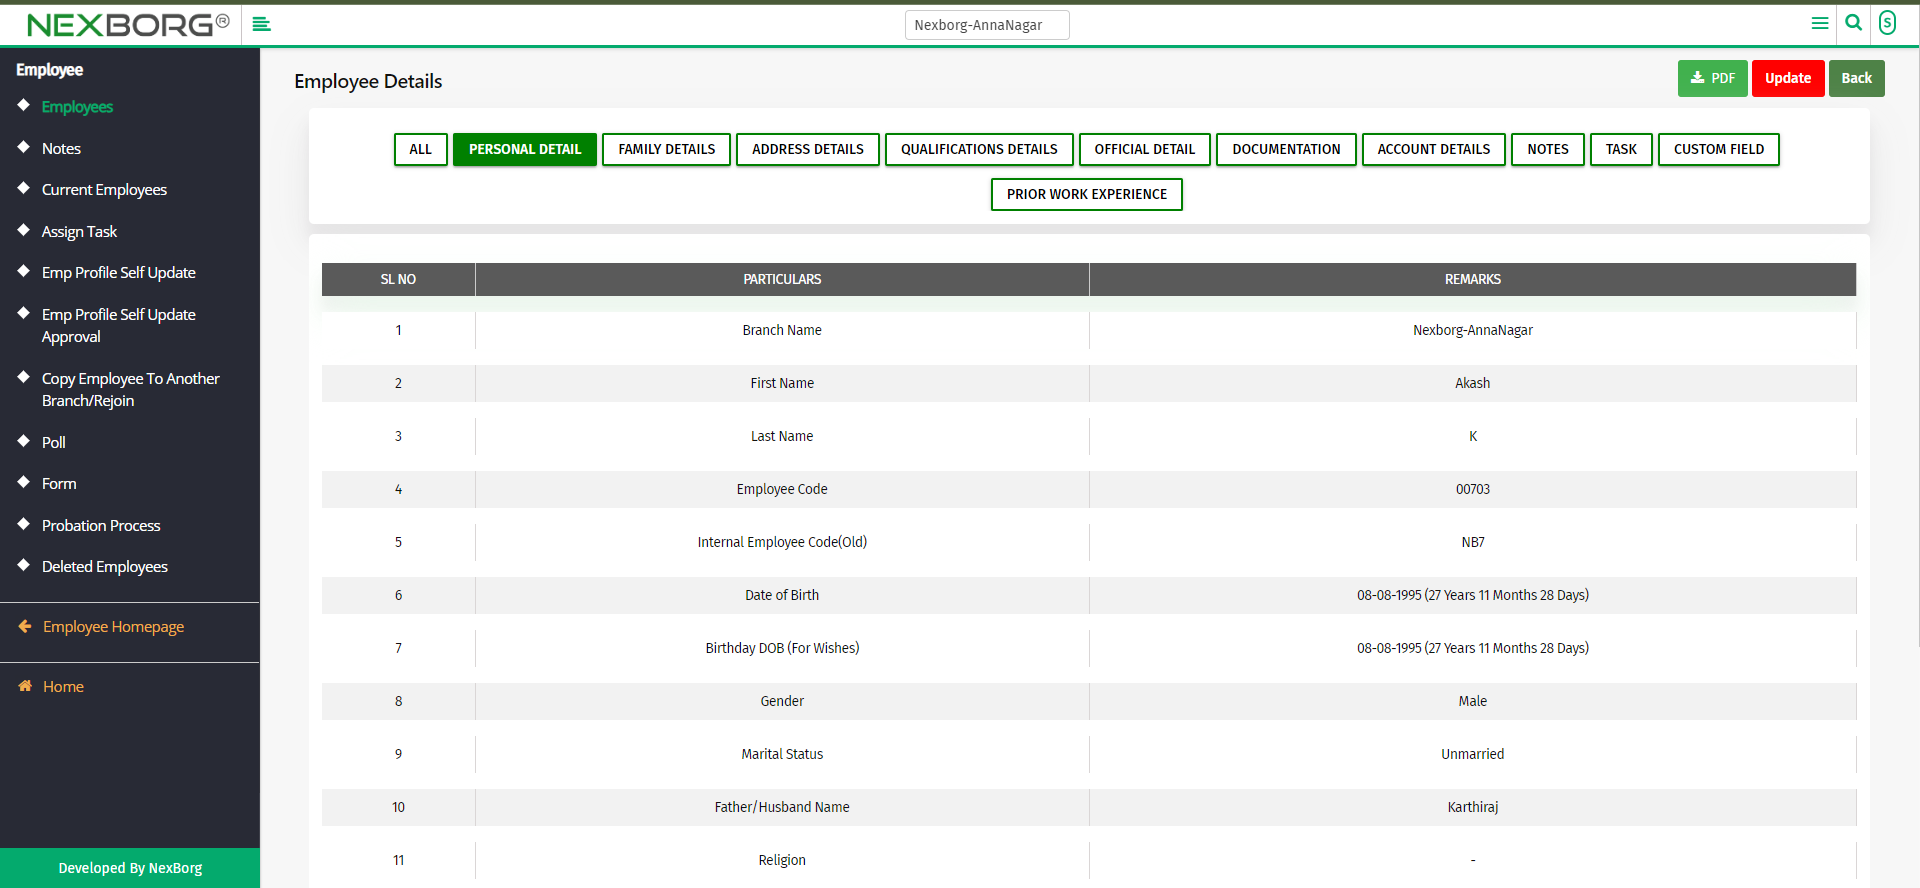
By clicking on "Personal details" you can view the employee's details.
- Family details
To add the family details of the employee, click on the "Add" button and fill in the necessary details and click on the "Save" button.
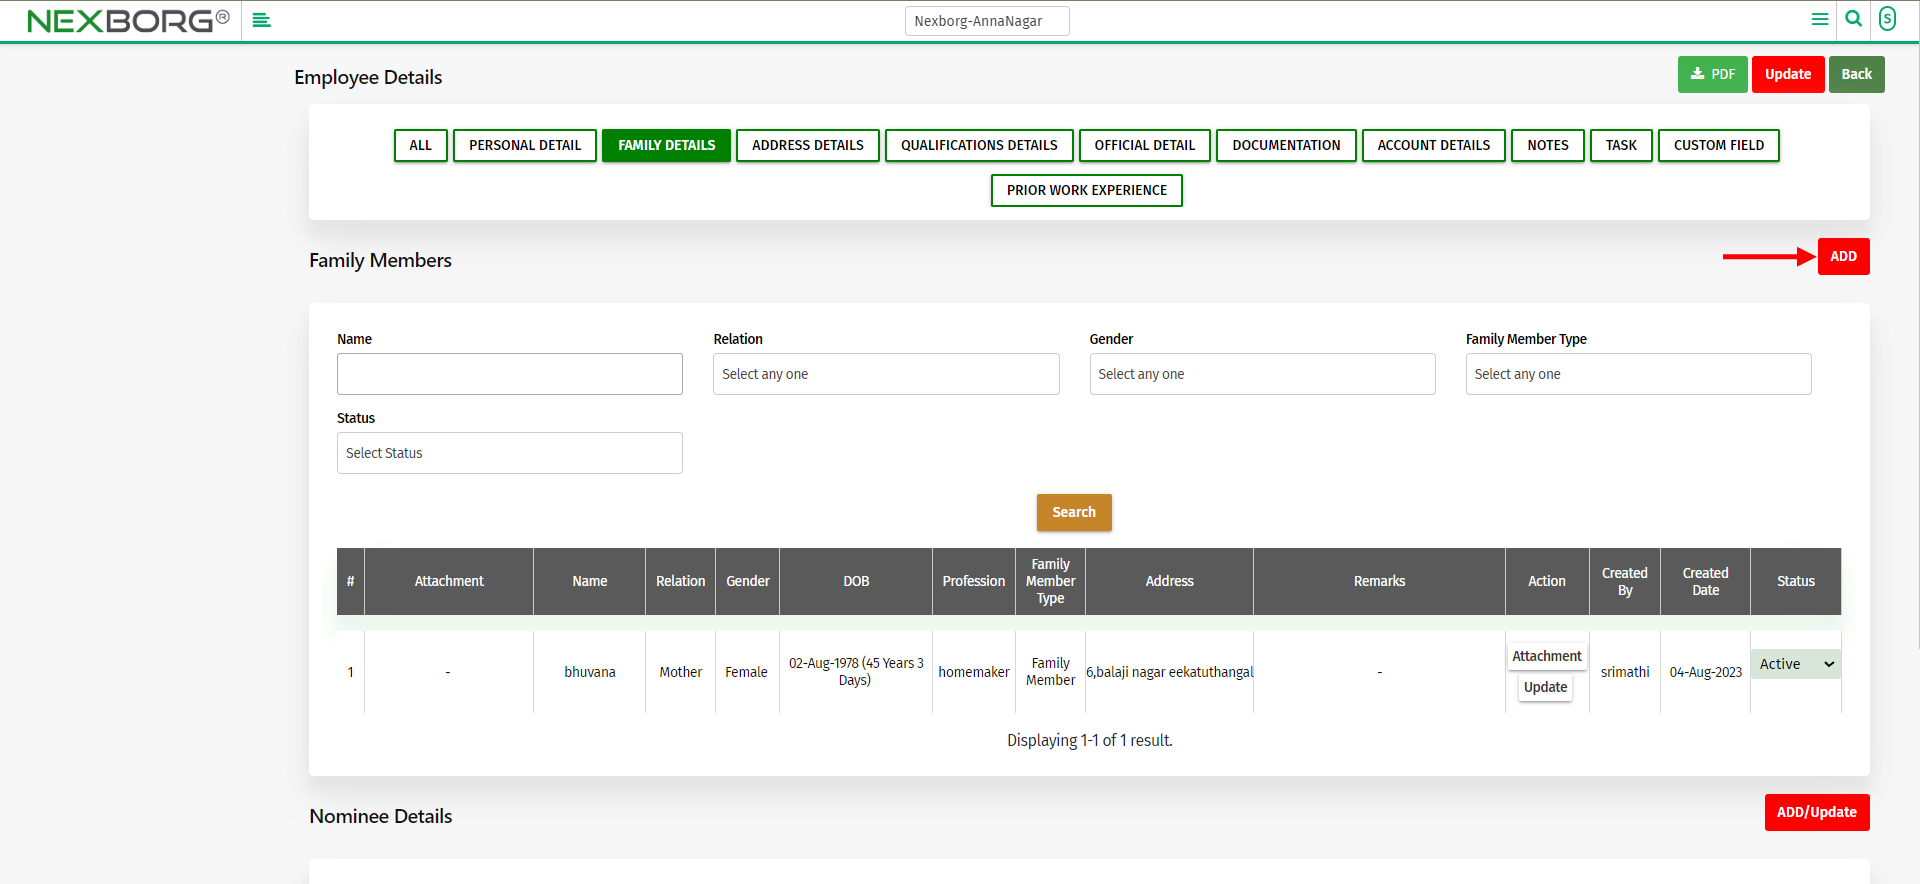
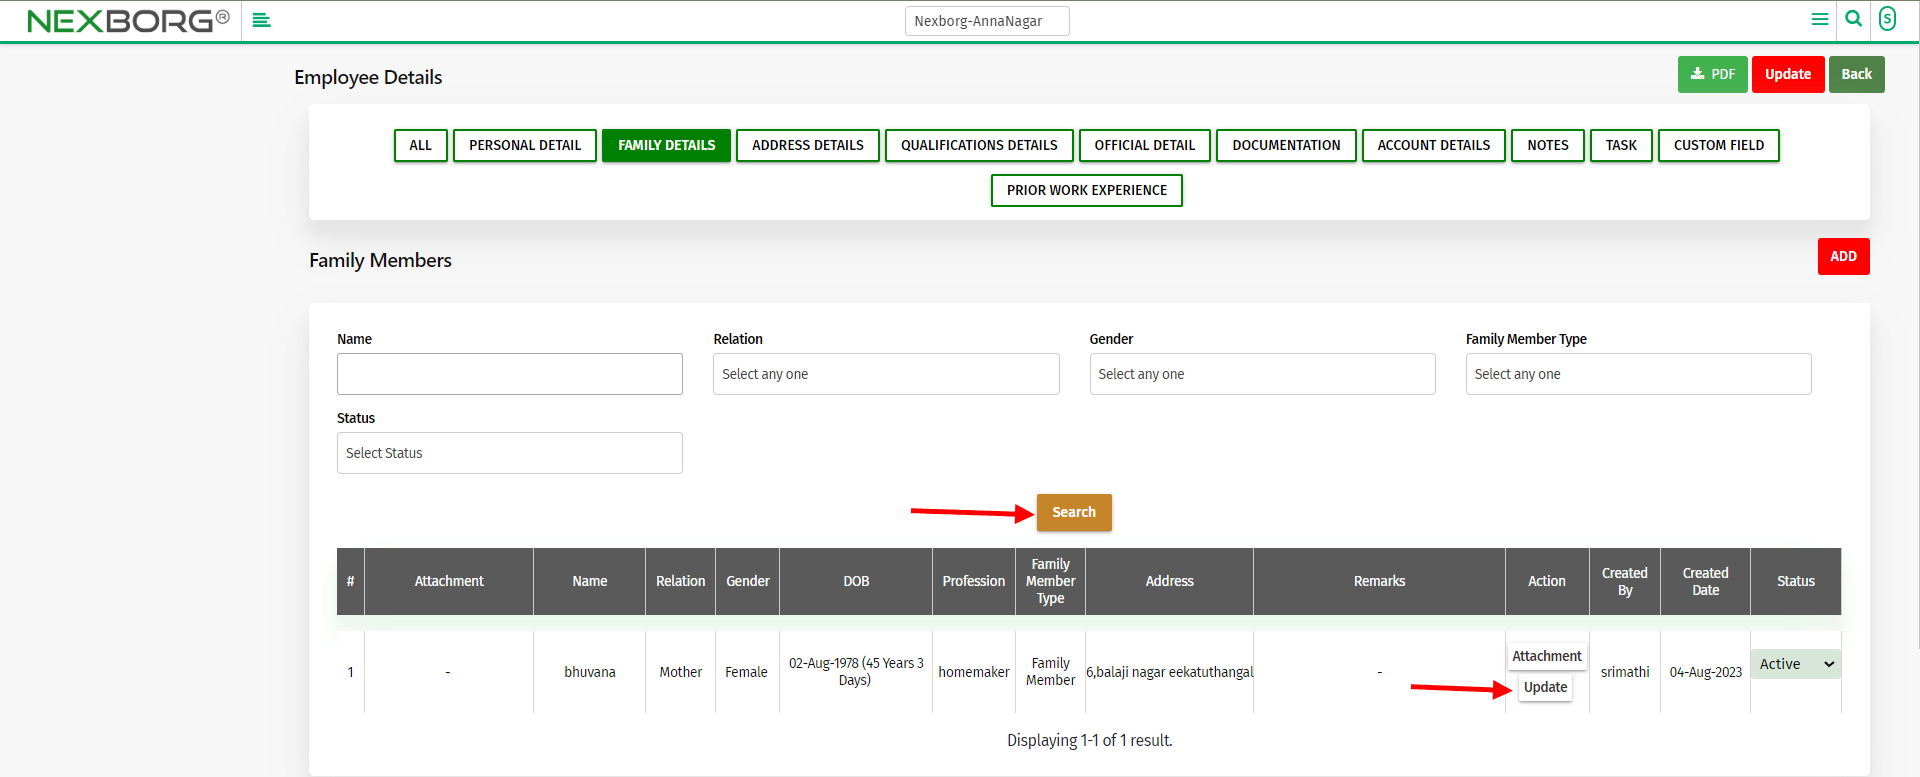
You can view the family details after adding them, to update click on the "Update" action.
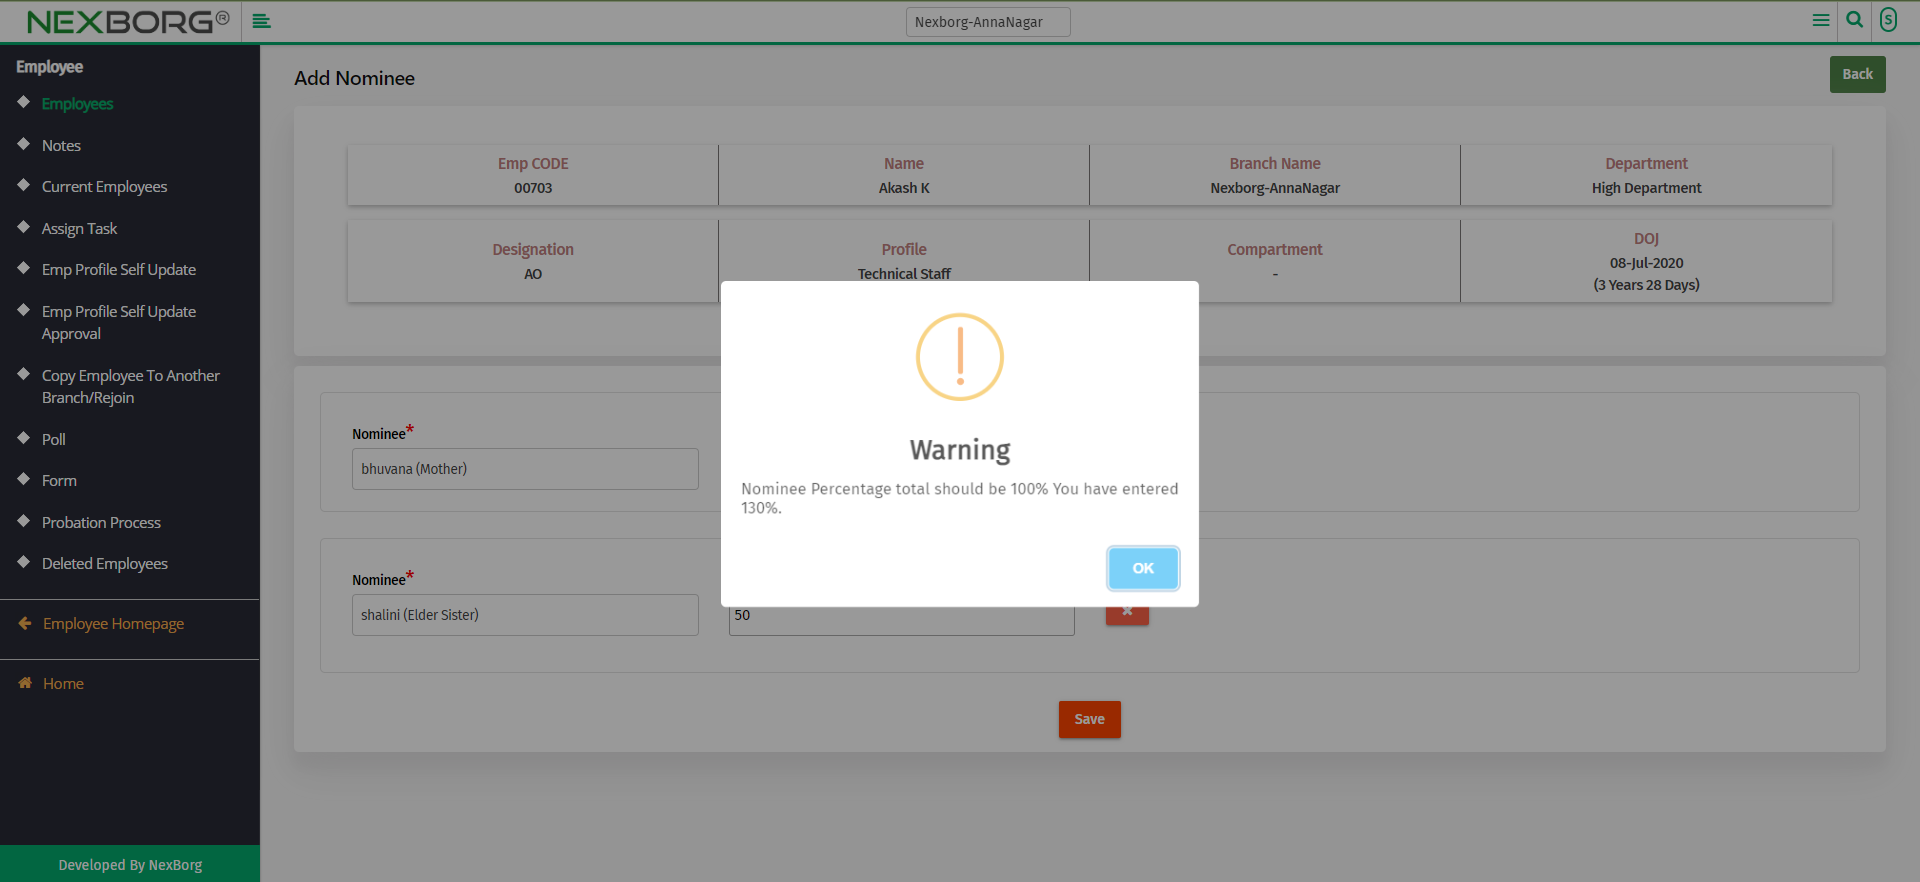
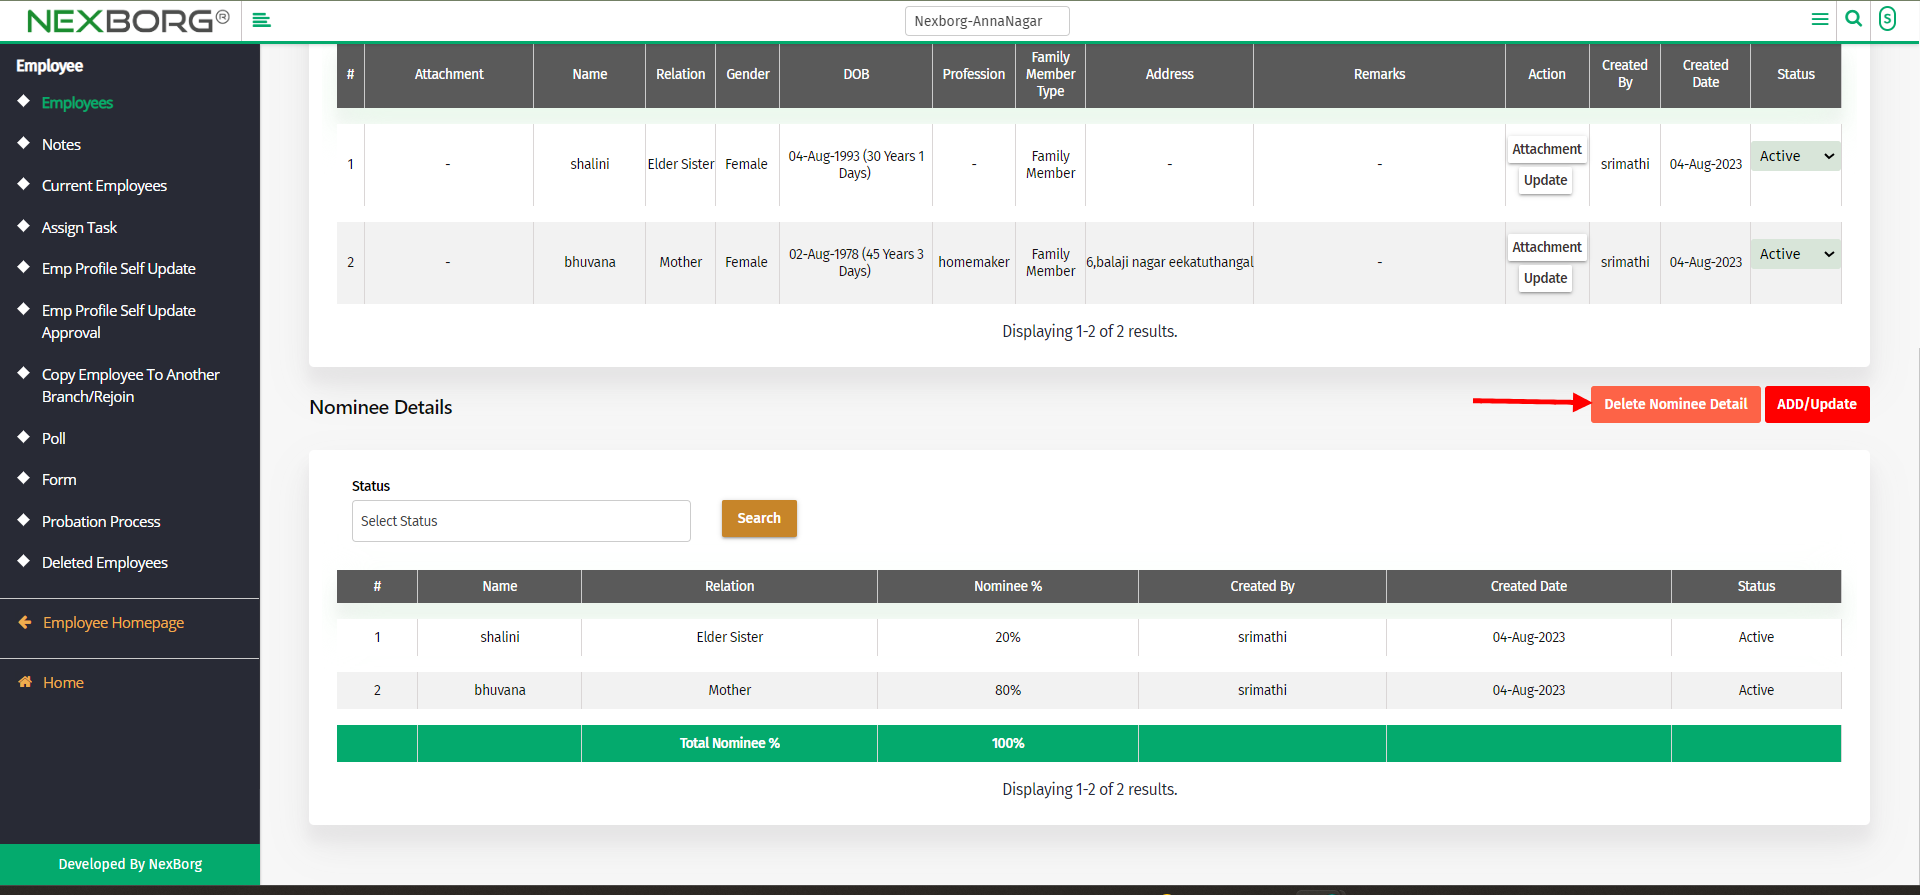
- Nominee details
To add Nominee details, click on the "Add/Update" button.
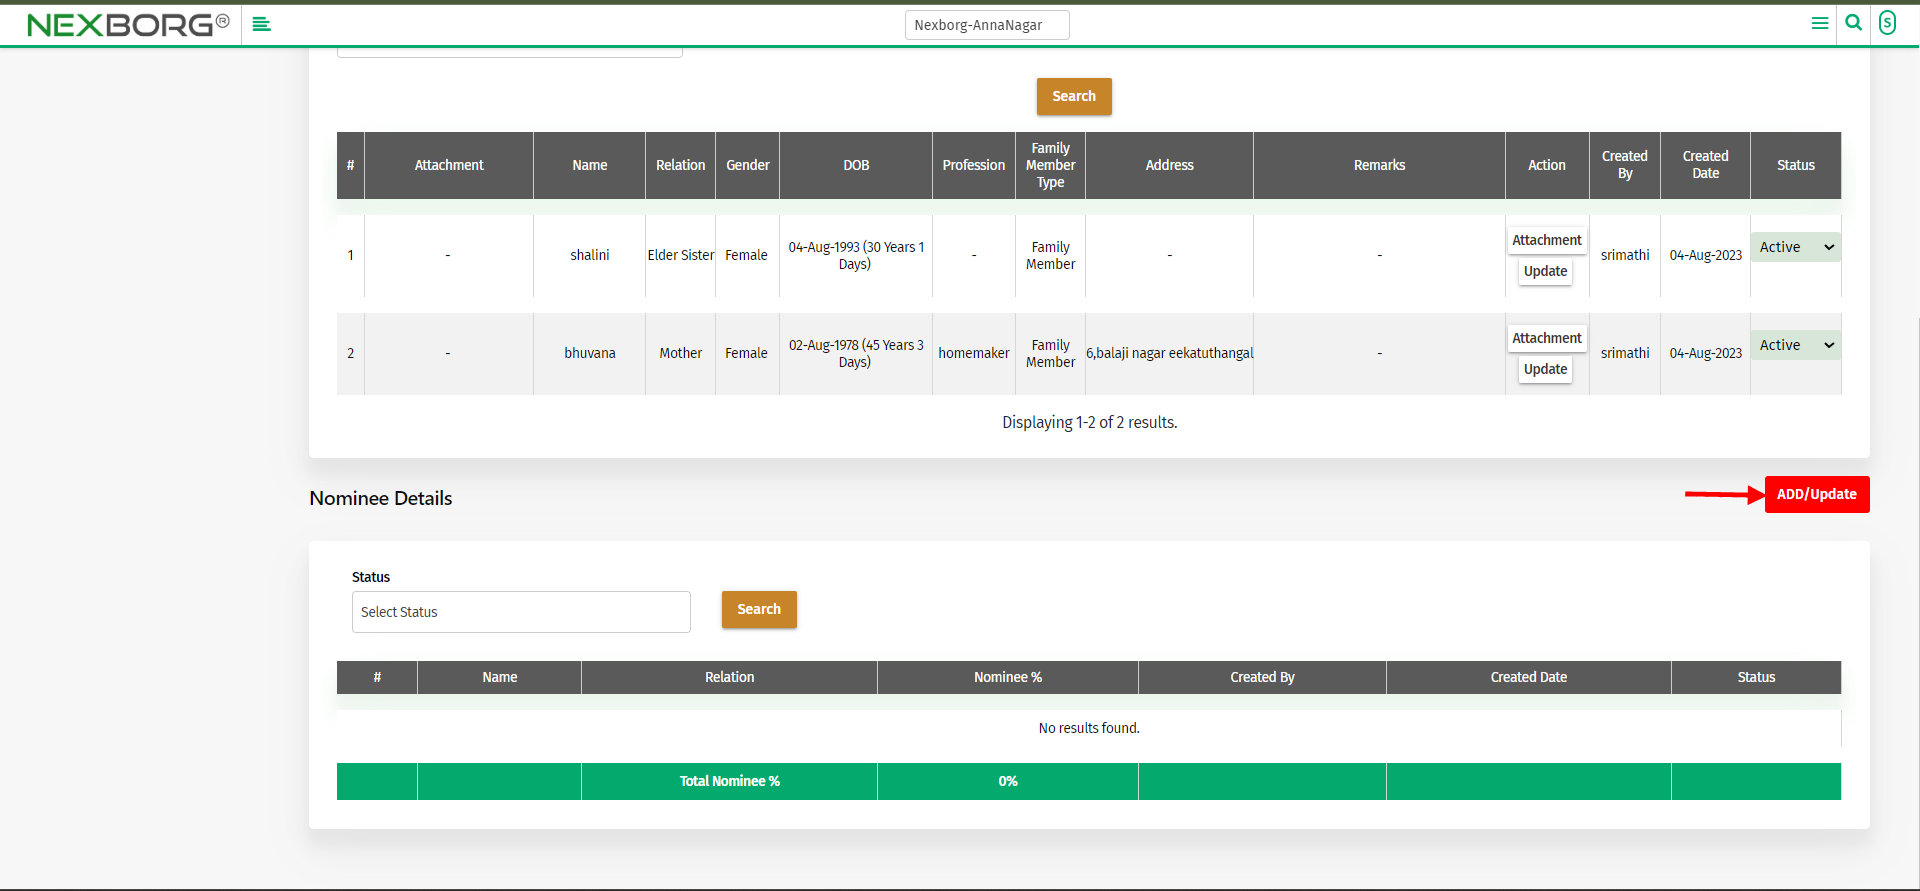
Select the Nominee(the list will be available only if family members were added)
Note: You can add multiple nominees by clicking on the (+) button.
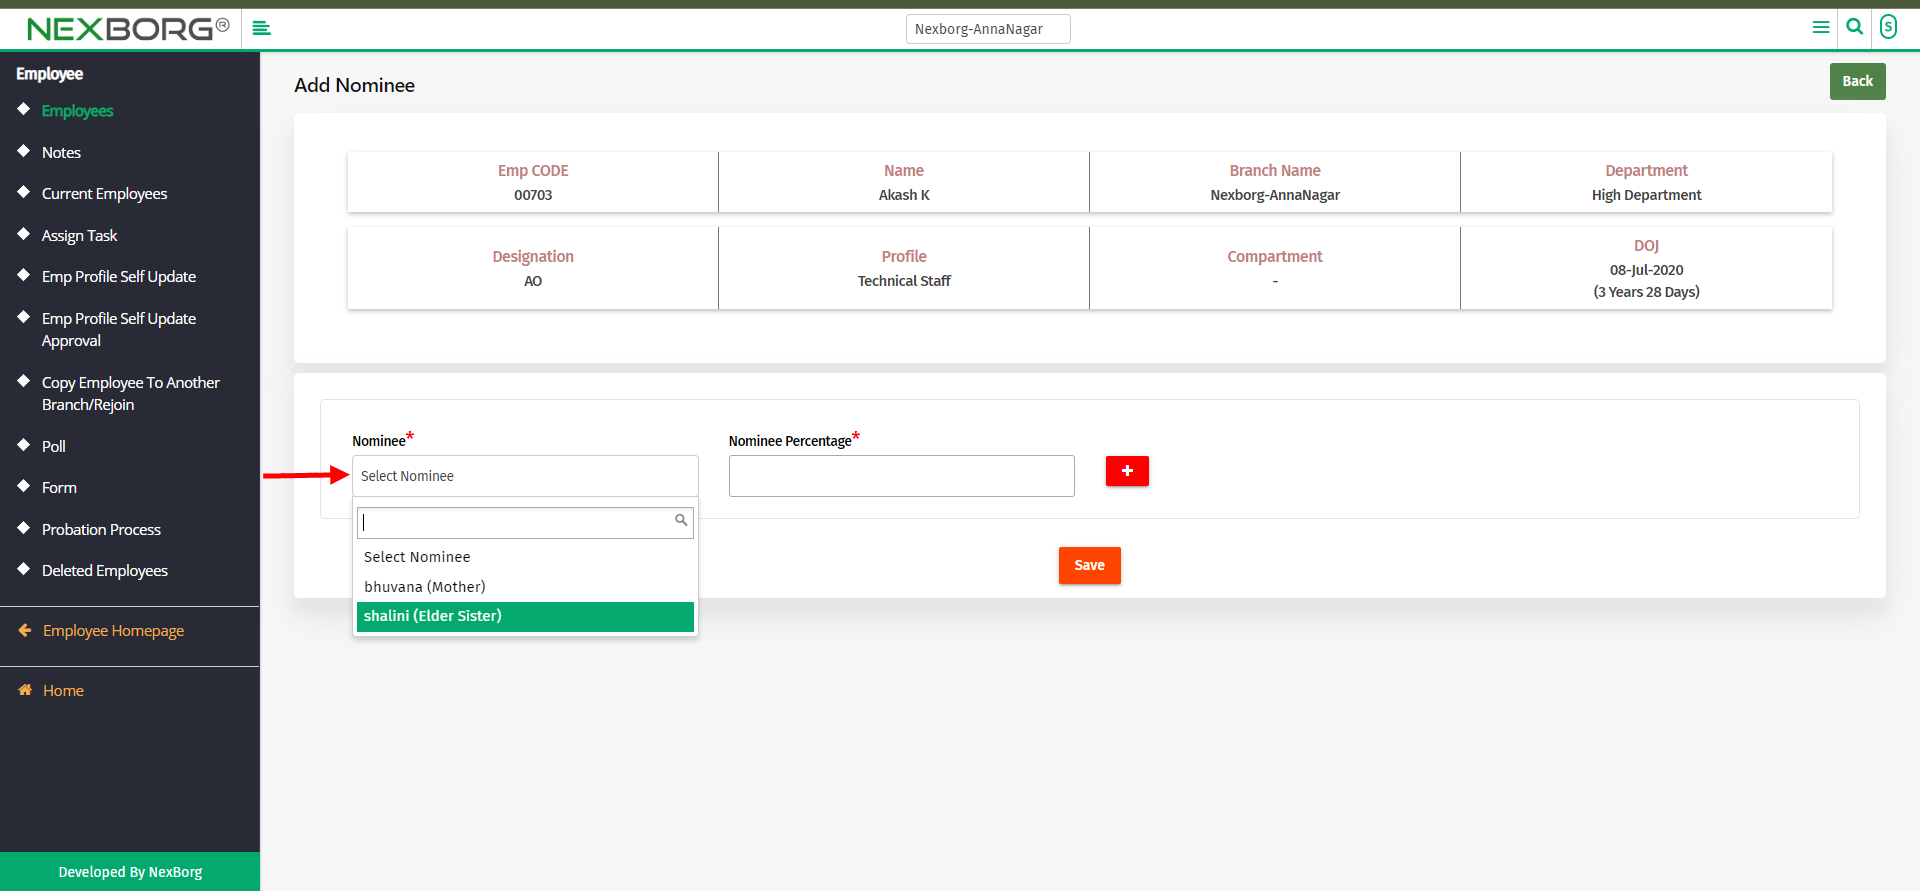
Enter the Nominee percentage and click on the "Save" button.

To delete click on the "Delete Nominee Detail" button.
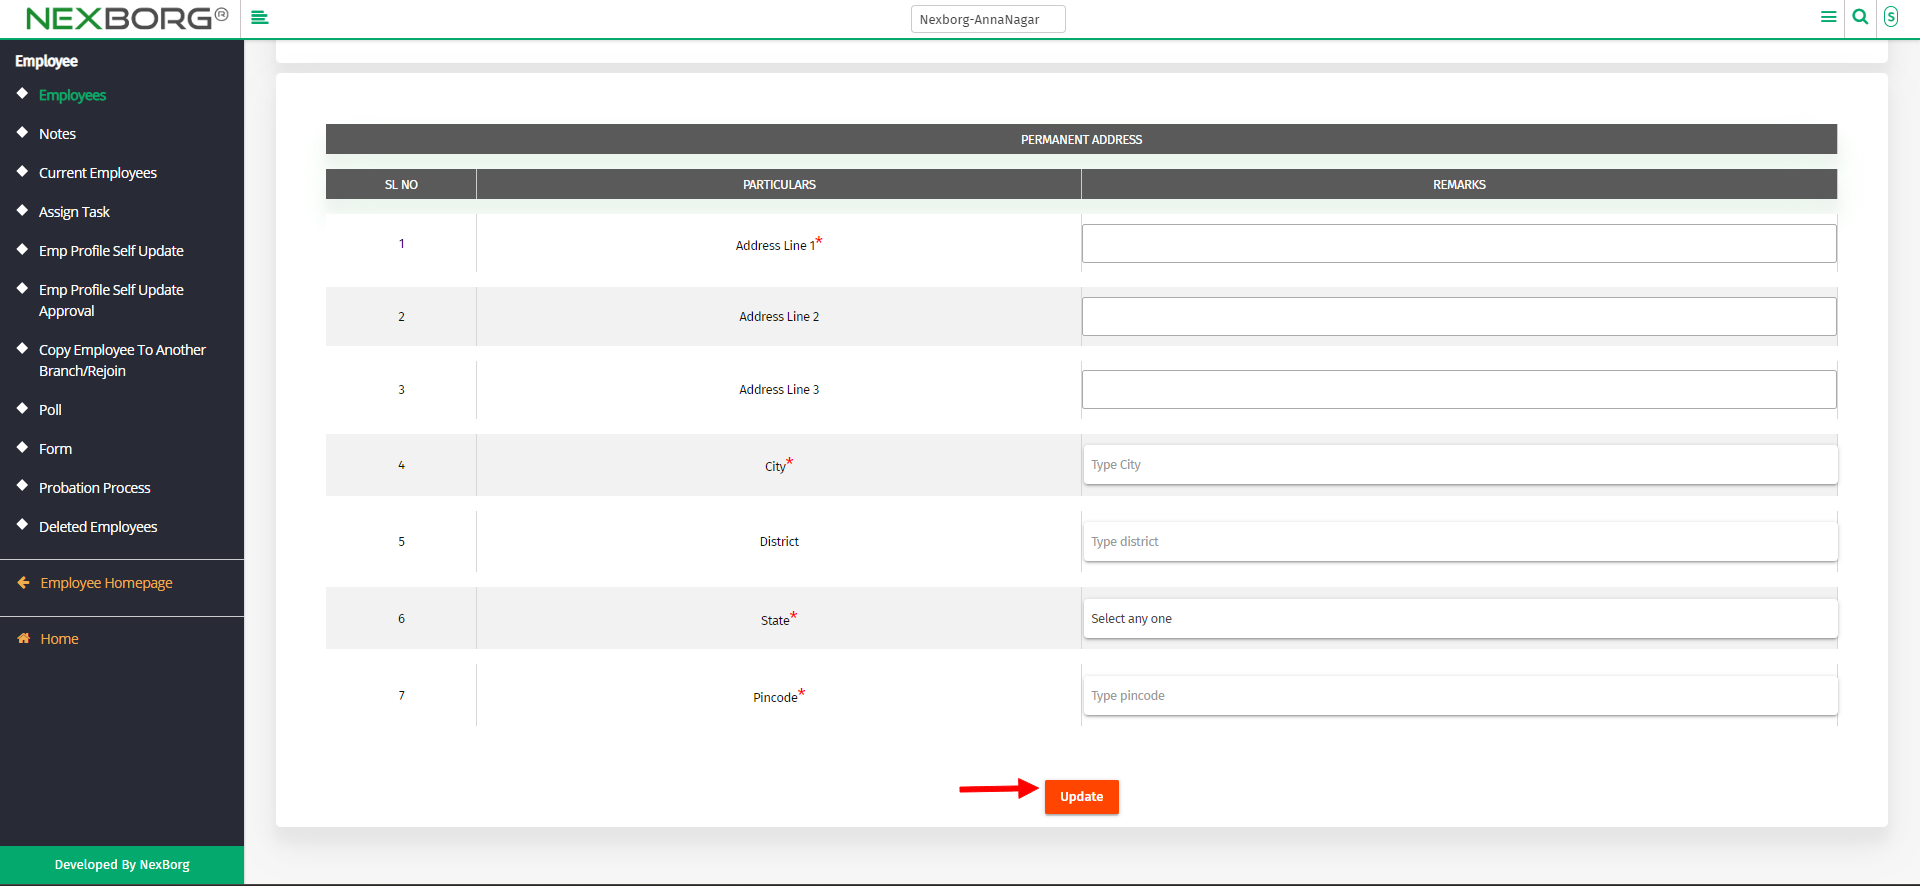
- Address details
Initially, there are two types of address, permanent and communication address.

To fill permanent and communication address, click the "Update" button and start filling in the details and click on the "Update" button.
To add an address detail to a new address type other than the type specified above. click on the "Add" button, Under Address type, select the type.
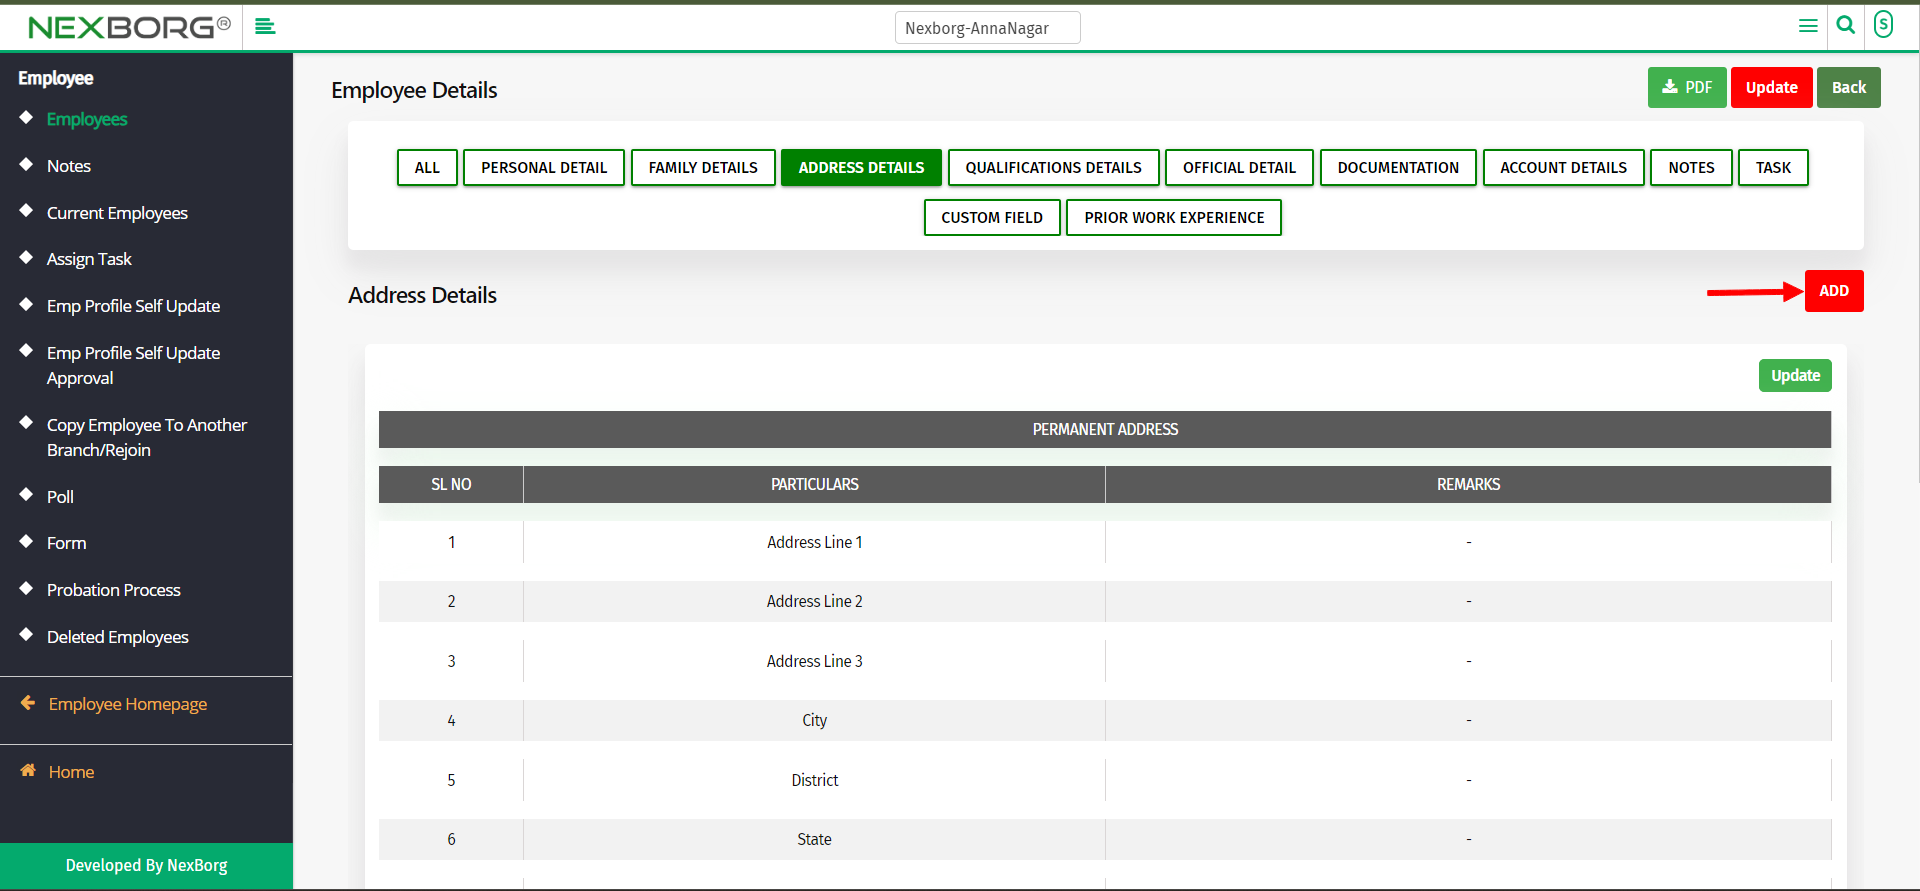
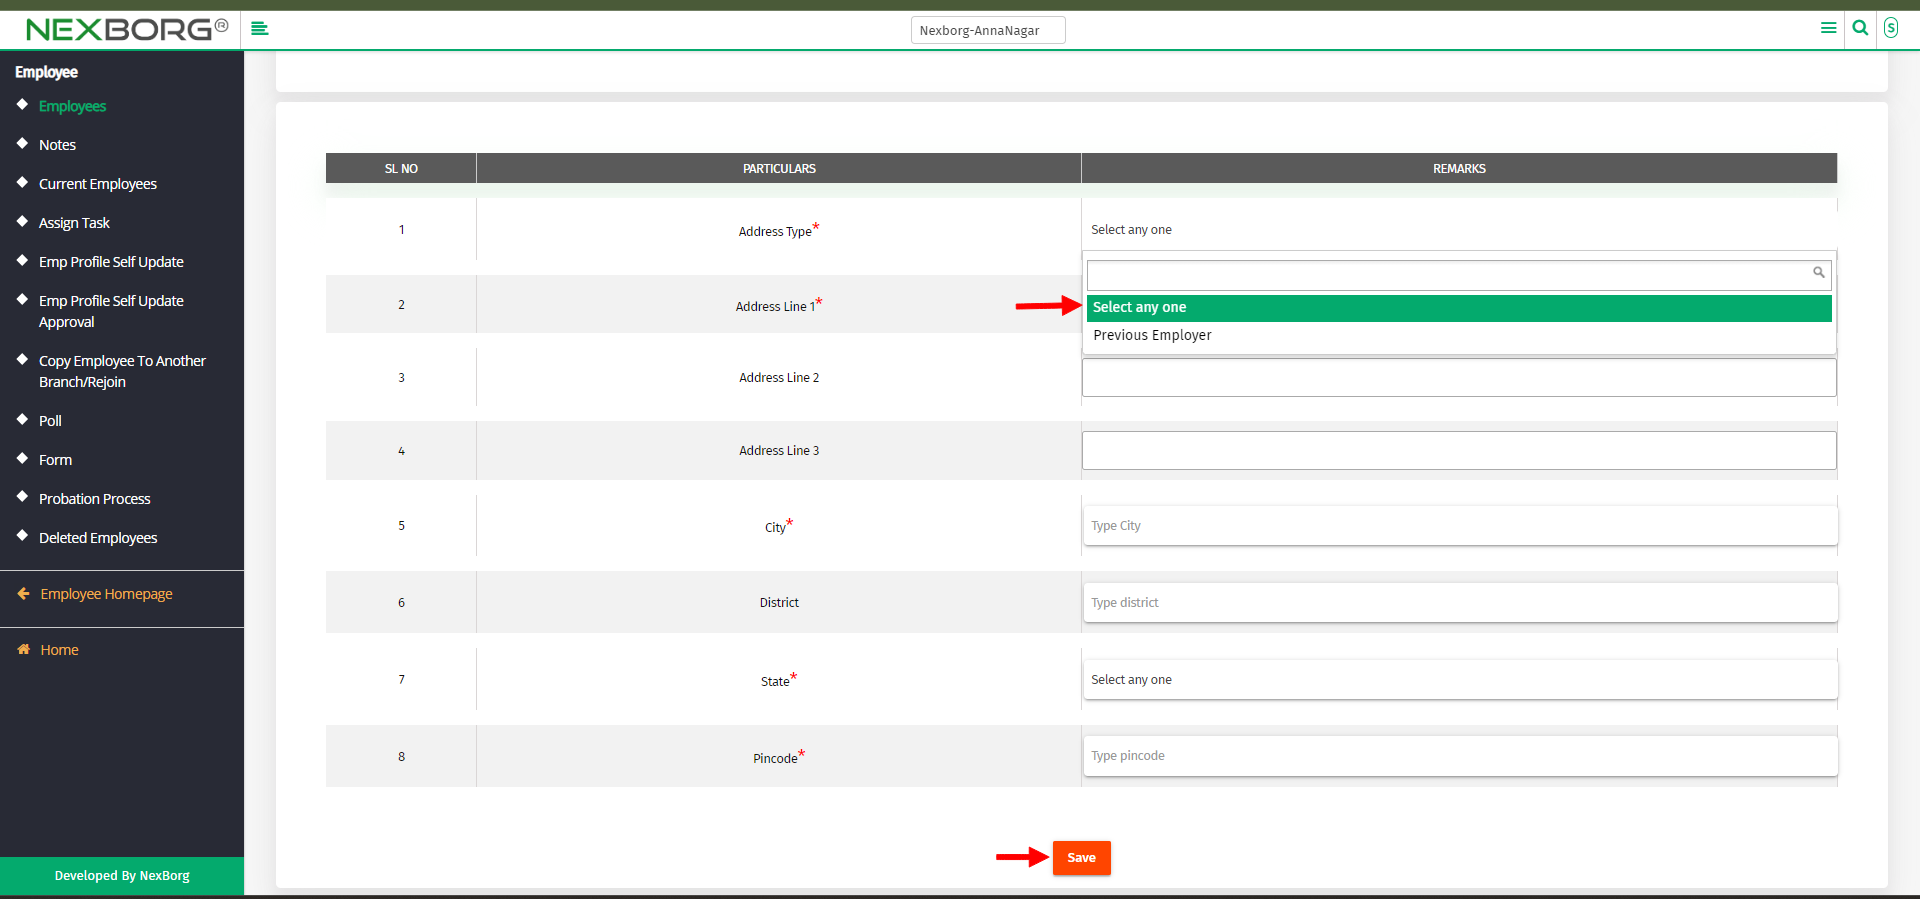
Fill in all necessary details and click on the "Save" button.
- Qualification details
To add the qualification details, click on the "Add" button.
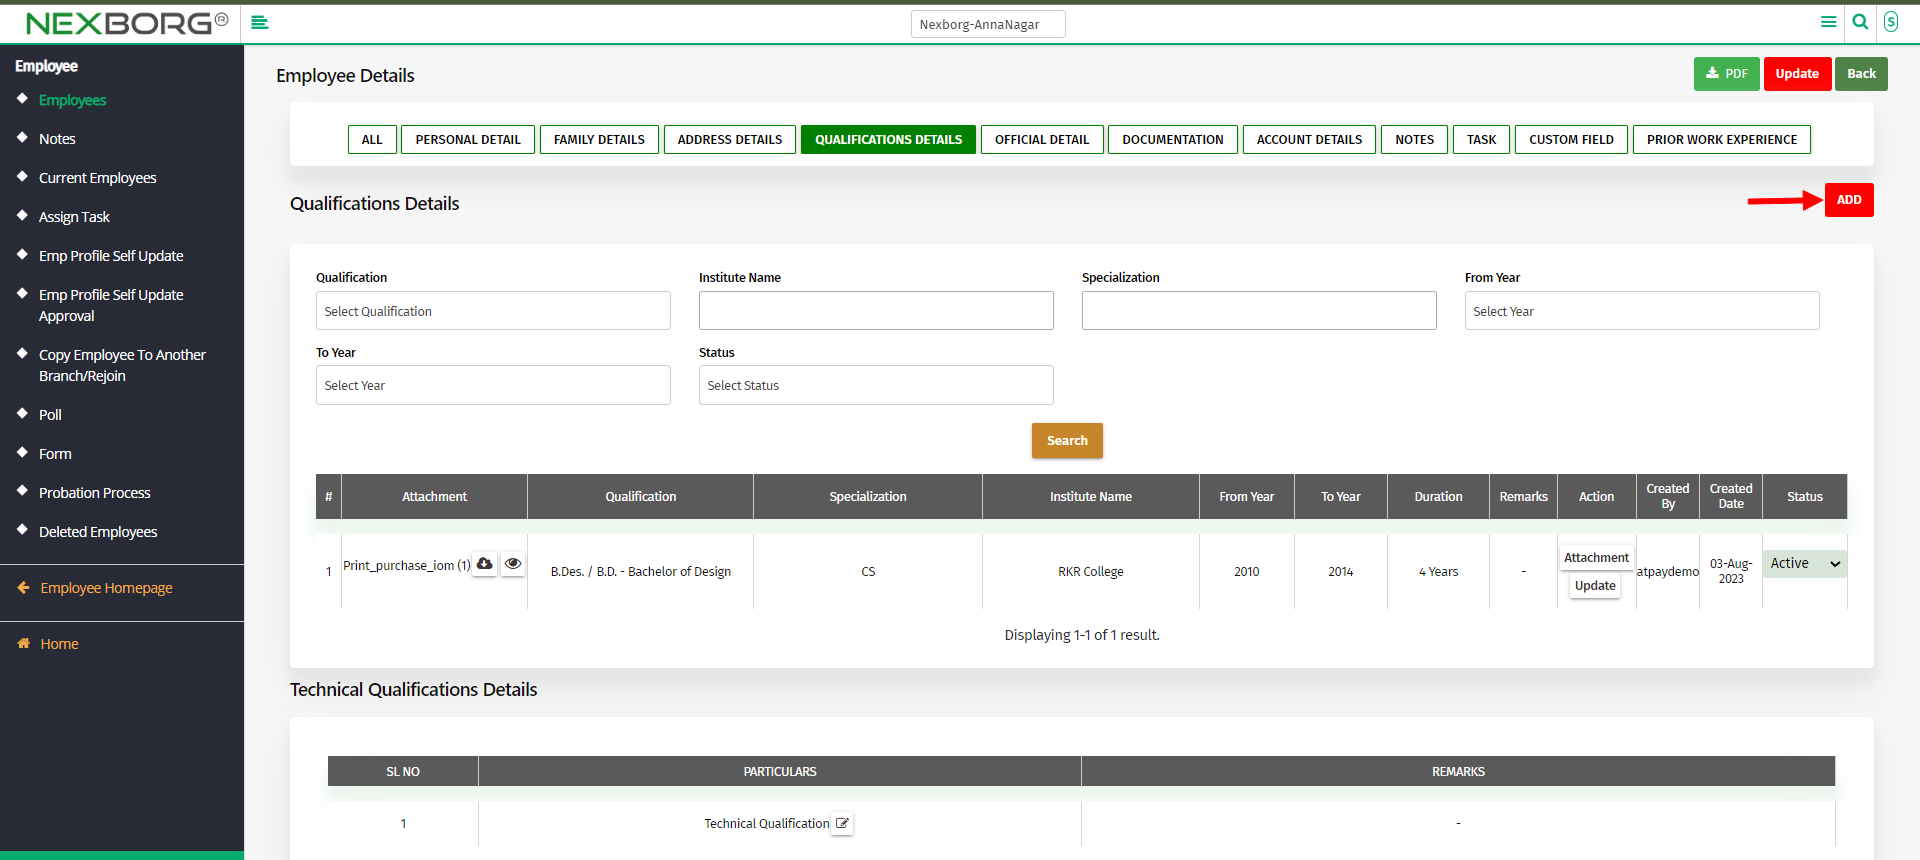
Fill in all the details and if you need to add more than one qualification, click on the (+) button. Click on the "Save" button to save the details.

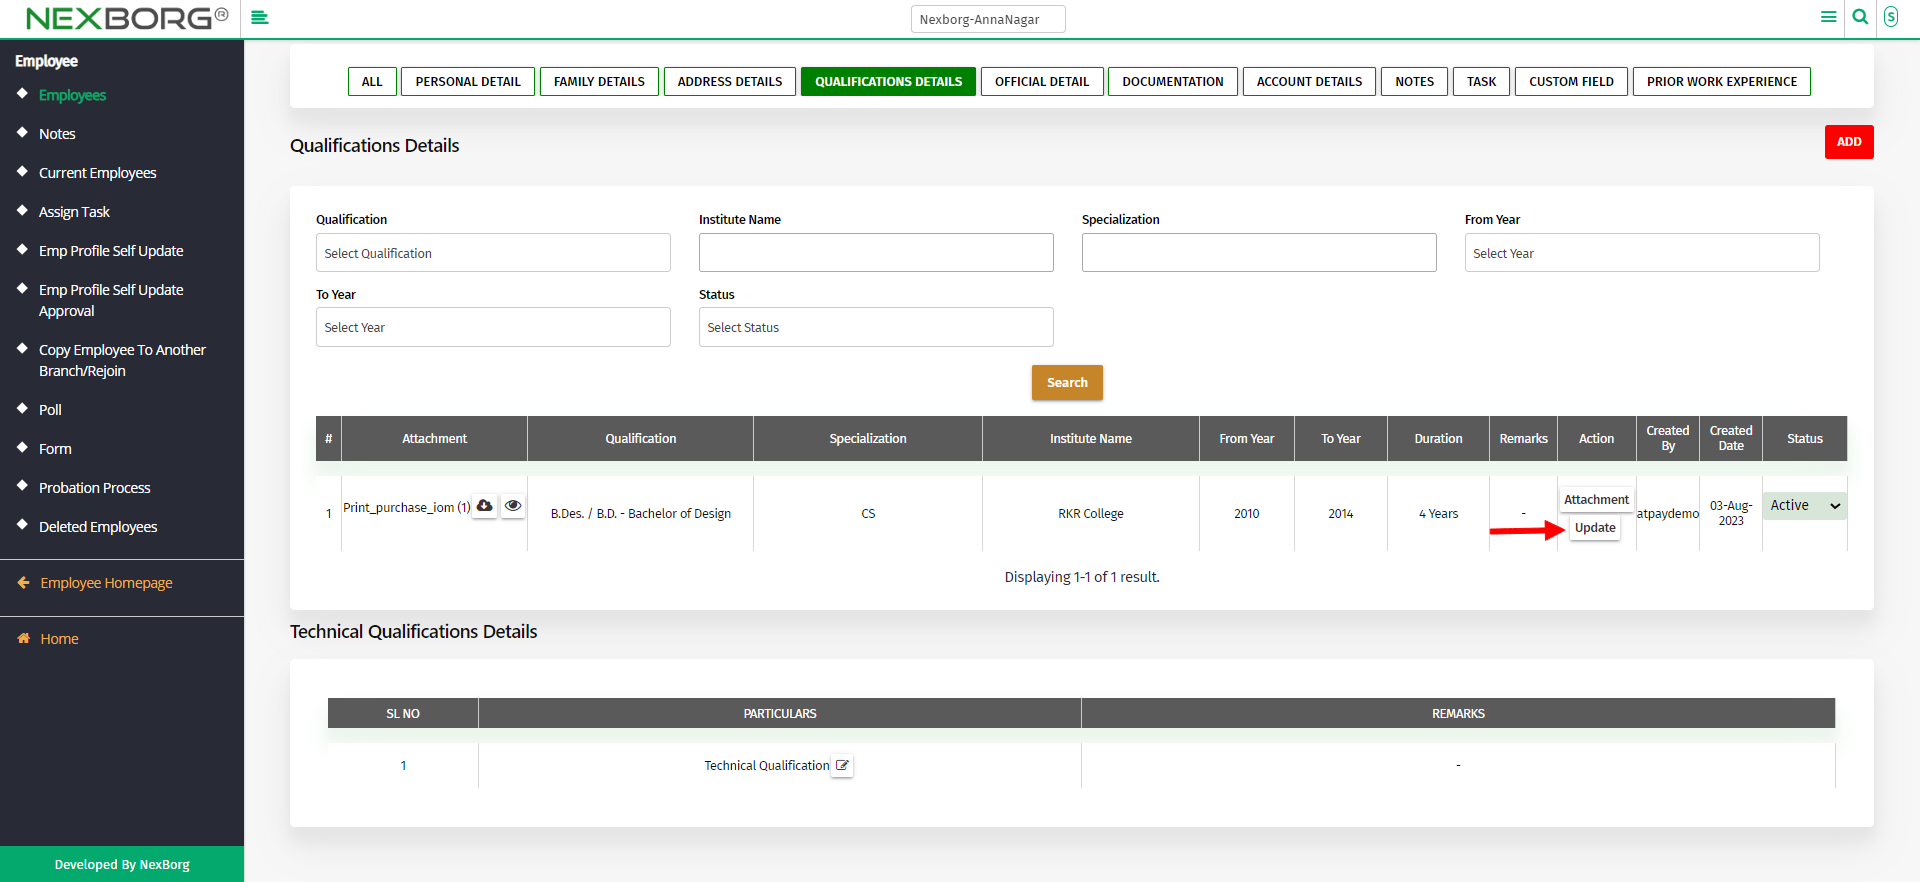
To update, click on the "Update" action and update the details.
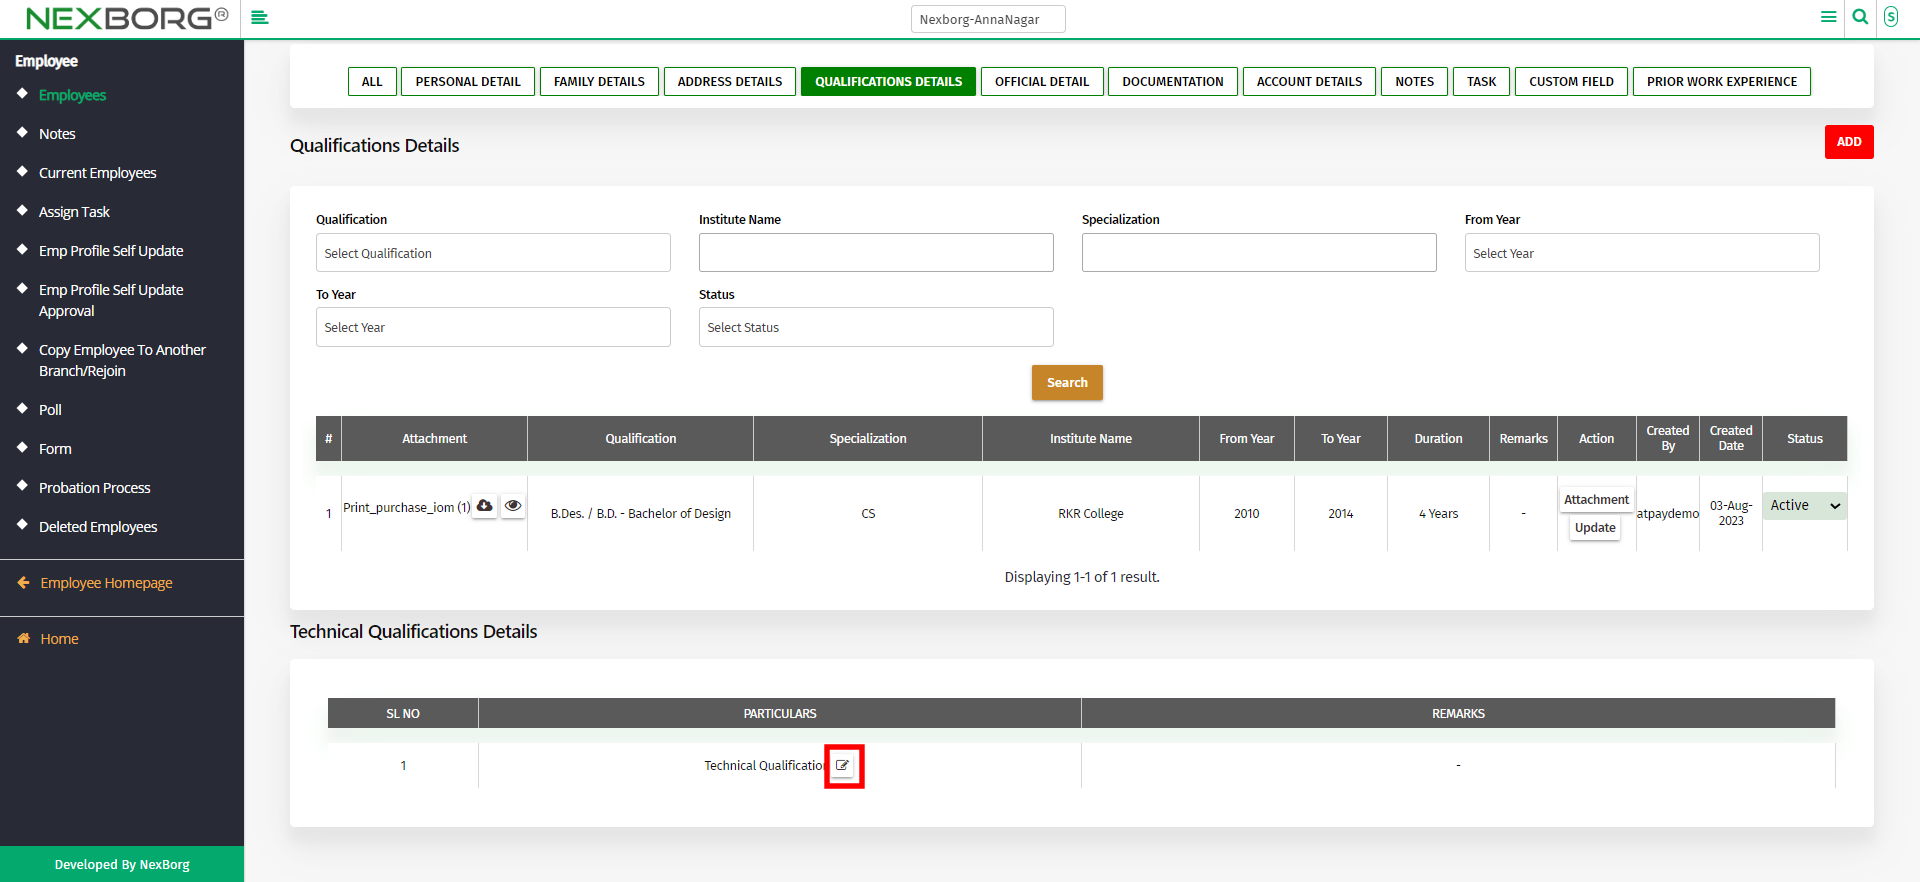
You can also have technical qualifications and add the details.
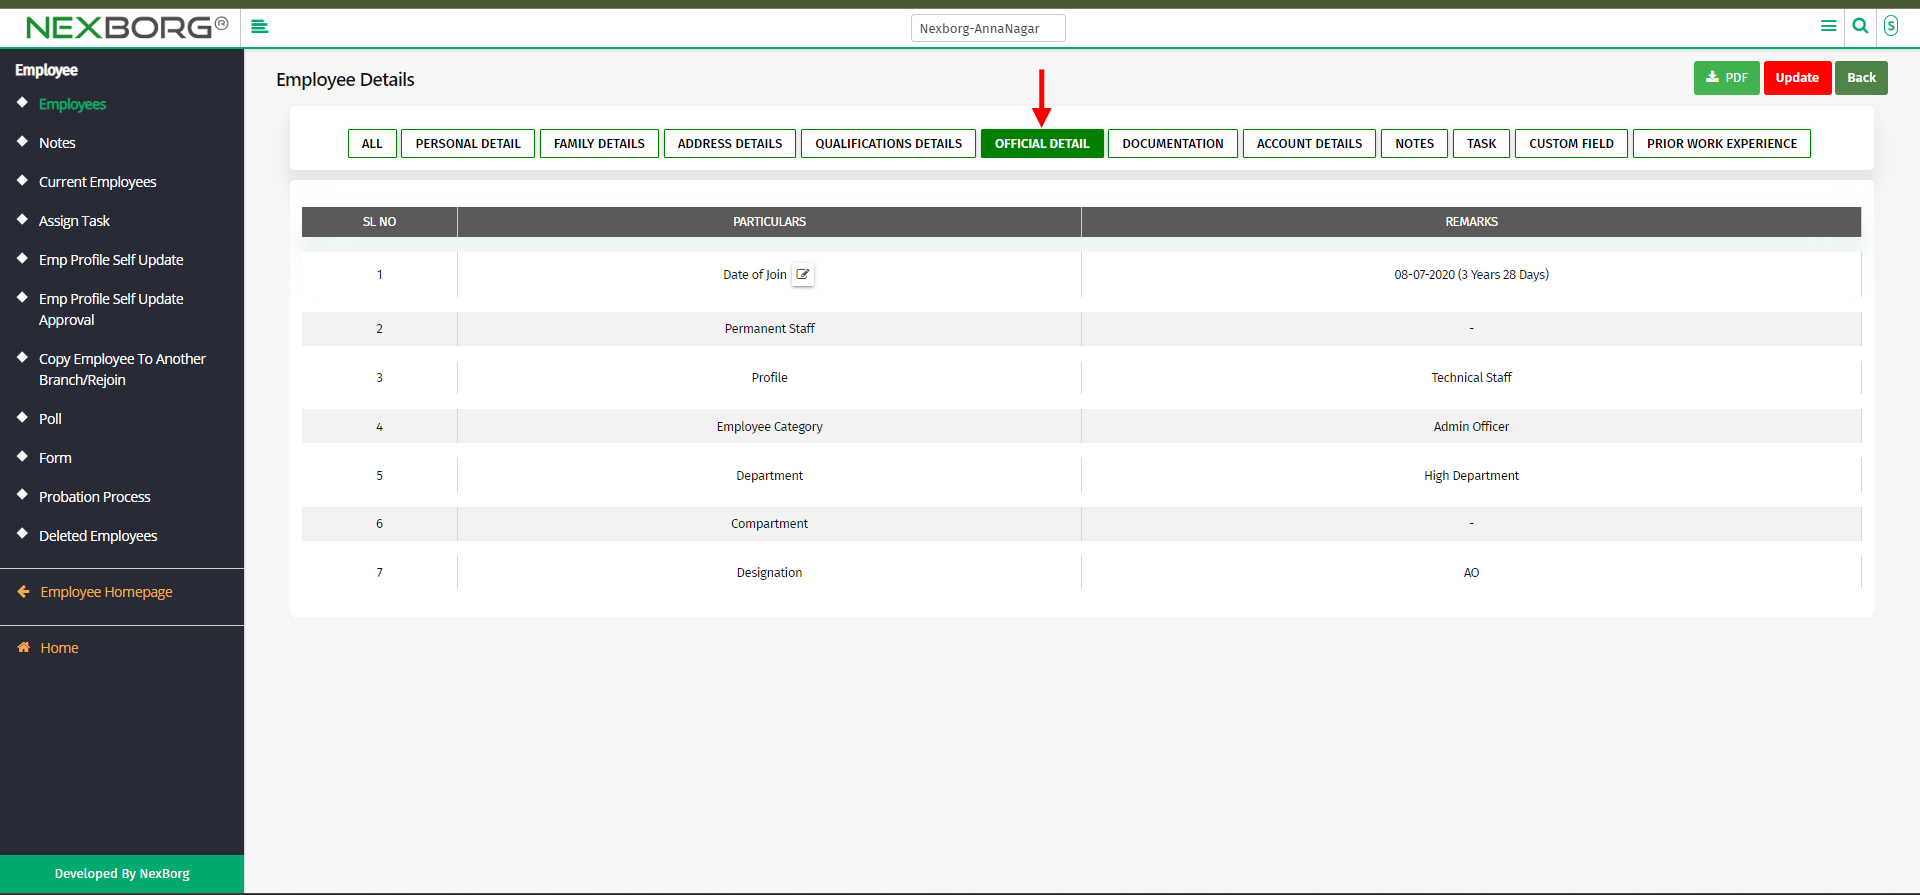
- Official details
You can view the official details of the employee like DOJ, designation, etc.
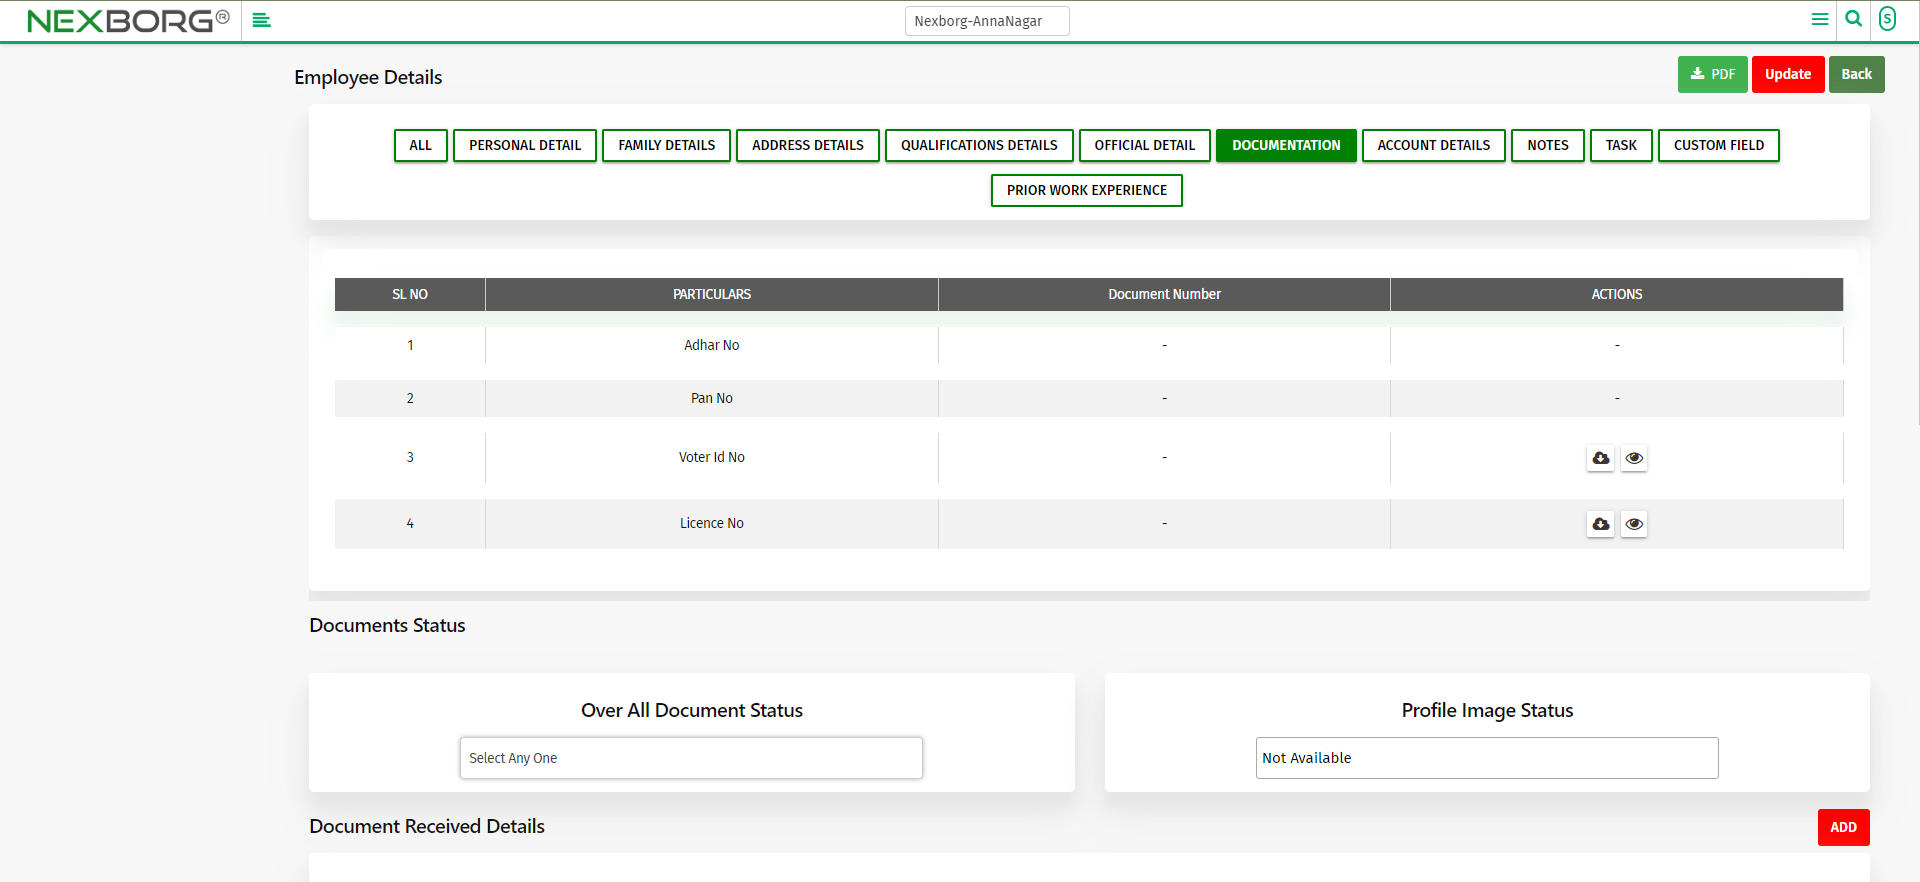
- Documentation
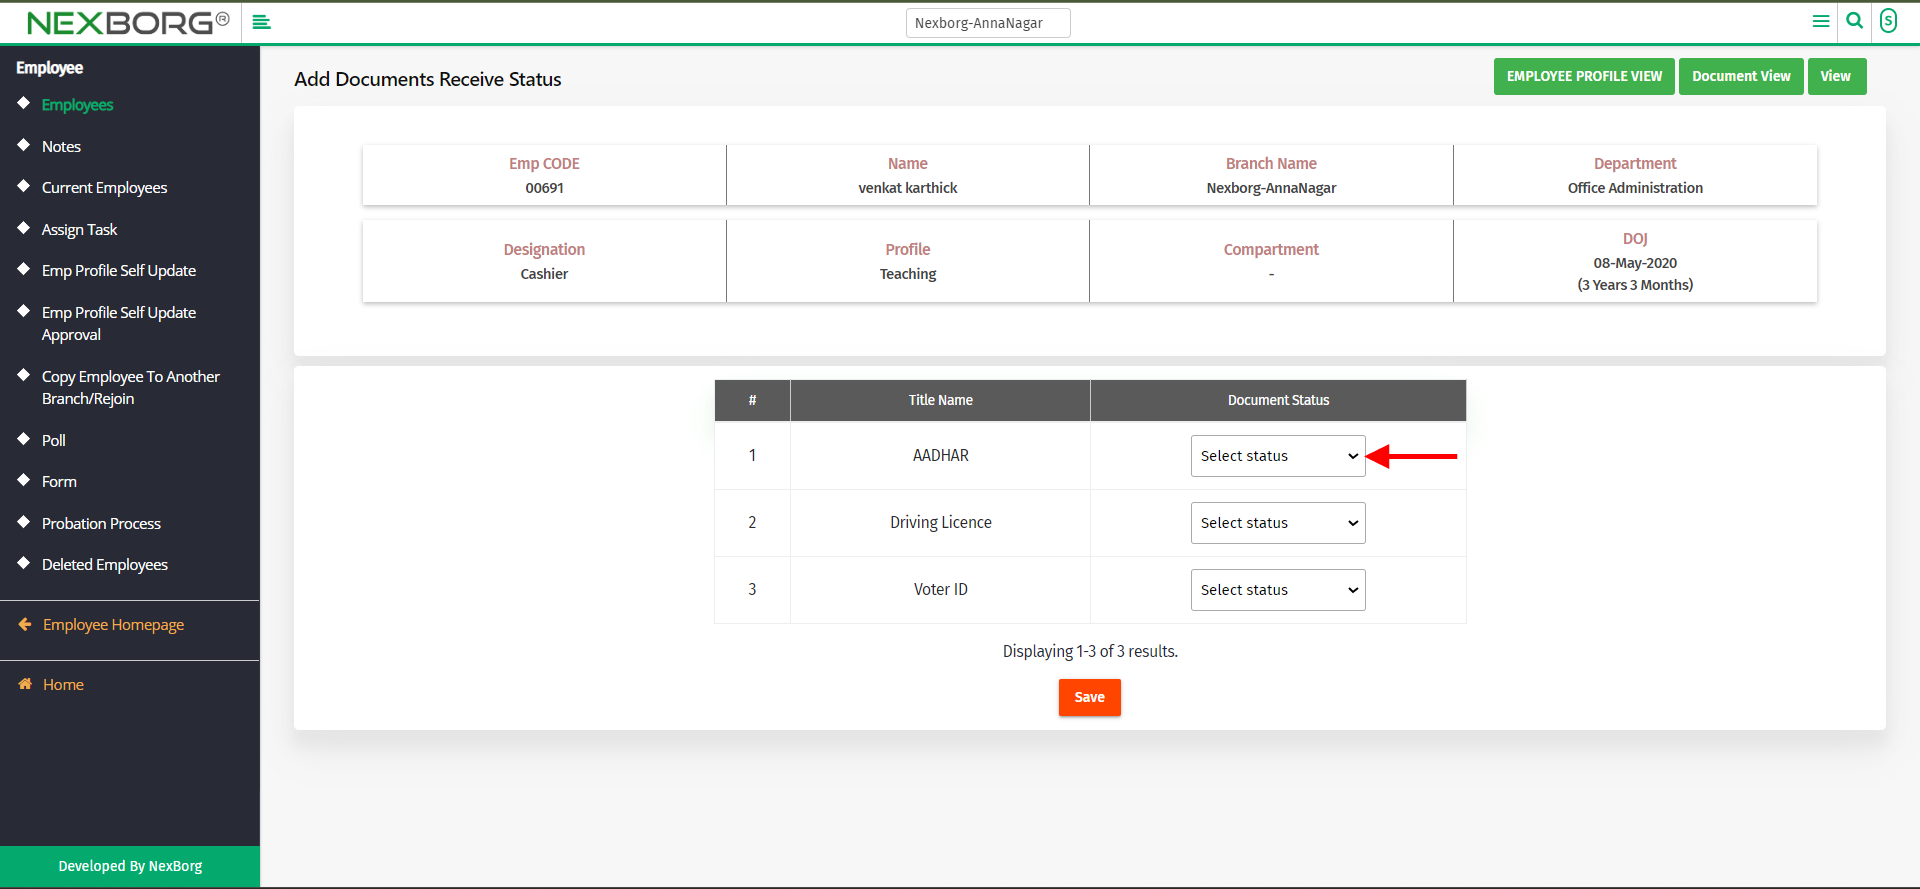
The documents needed to be submitted will be presented first. Scroll down to view the document received details.
Click on the "Add" button which redirects to another page. Now change the status if needed and click on the "Save" button.
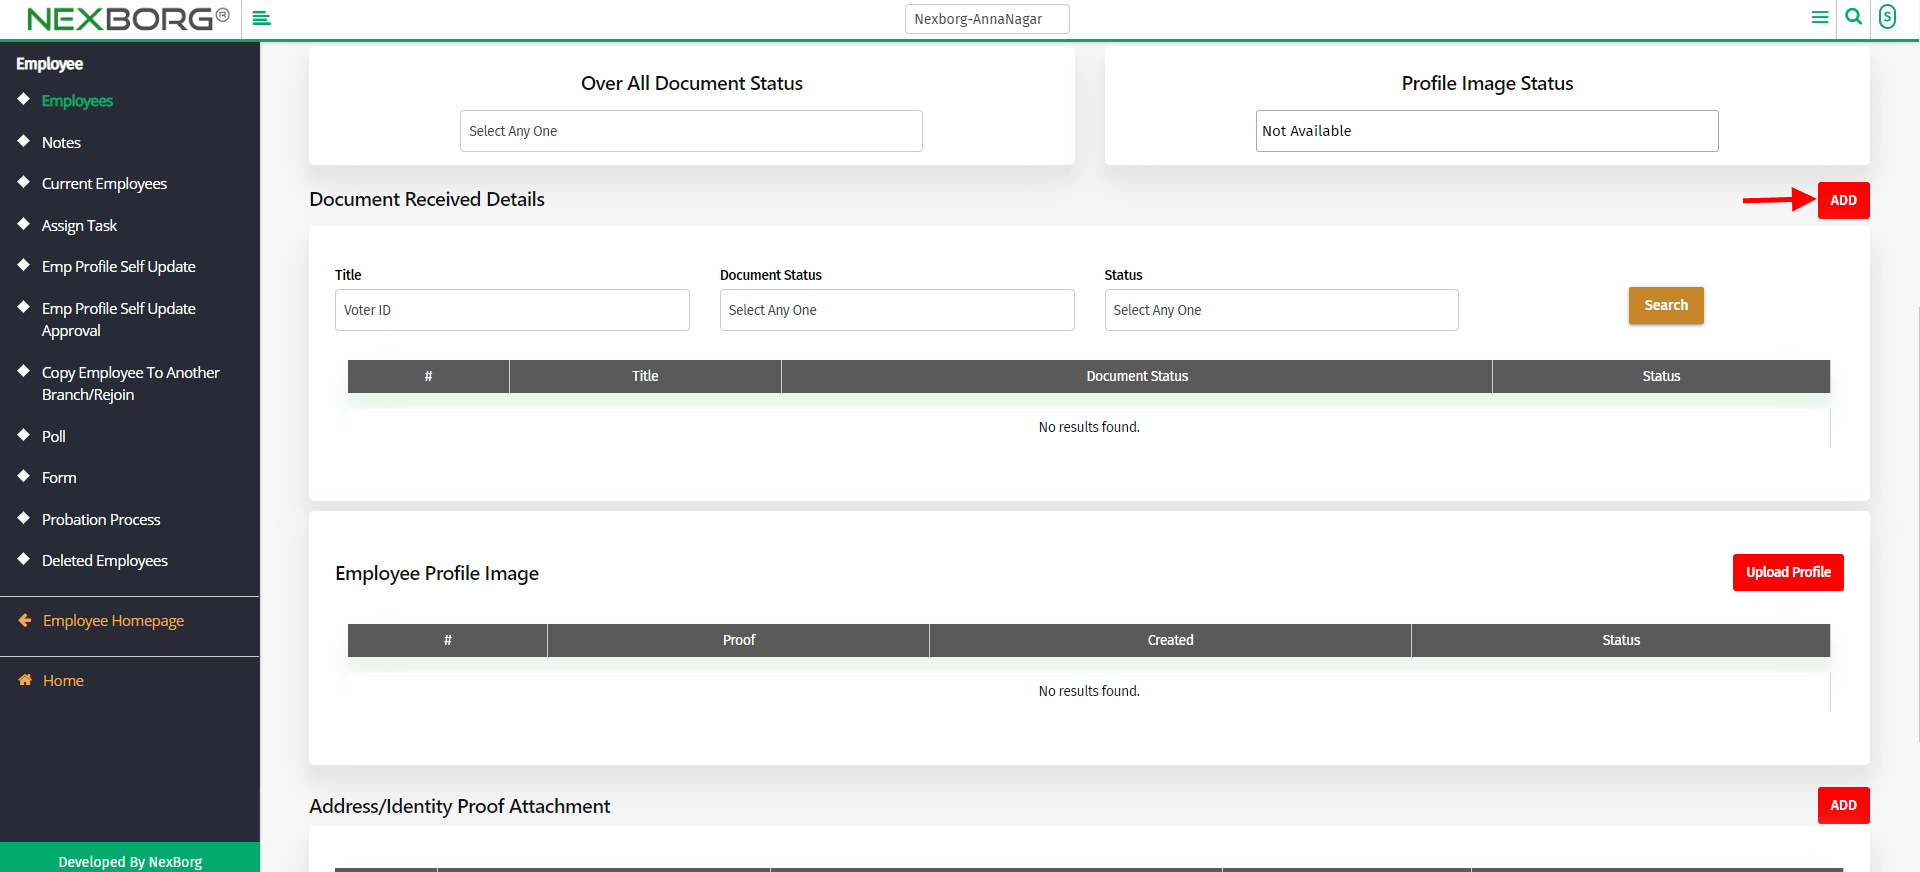
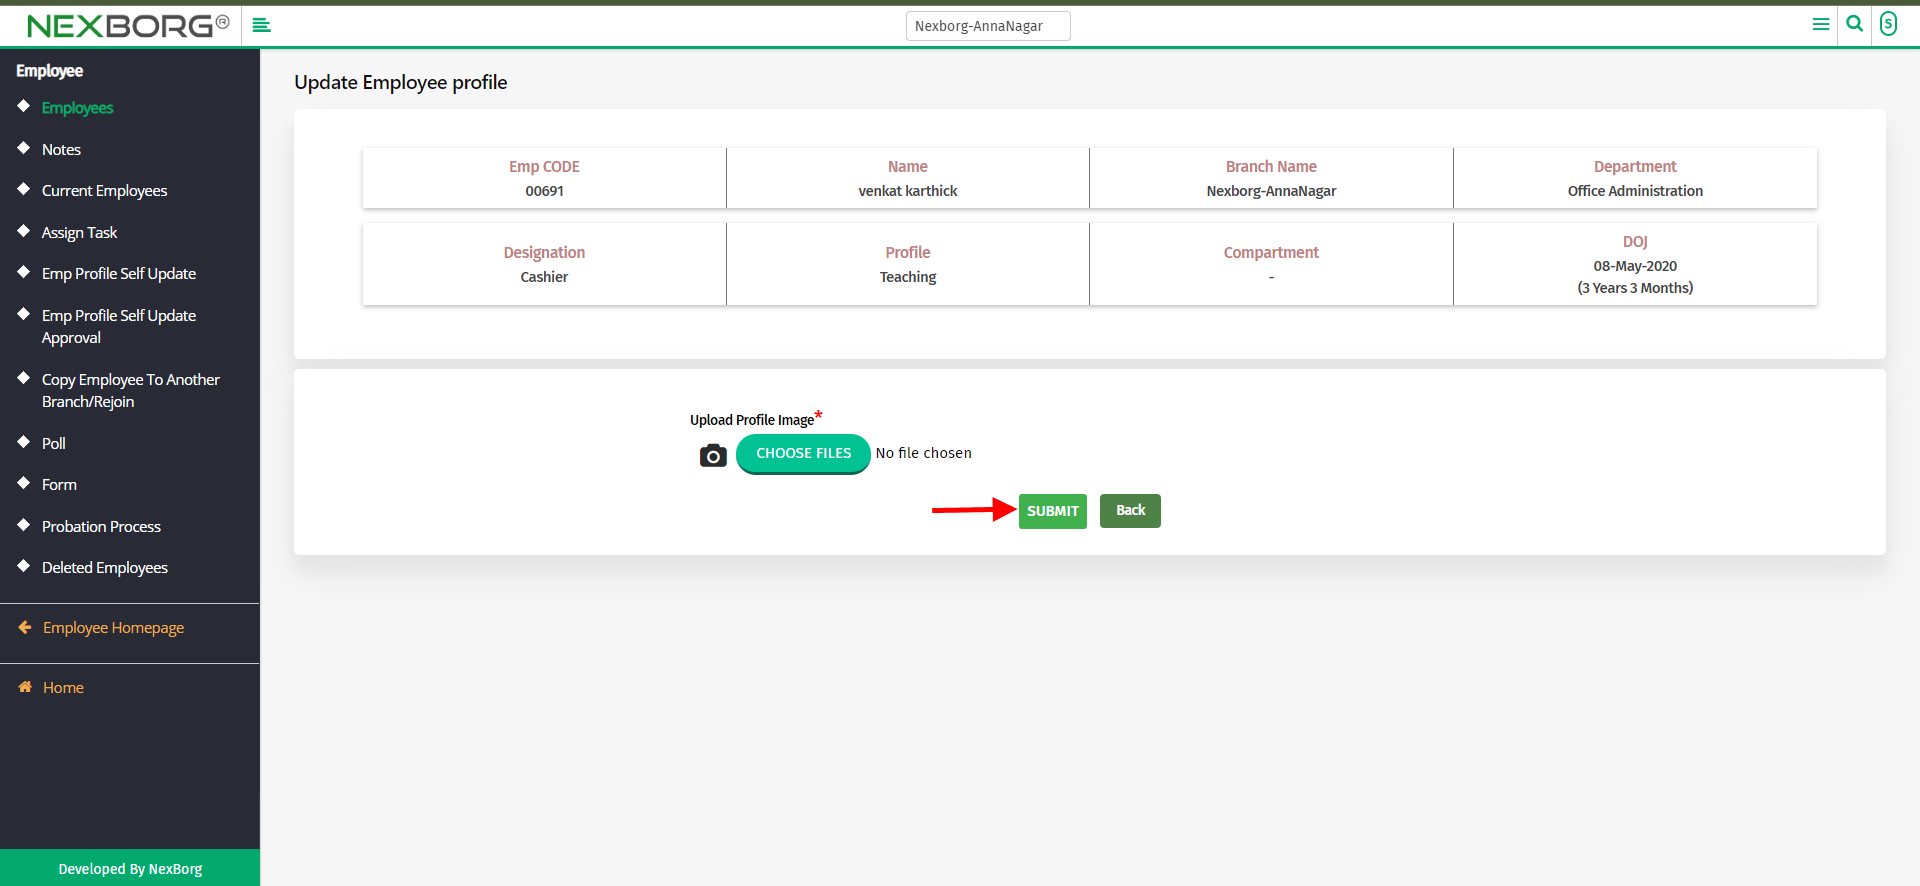
To upload a profile, click on the "Update Profile" button and choose the file needed and click on the "Submit" button.

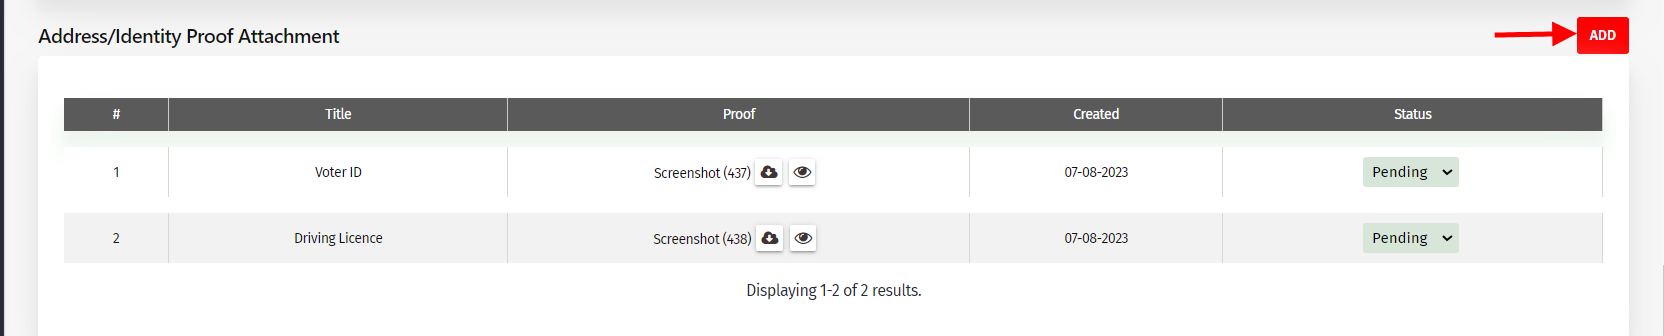
To add an address/identity proof attachment, click on the "Add" button. Choose the file needed to be added and click on the "Save" button.

To add qualification attachment, click on "Add" button which redirects to another page. Now, select the qualification and choose the files and click on the "save" button.

- Account details
You can only view the details. To add account details, click on the Update action that appears at the top of the page.
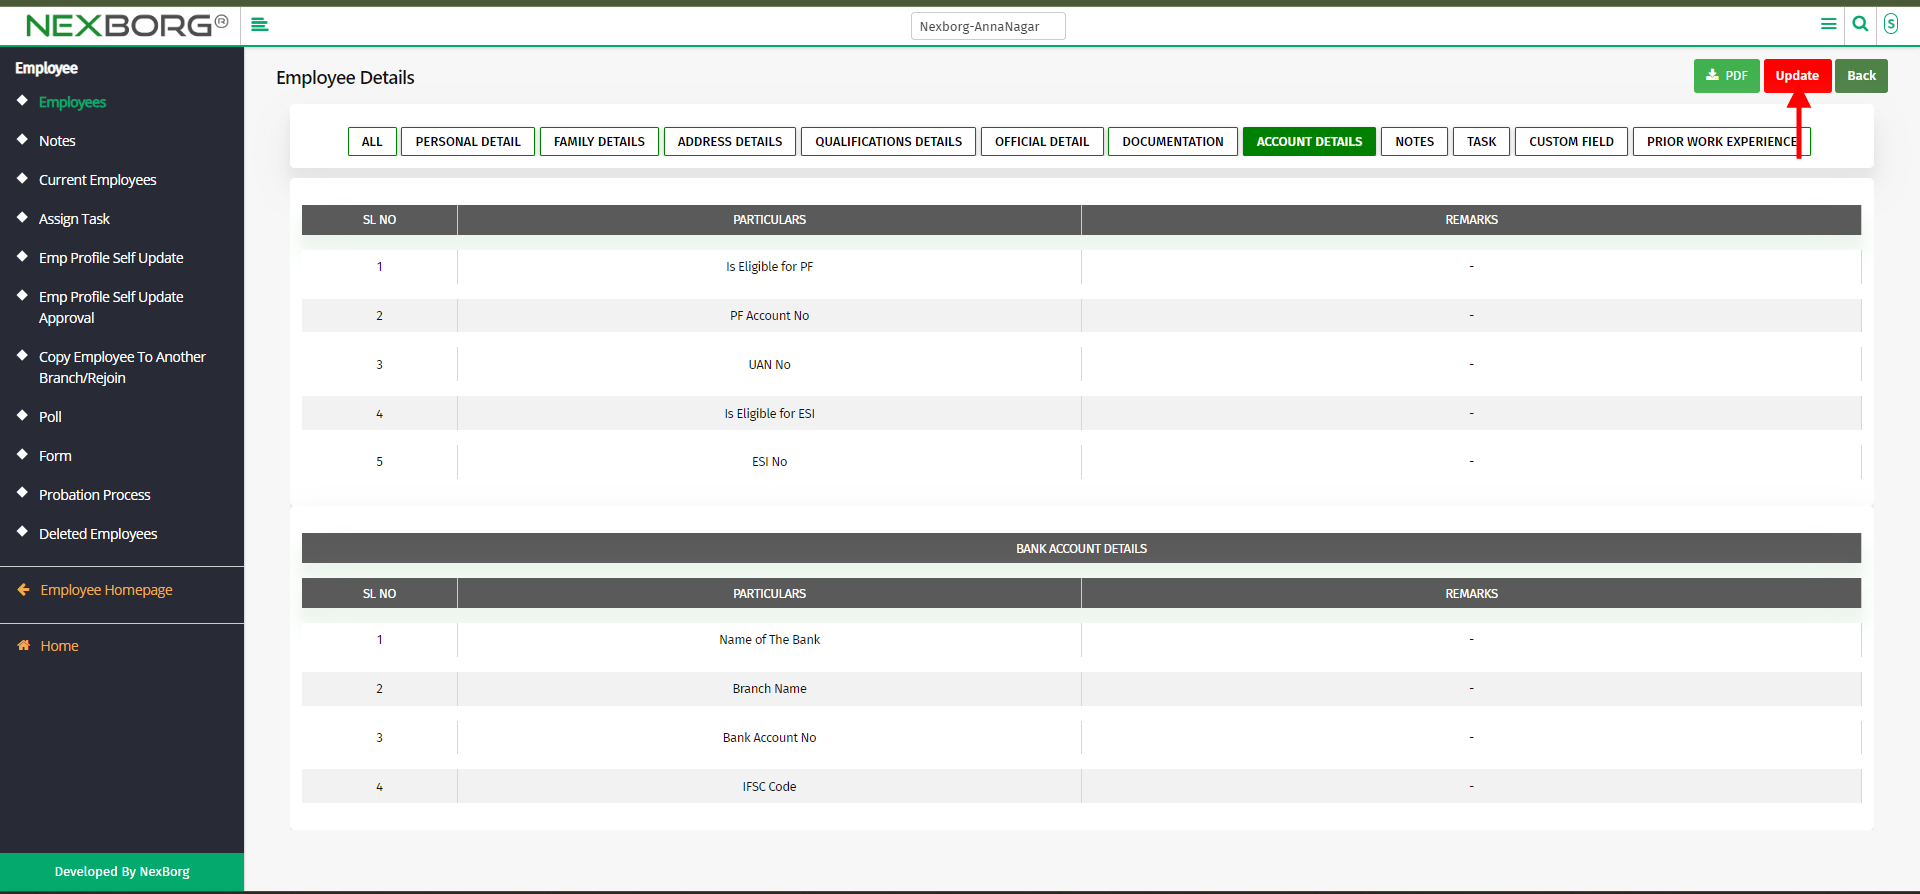
Now go to Account details section and fill in the details and click on Update.

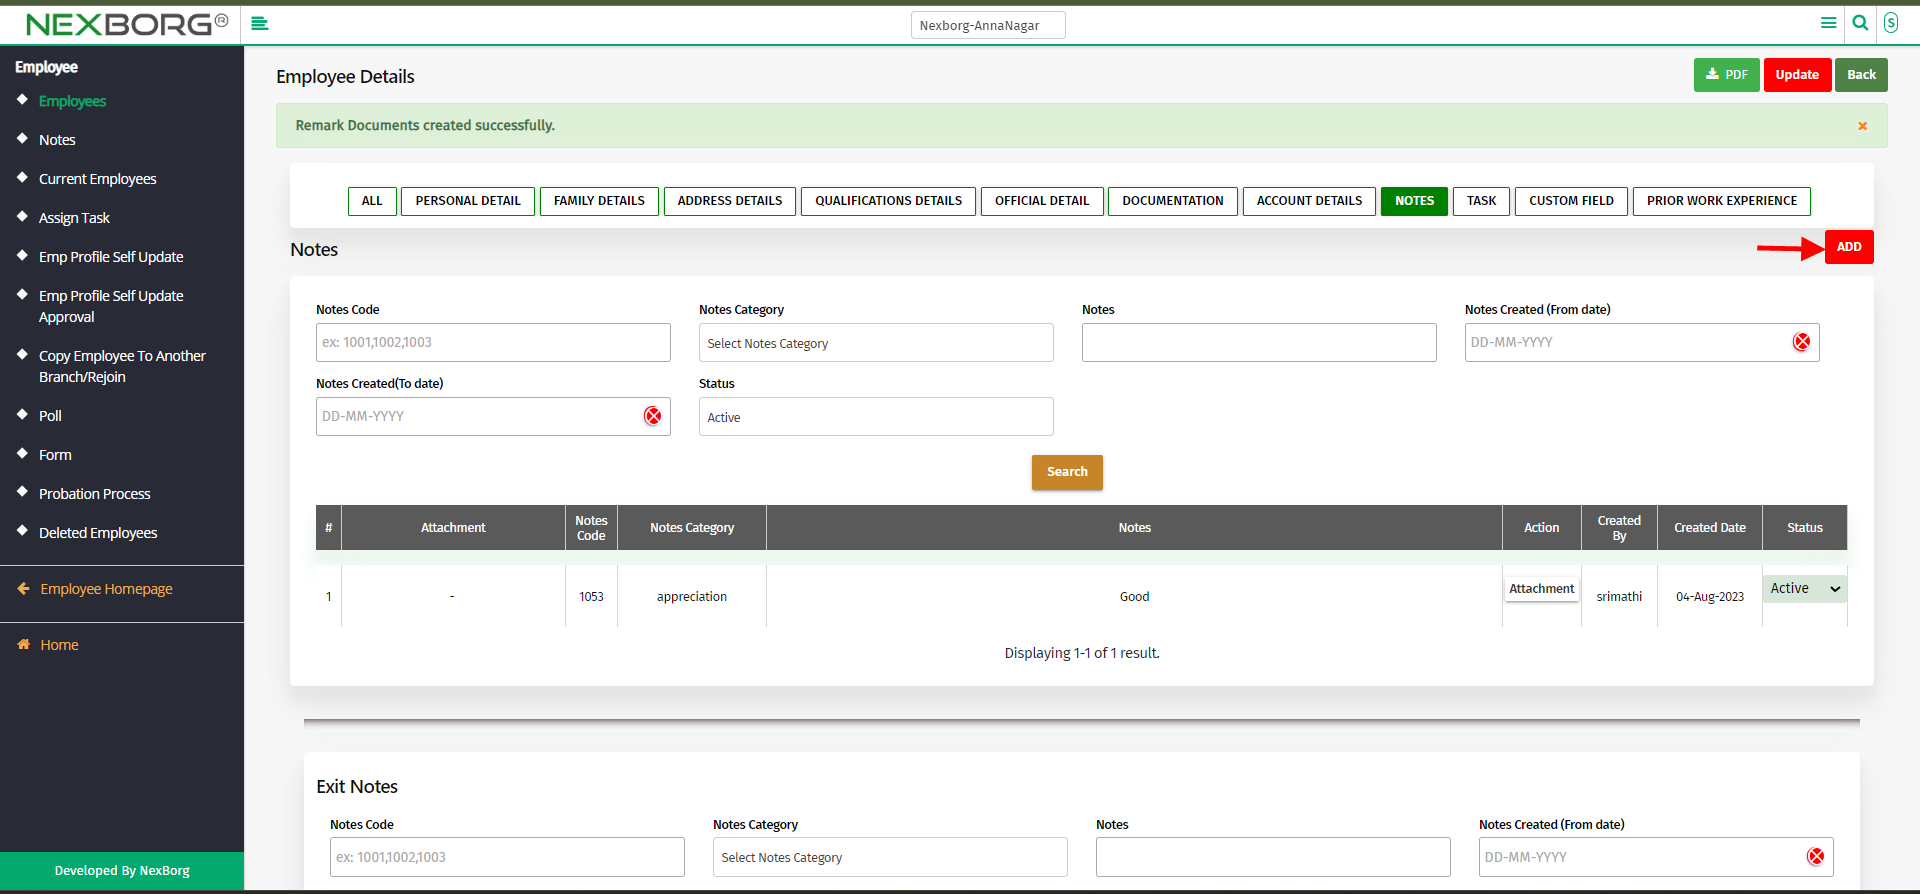
- Notes
To add notes, click on the "Add" button, now select the category of notes, add notes, and click on the "Save" button. Click on "save & add" to add another note.

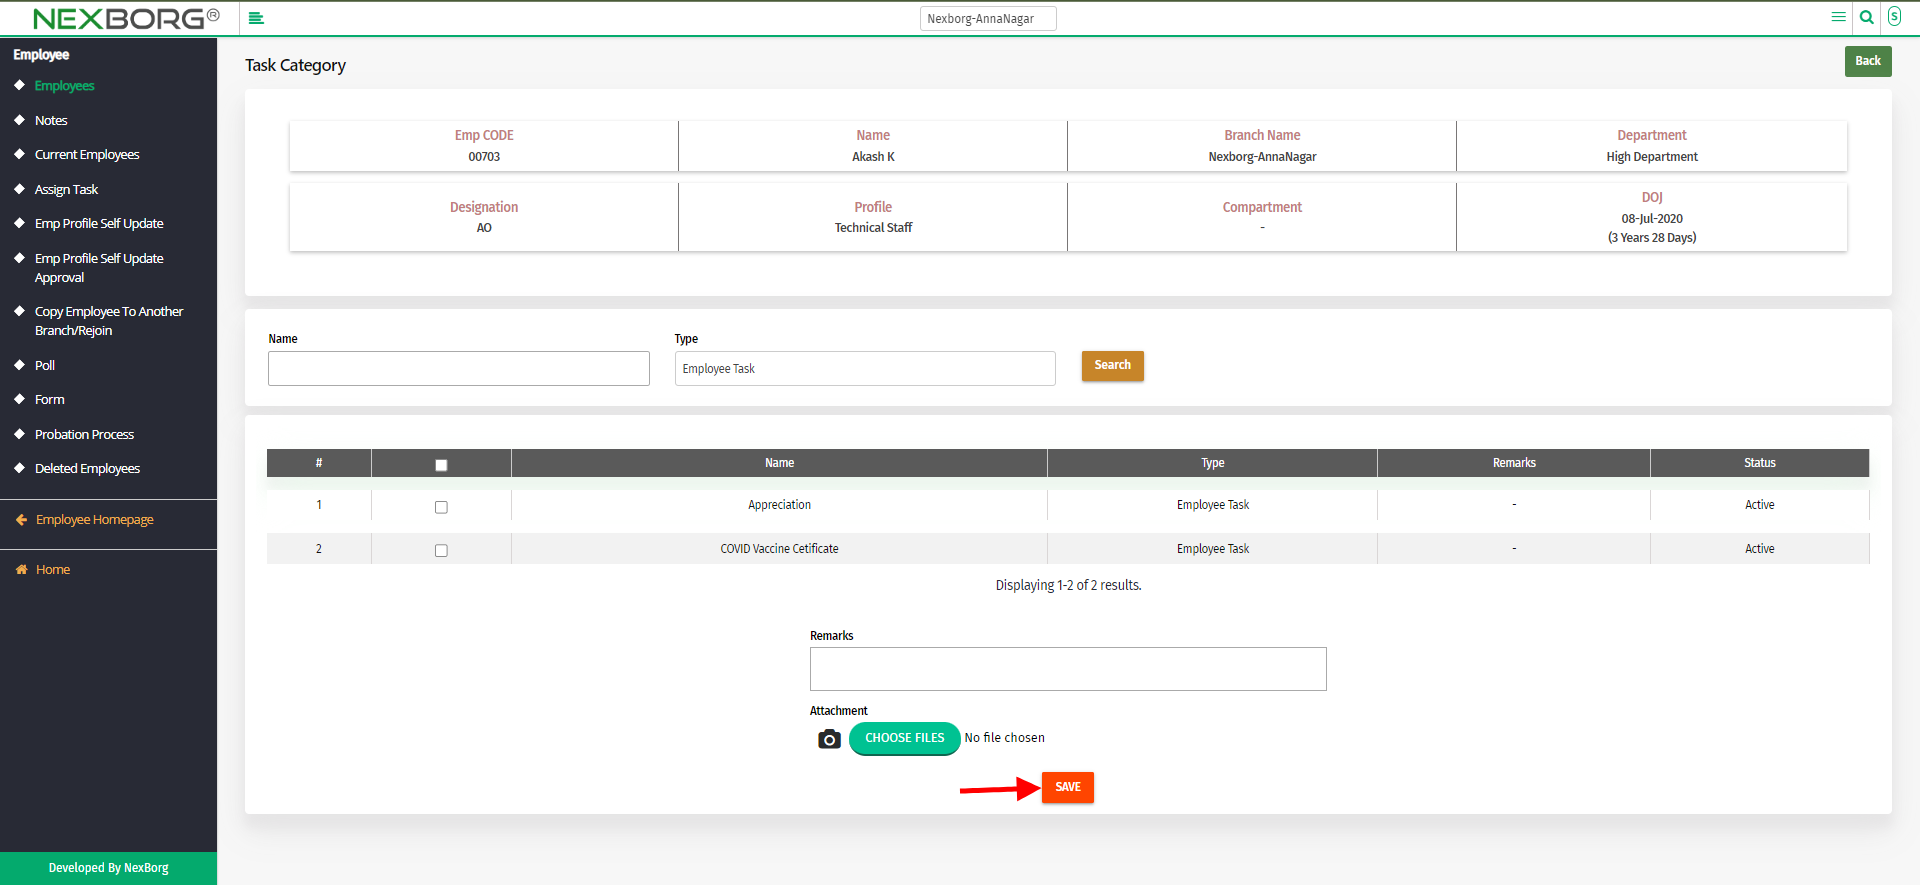
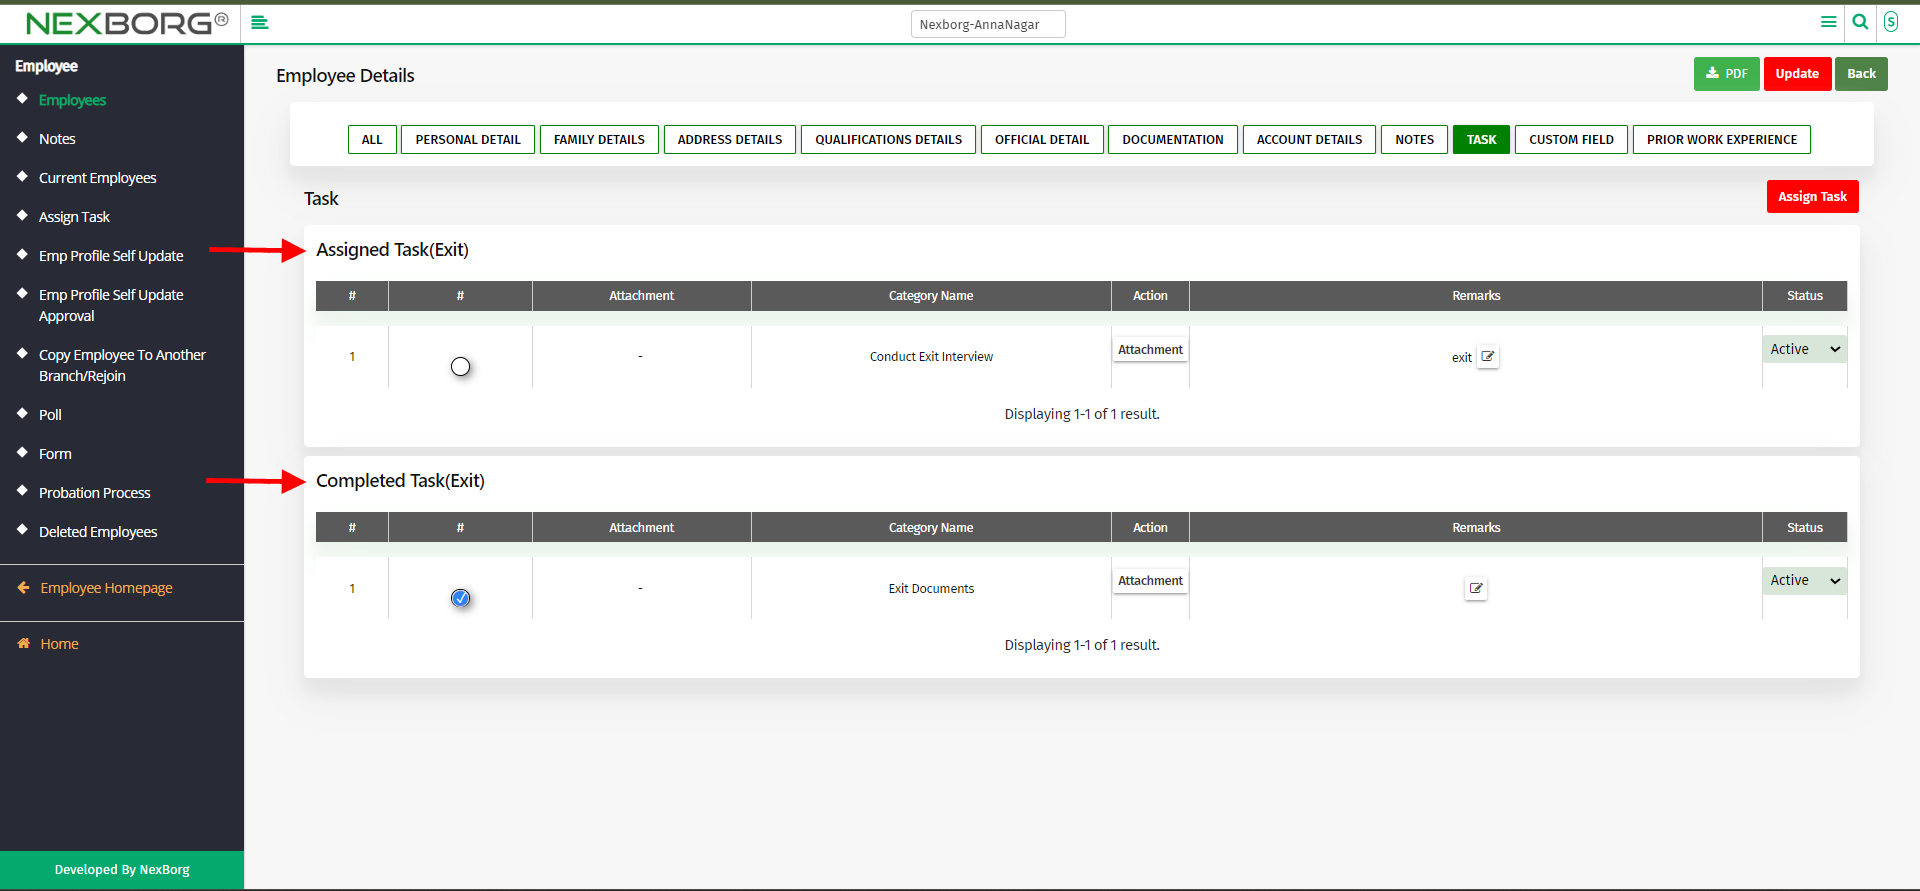
- Task
To assign the task, click on "Assign task".
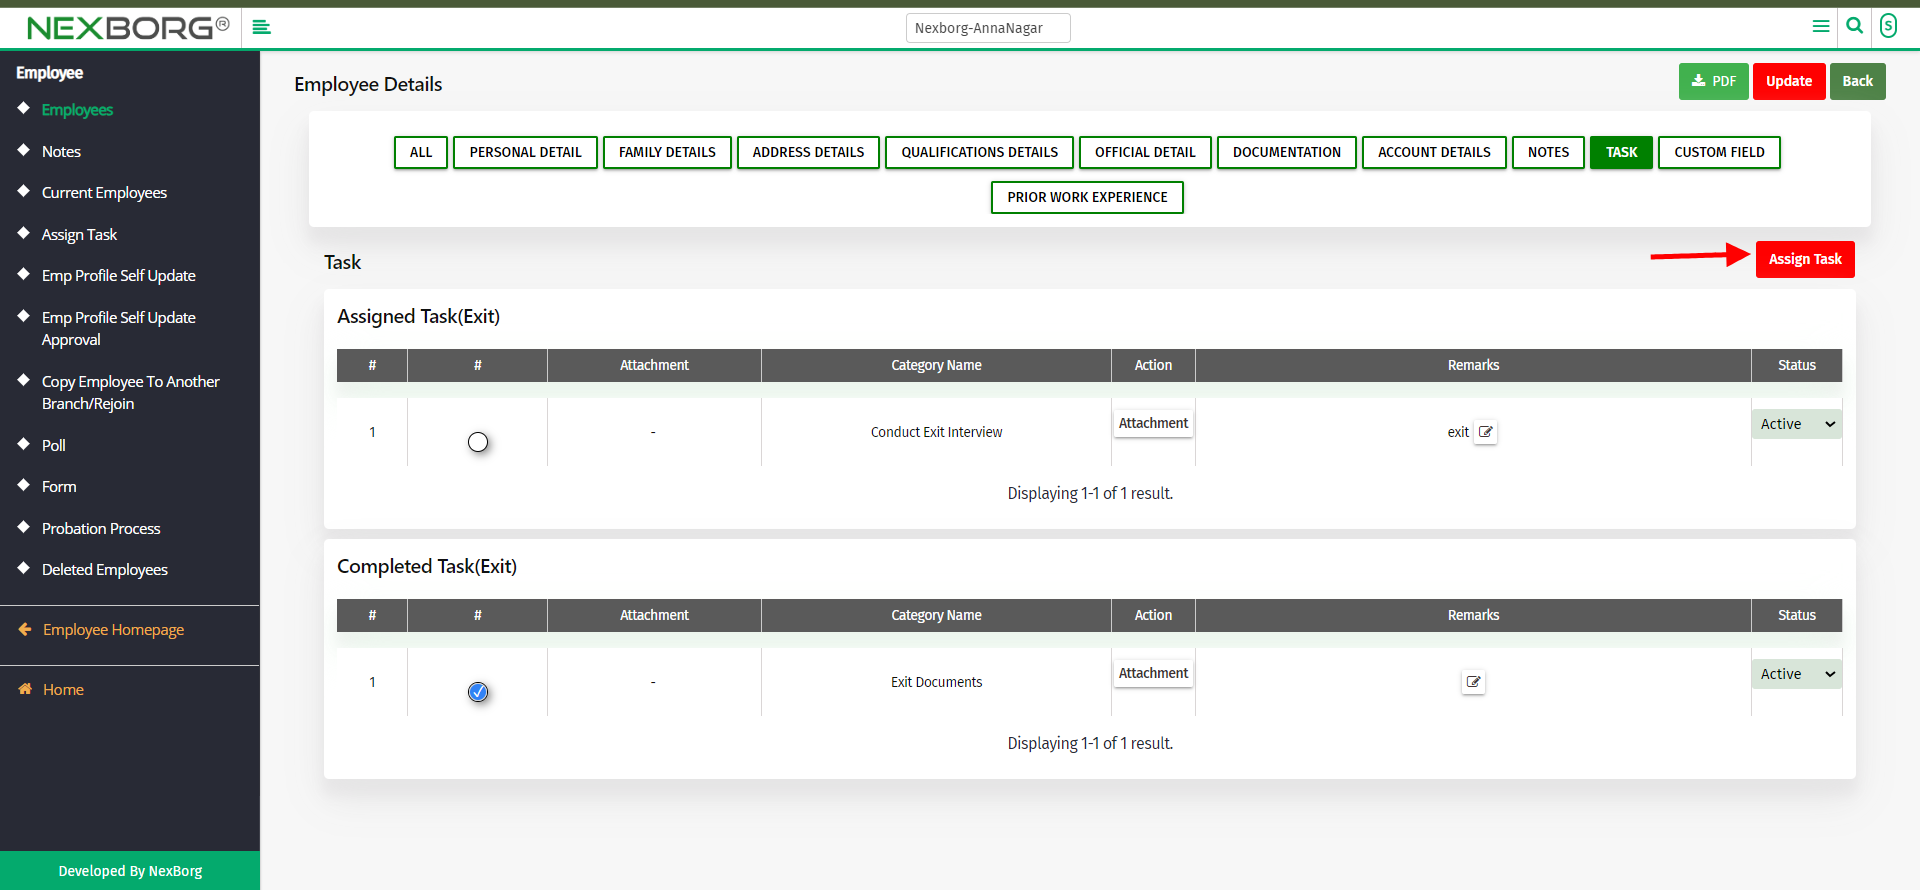
Then select the type of task and click on the "save" button.
You can also view the task assigned, if it is marked as completed it will move to the completed task category.
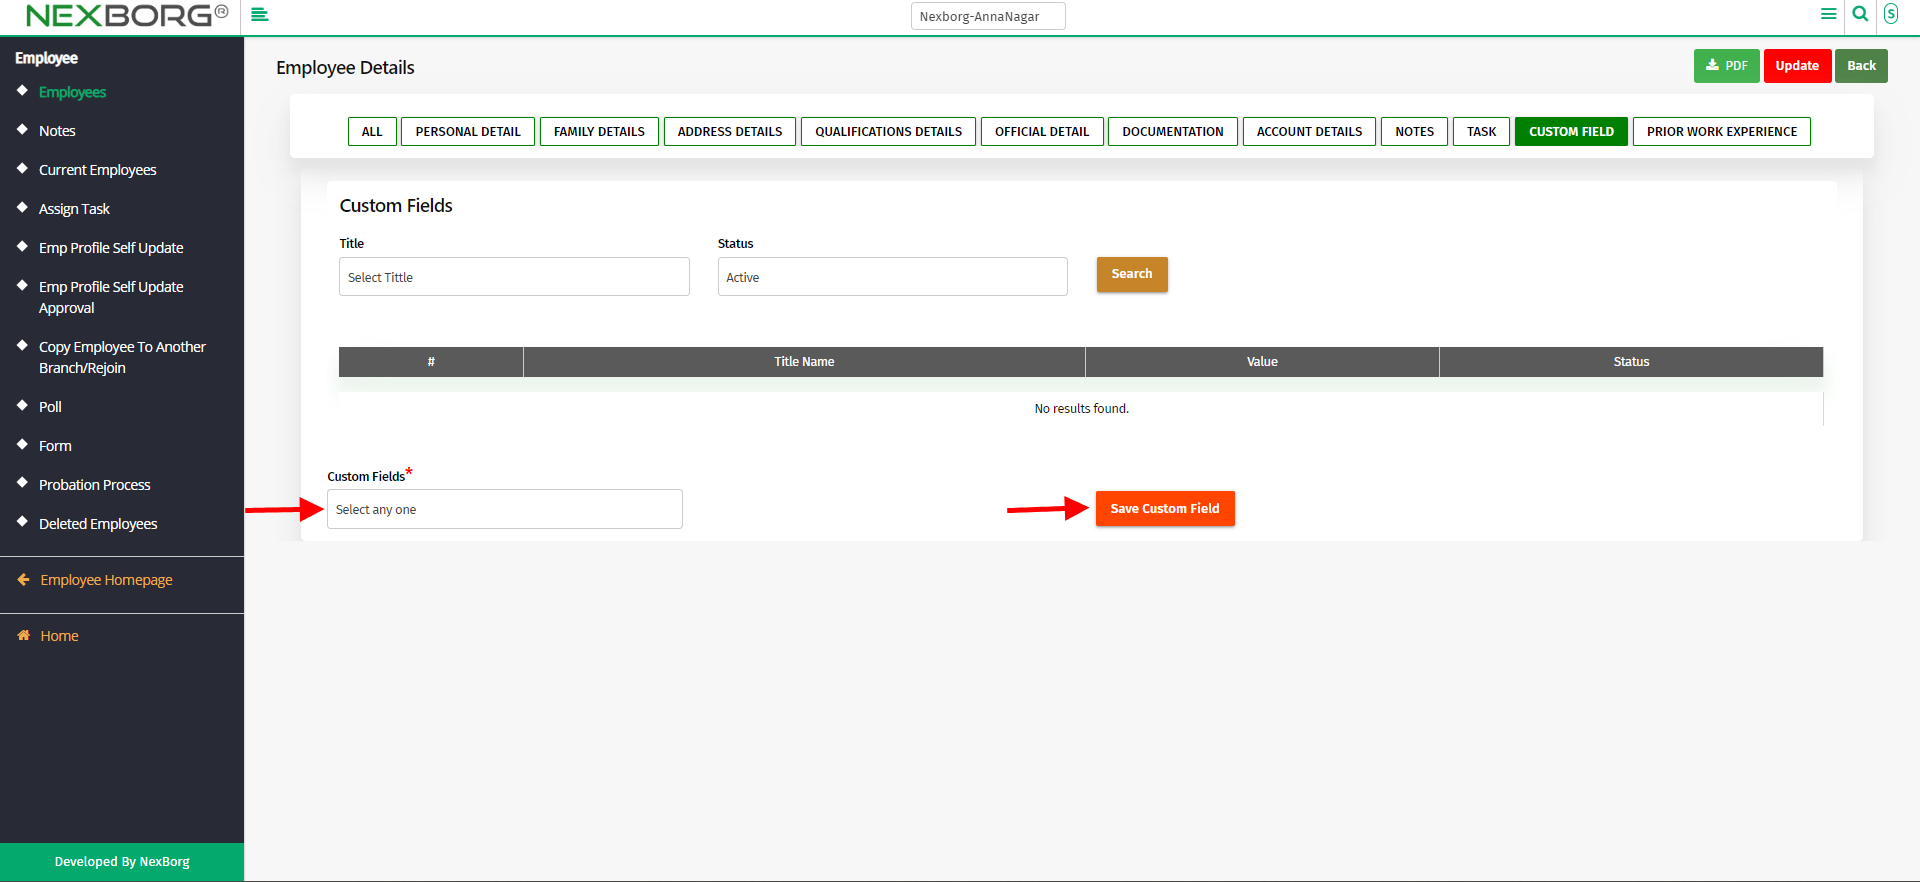
- Custom fields
Select the field, enter the details, and click on "save custom field".
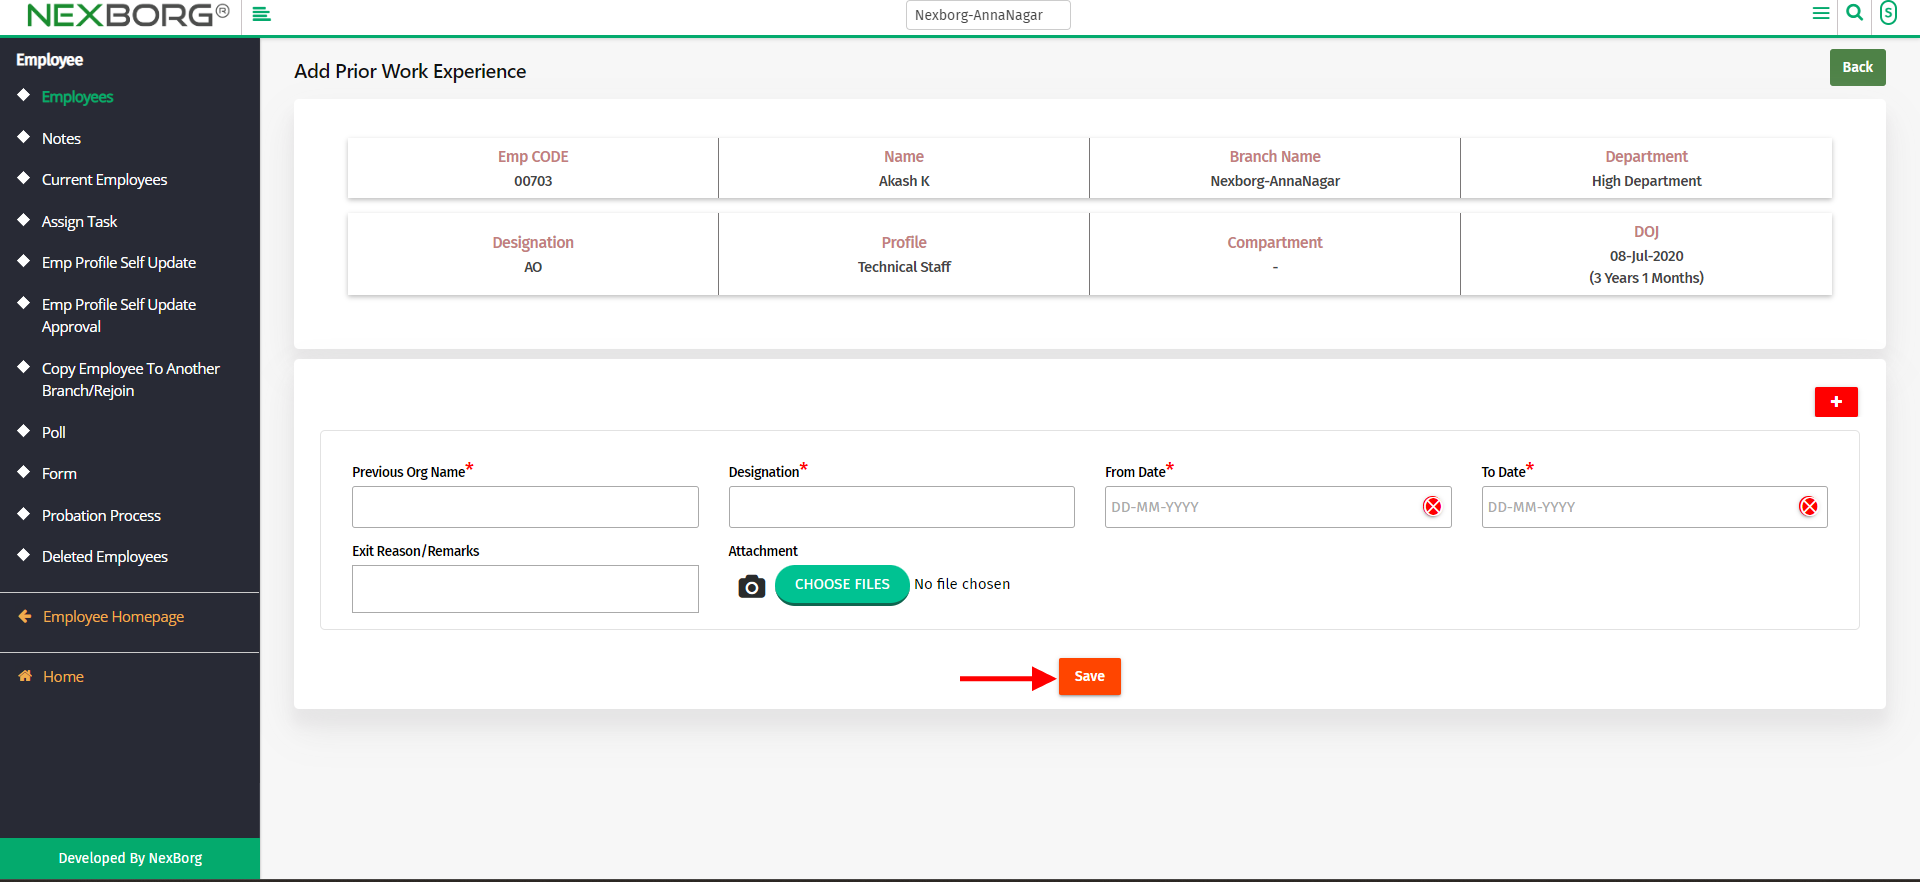
- Prior work experience
Click on the "Add" button to enter the details.
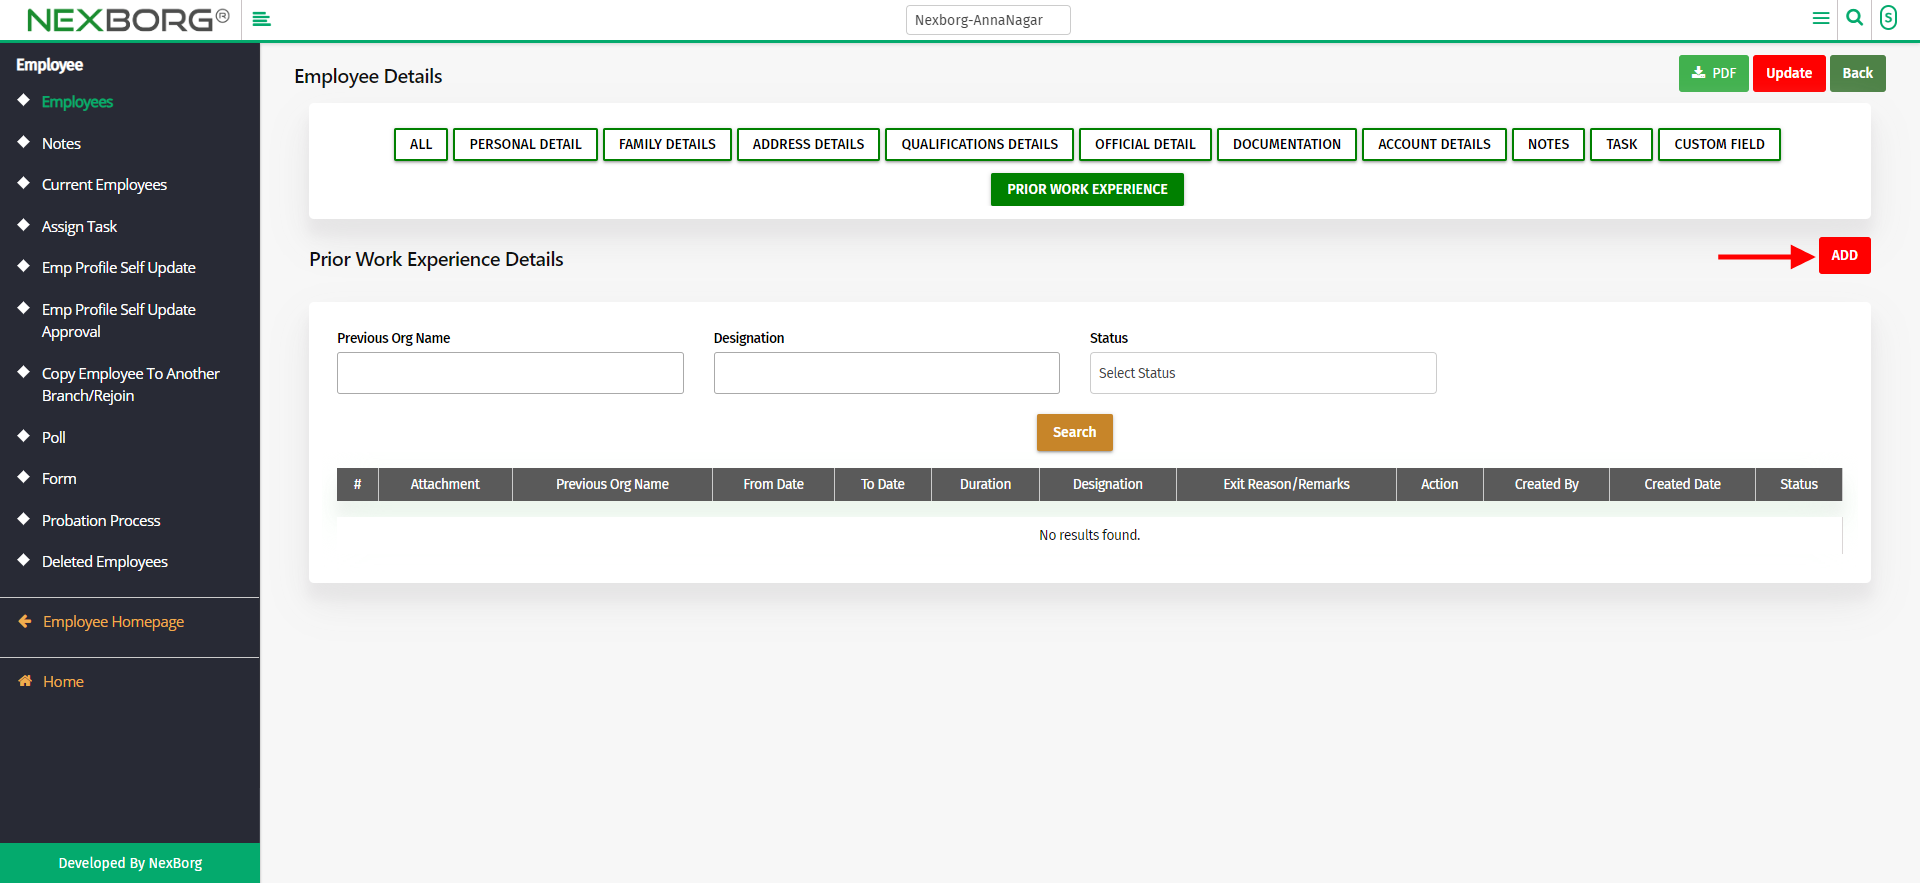
Now fill in all the mandatory details, and click on the "Save" button. To add more than details click on (+).